• home
    • Appetizers
    • Breakfast
    • Baking
    • Desserts
    • Mains
    • Muffins
    • Raw
    • Salads
    • Sides
    • Snacks
    • Soups
    • Vegan
    • Vegetarian
    • Veggie Burgers
  • Work With Me
  • Info
  • BUY MY HOME-MADE BONE BROTHS
  • Instagram
Menu

love thy carrot

Street Address
City, State, Zip
Phone Number

love thy carrot

  • home
  • Recipes
    • Appetizers
    • Breakfast
    • Baking
    • Desserts
    • Mains
    • Muffins
    • Raw
    • Salads
    • Sides
    • Snacks
    • Soups
    • Vegan
    • Vegetarian
    • Veggie Burgers
  • Work With Me
  • Info
  • BUY MY HOME-MADE BONE BROTHS
  • Instagram

Roasted Mini Peppers and Potatoes with Fresh Thyme, Rosemary and Garlic.

May 23, 2017 Marla Hertzman
peppers1.jpg
peppers5.jpg

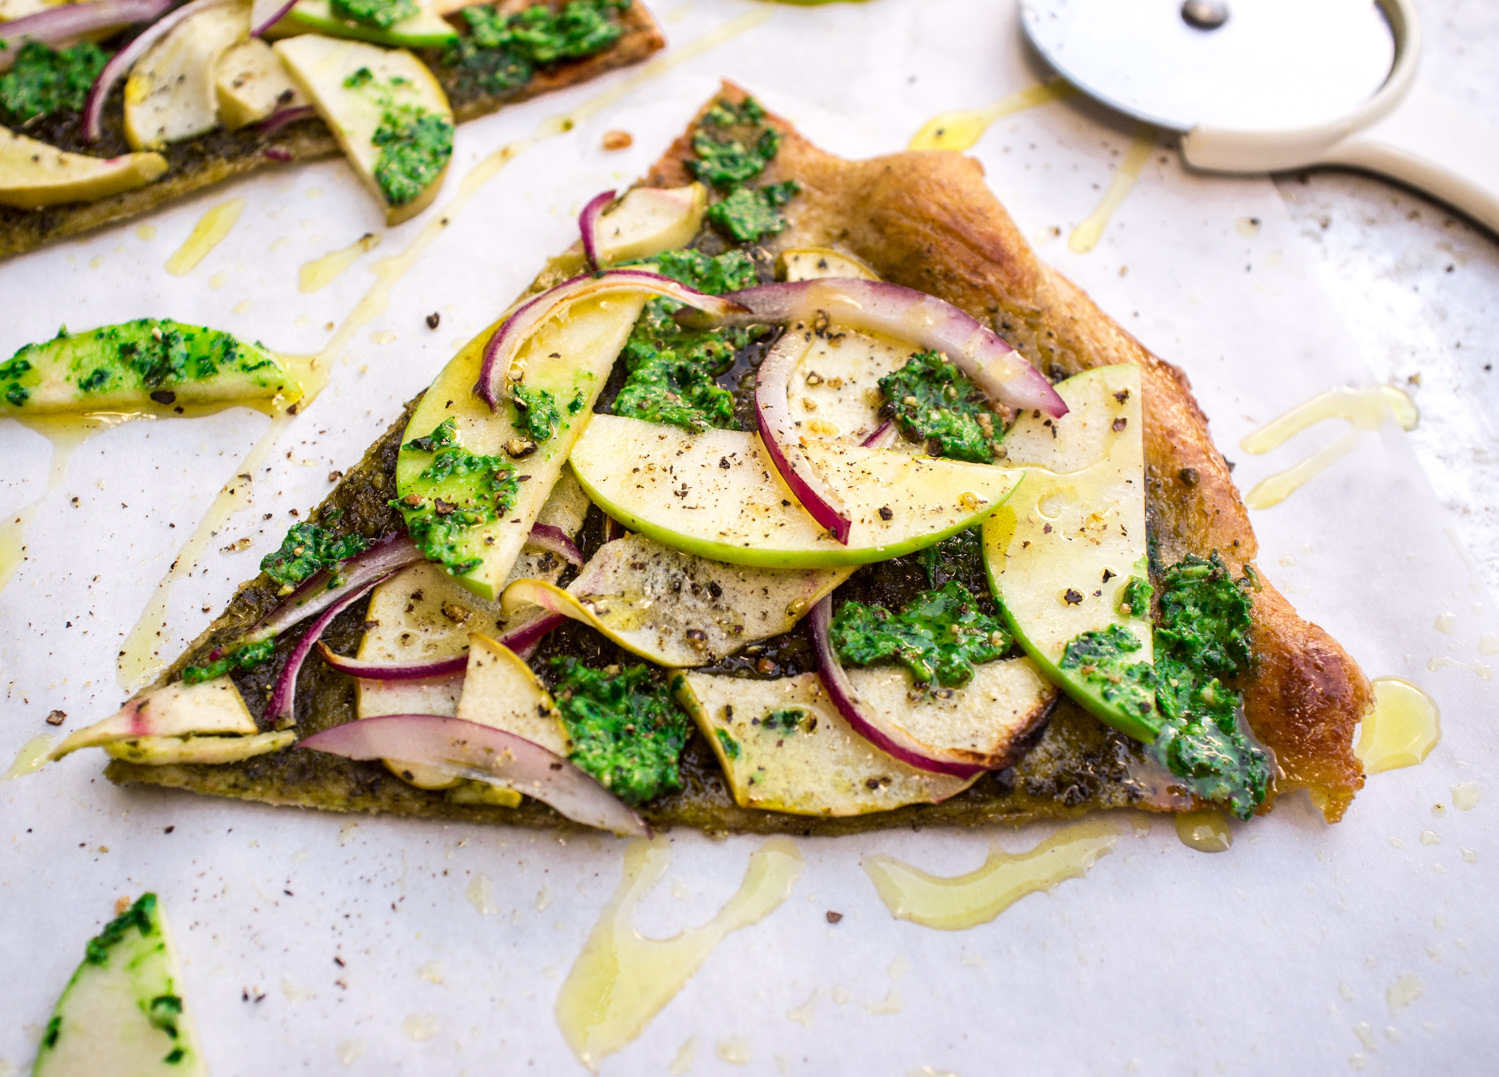
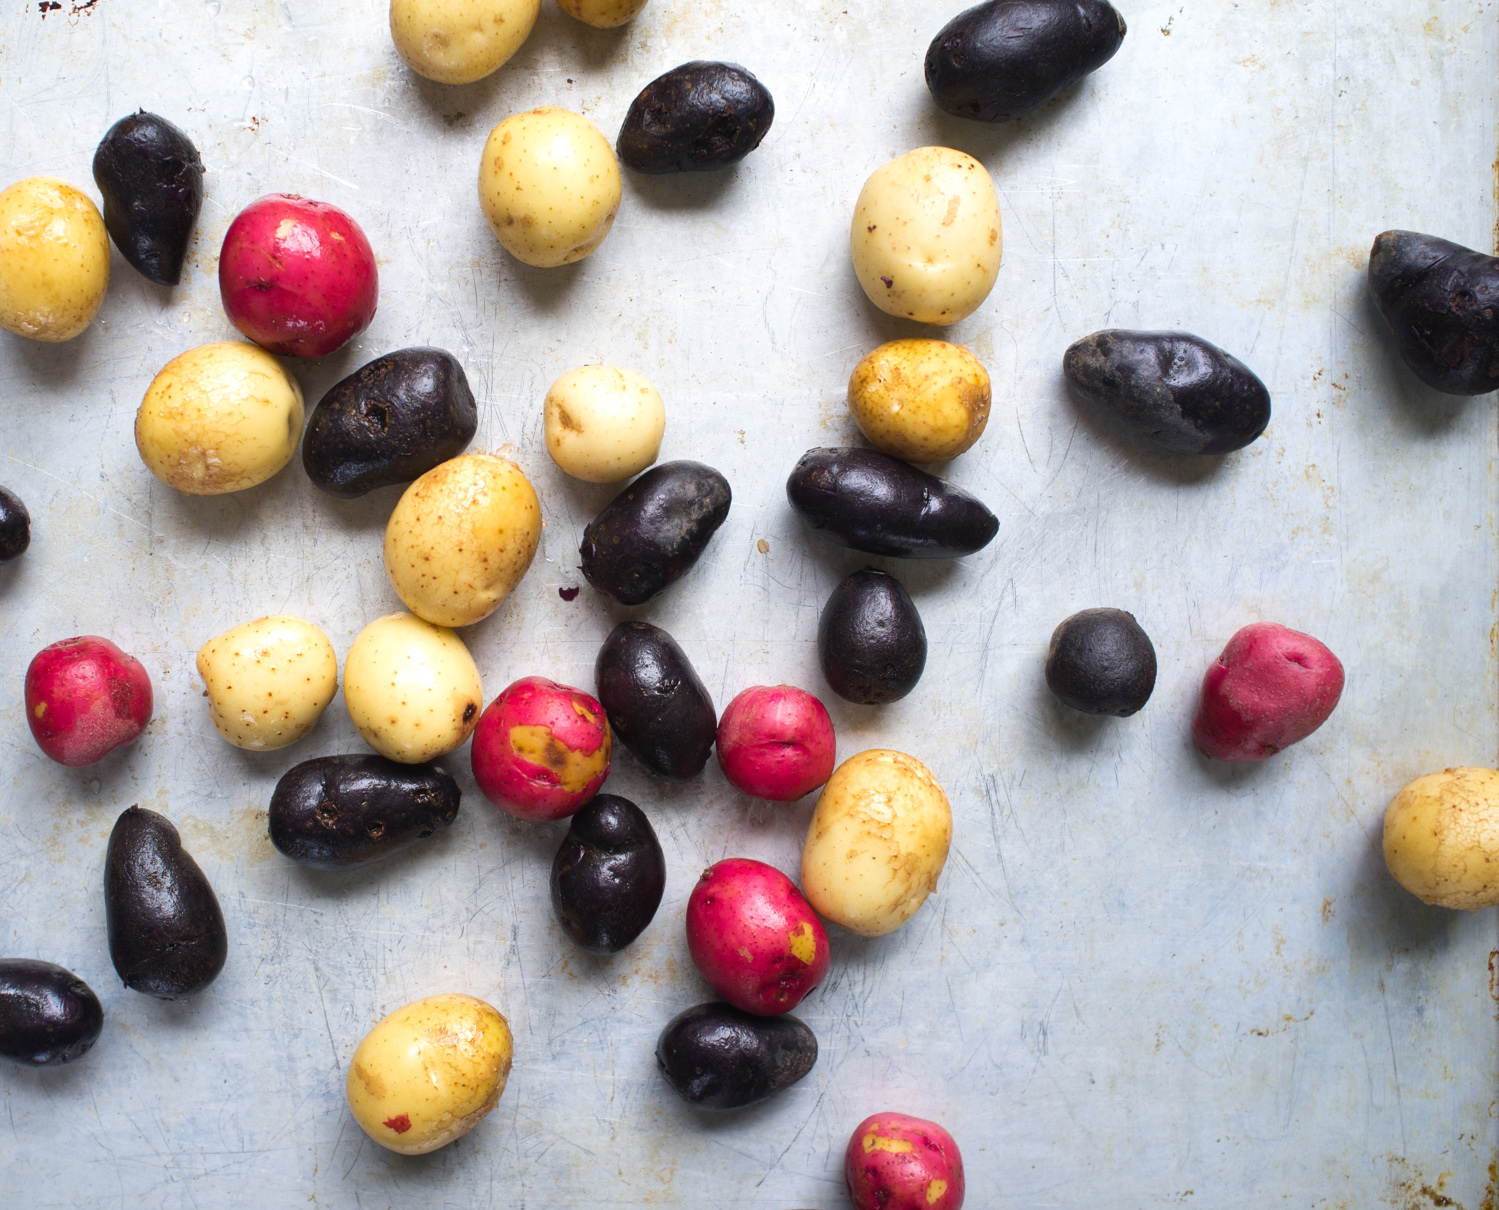
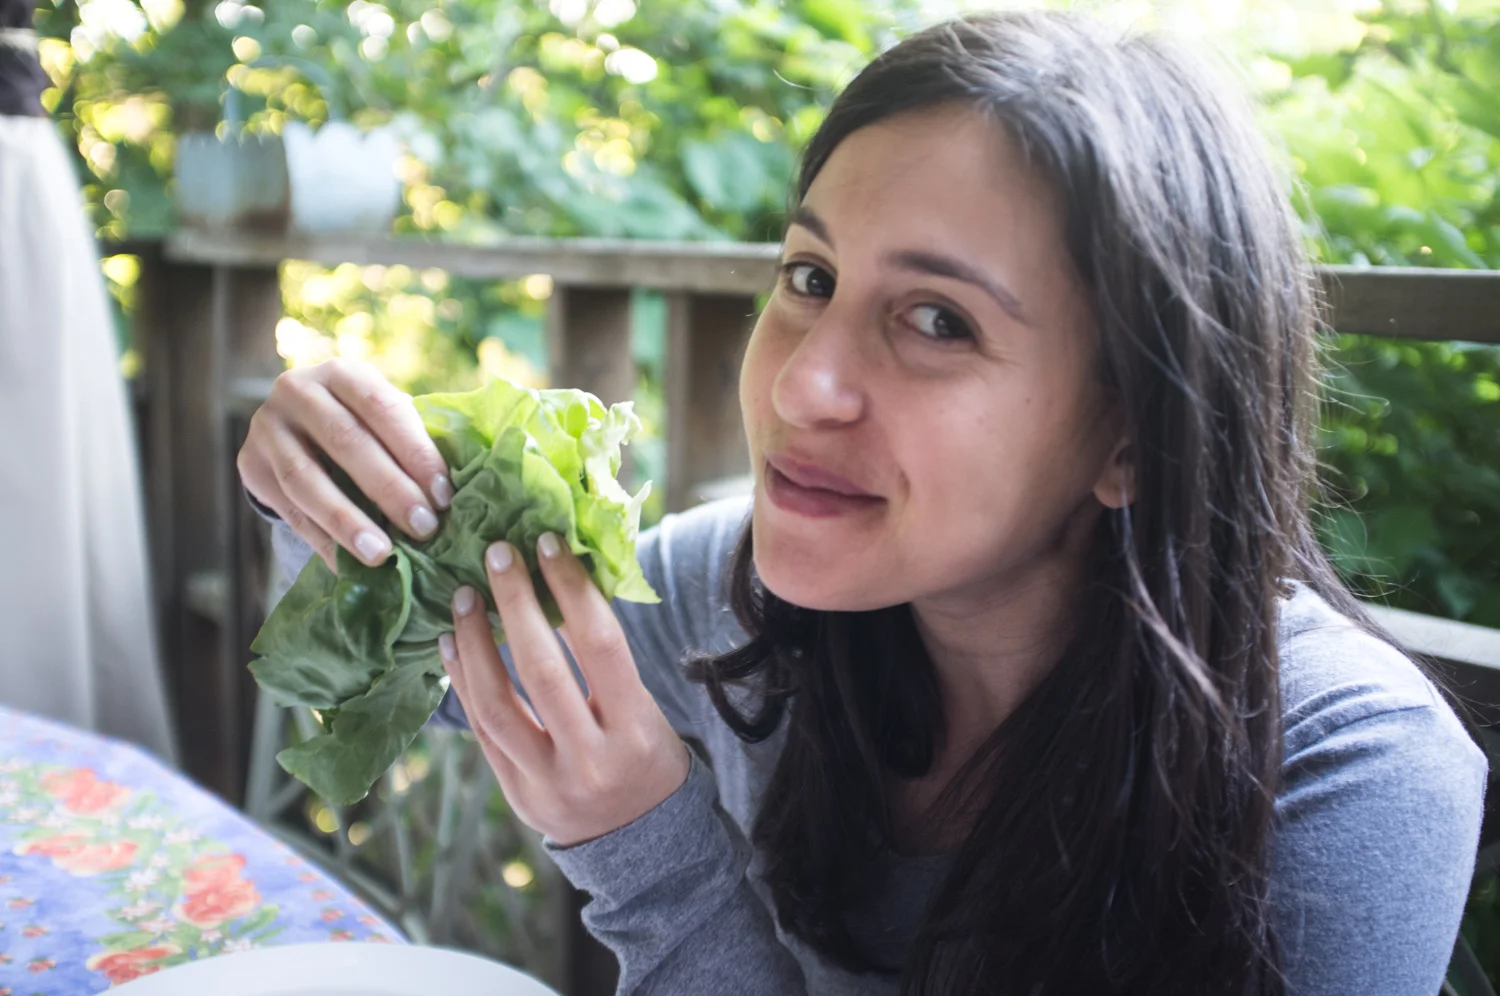
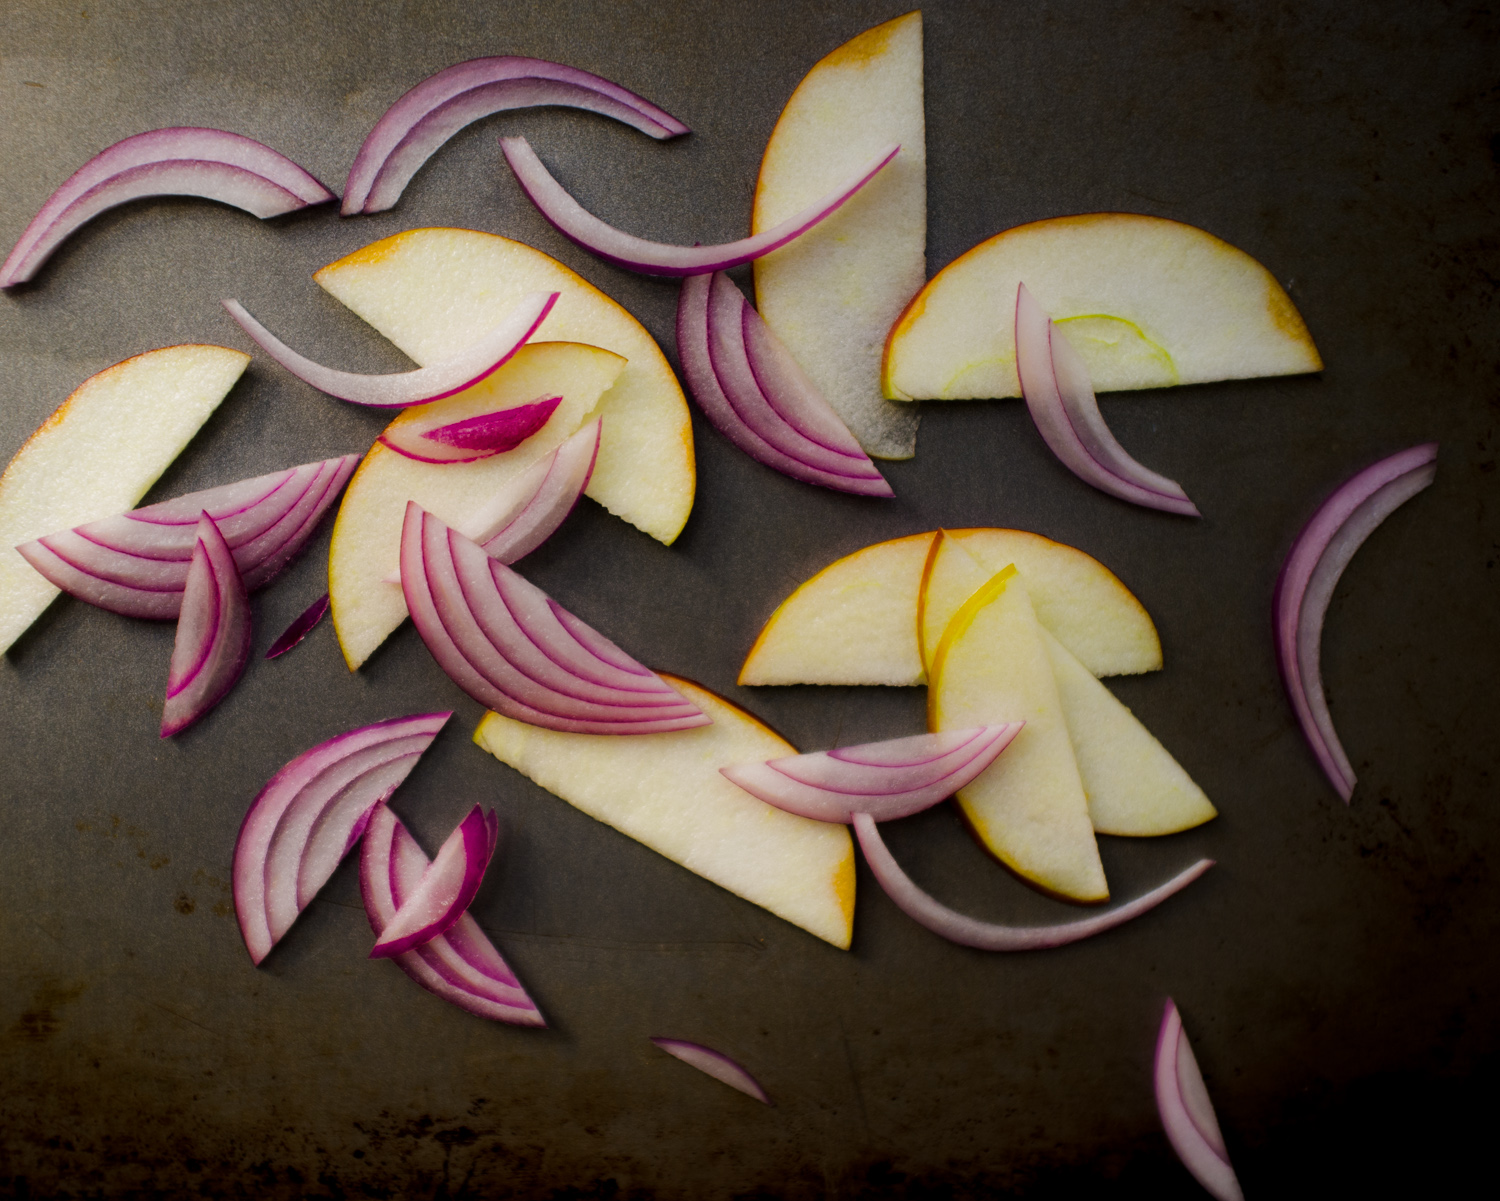
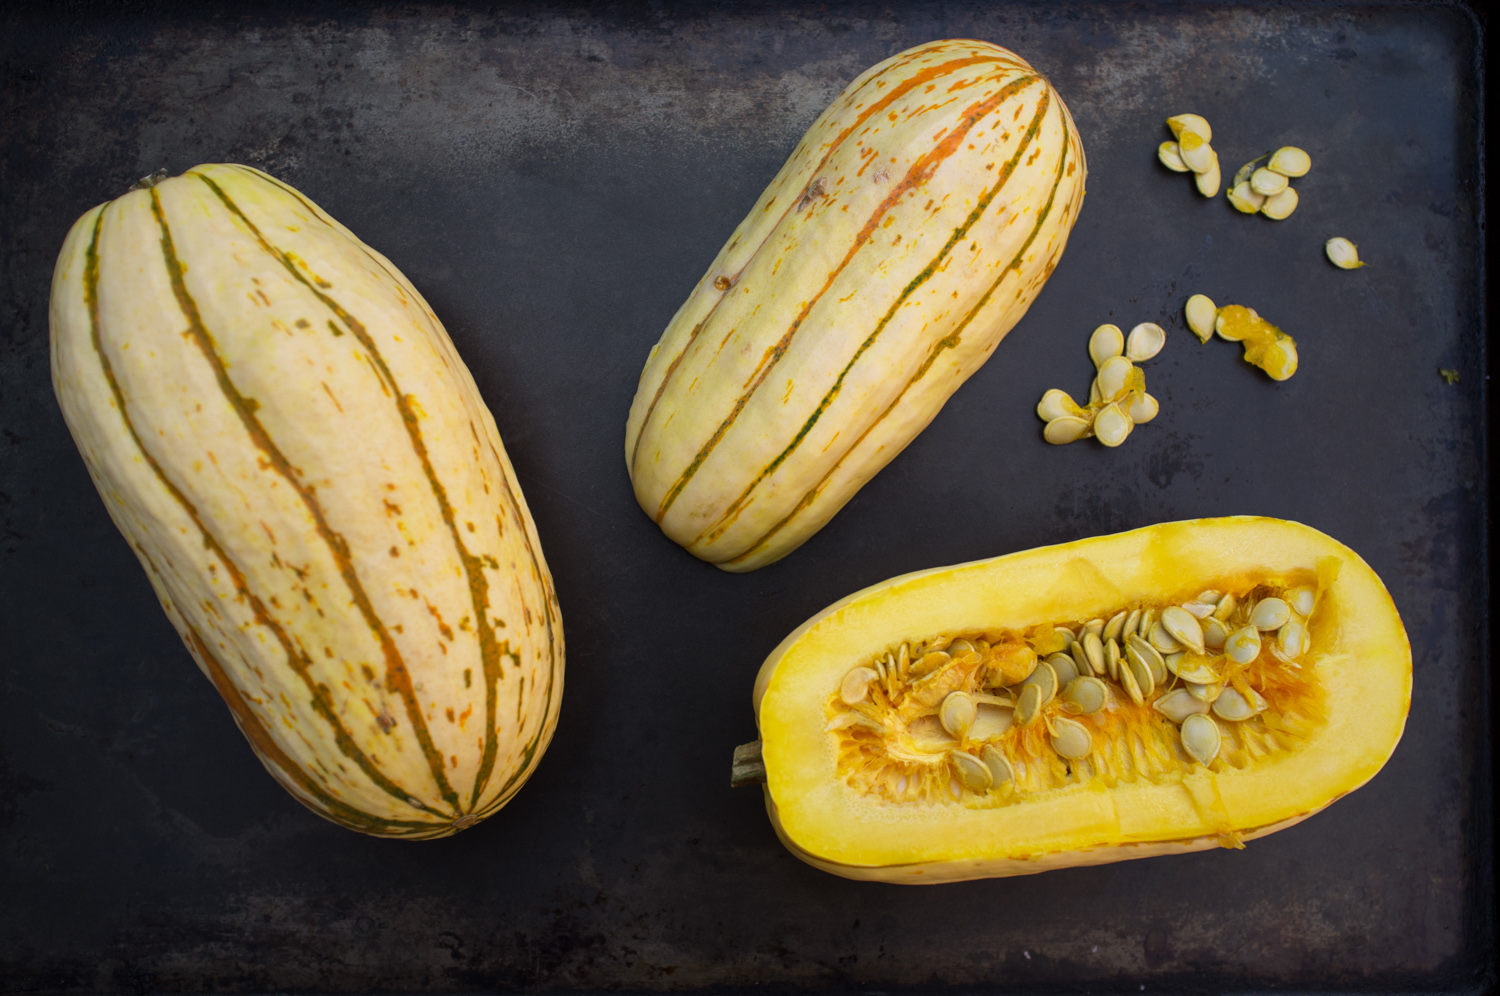
I spent a delicious day with my friend Karen from Nutrilicious tasting and talking to some of the best fruit and veggie producers from across the country at the Canadian Producers Marketing Association otherwise known as the CPMA Trade Show.   I came home with all of my favourites; cucumbers, peppers, eggplants, lettuces, potatoes...Gordy kept asking me where is all the real food, this is it, the real thing, all natural and all fresh.  The closest I came to a treat was some apple chips.  

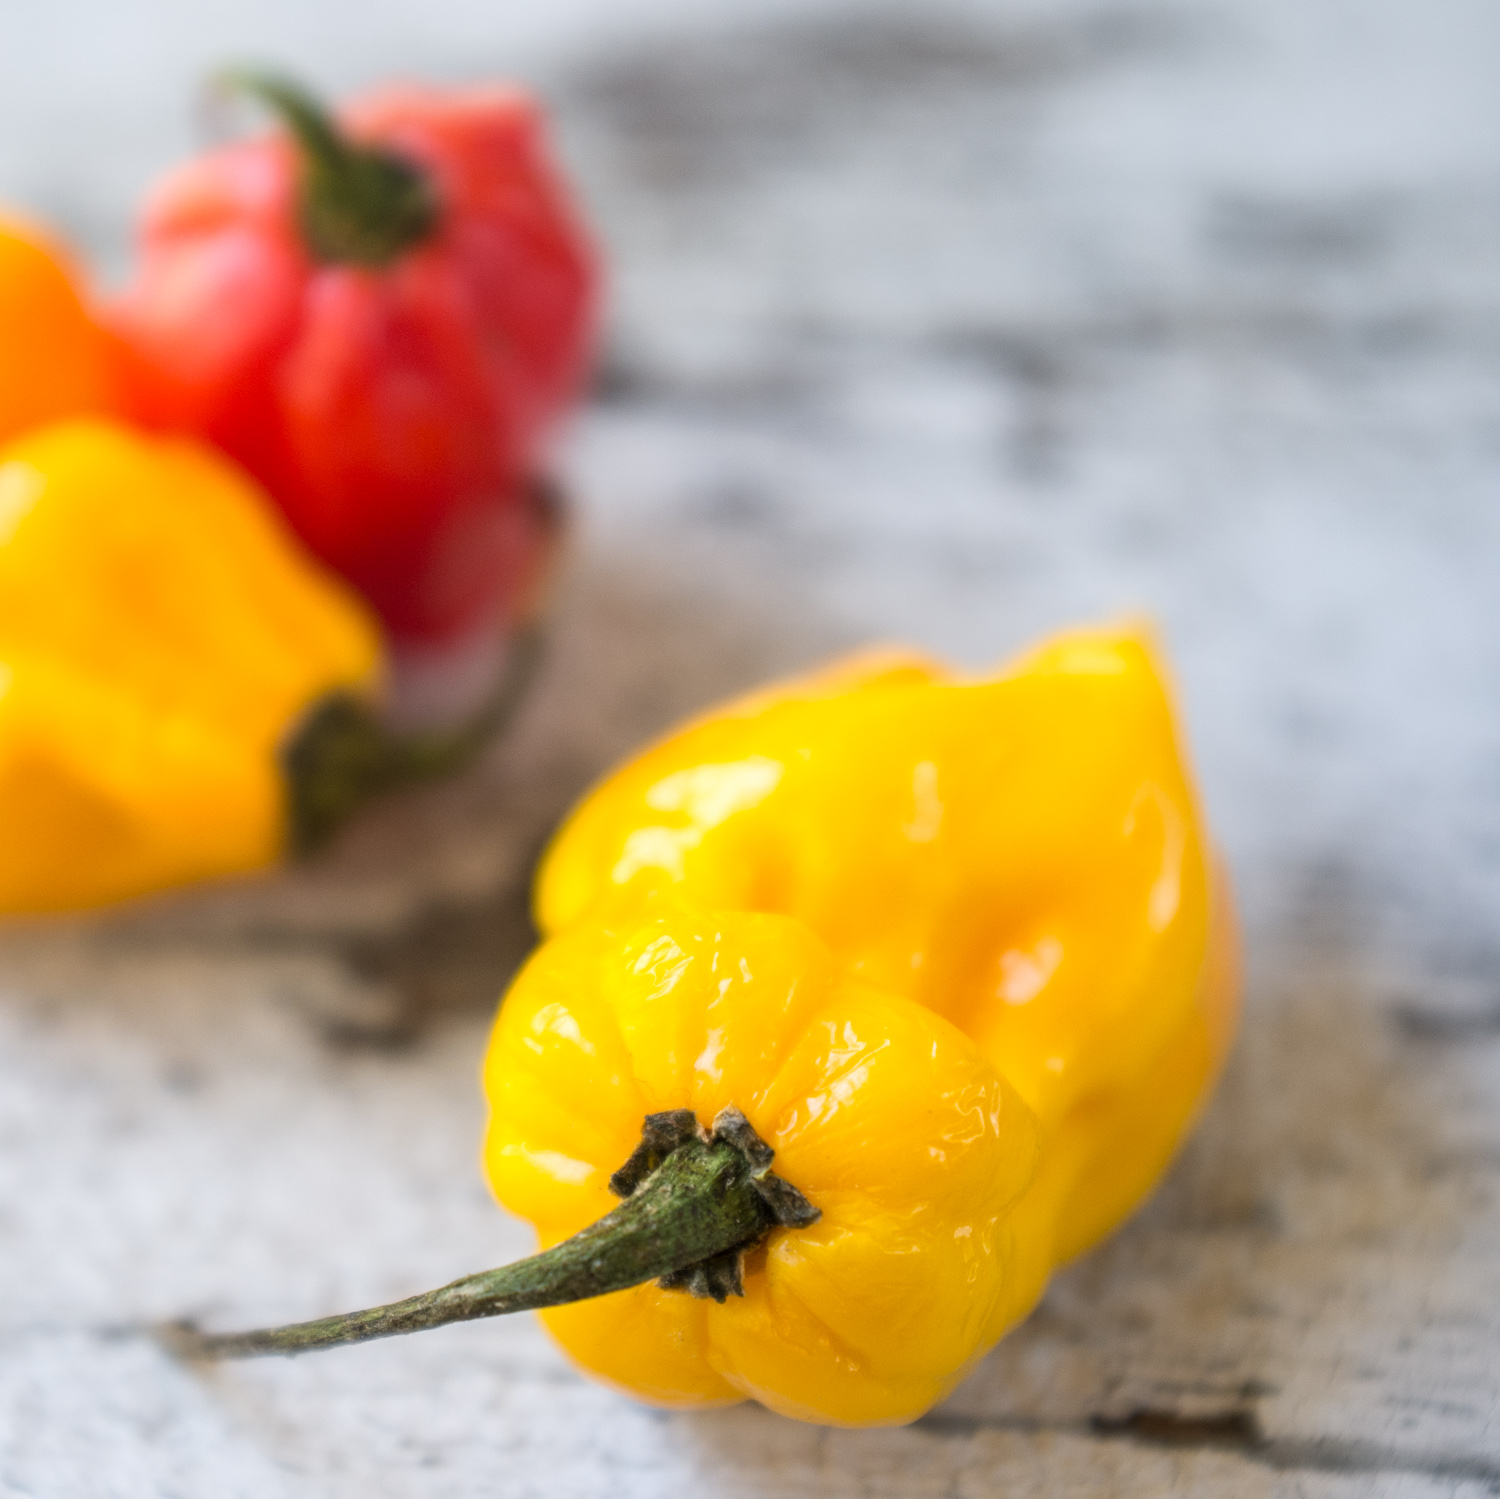
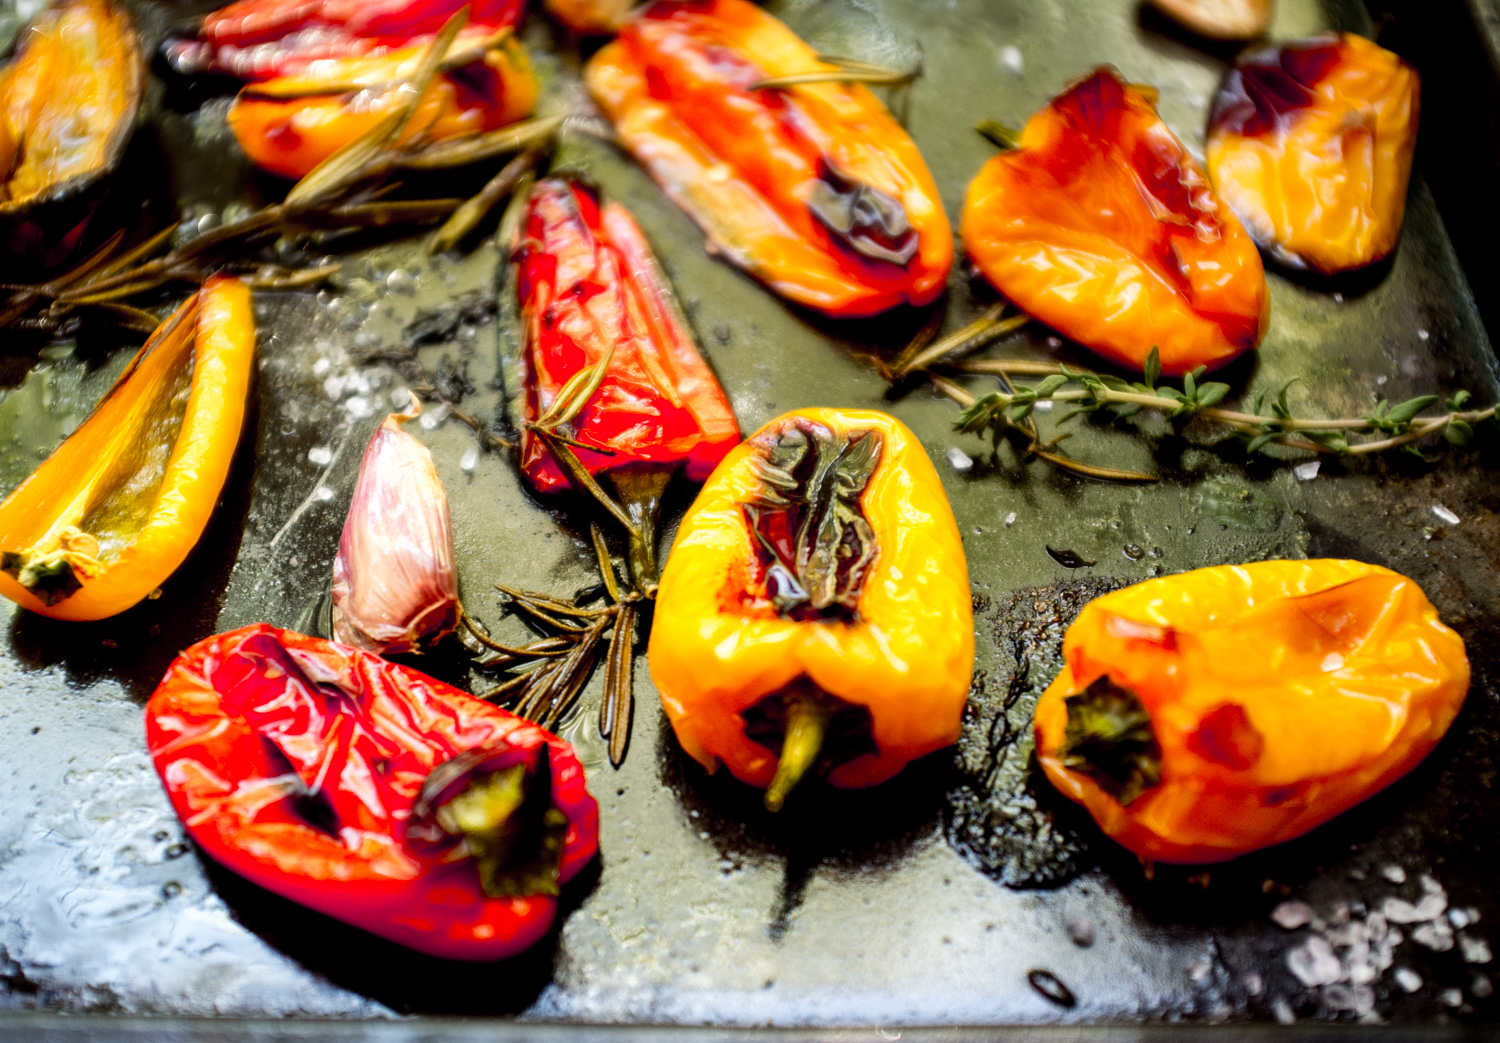
I do love these cute mini peppers, grown in Leamington Ontario at Pure Flavor's 25-acre greenhouse. I drizzled them with olive oil, added whole pieces of garlic, a handful of fresh herbs and roasted them until charred.  For a little pepper they pack a lot of flavour.  We ate them with a crusty baguette, a hunk of feta and a glass of wine, and now these little sweet peppers are all gone.  

My box of goodies from Pure Flavour!

My box of goodies from Pure Flavour!


Roasted Mini Peppers and Potatoes with Fresh Thyme, Rosemary and Garlic
This recipe will make enough to serve 6 as an appetizer.

Ingredients

2 lbs mini bell peppers
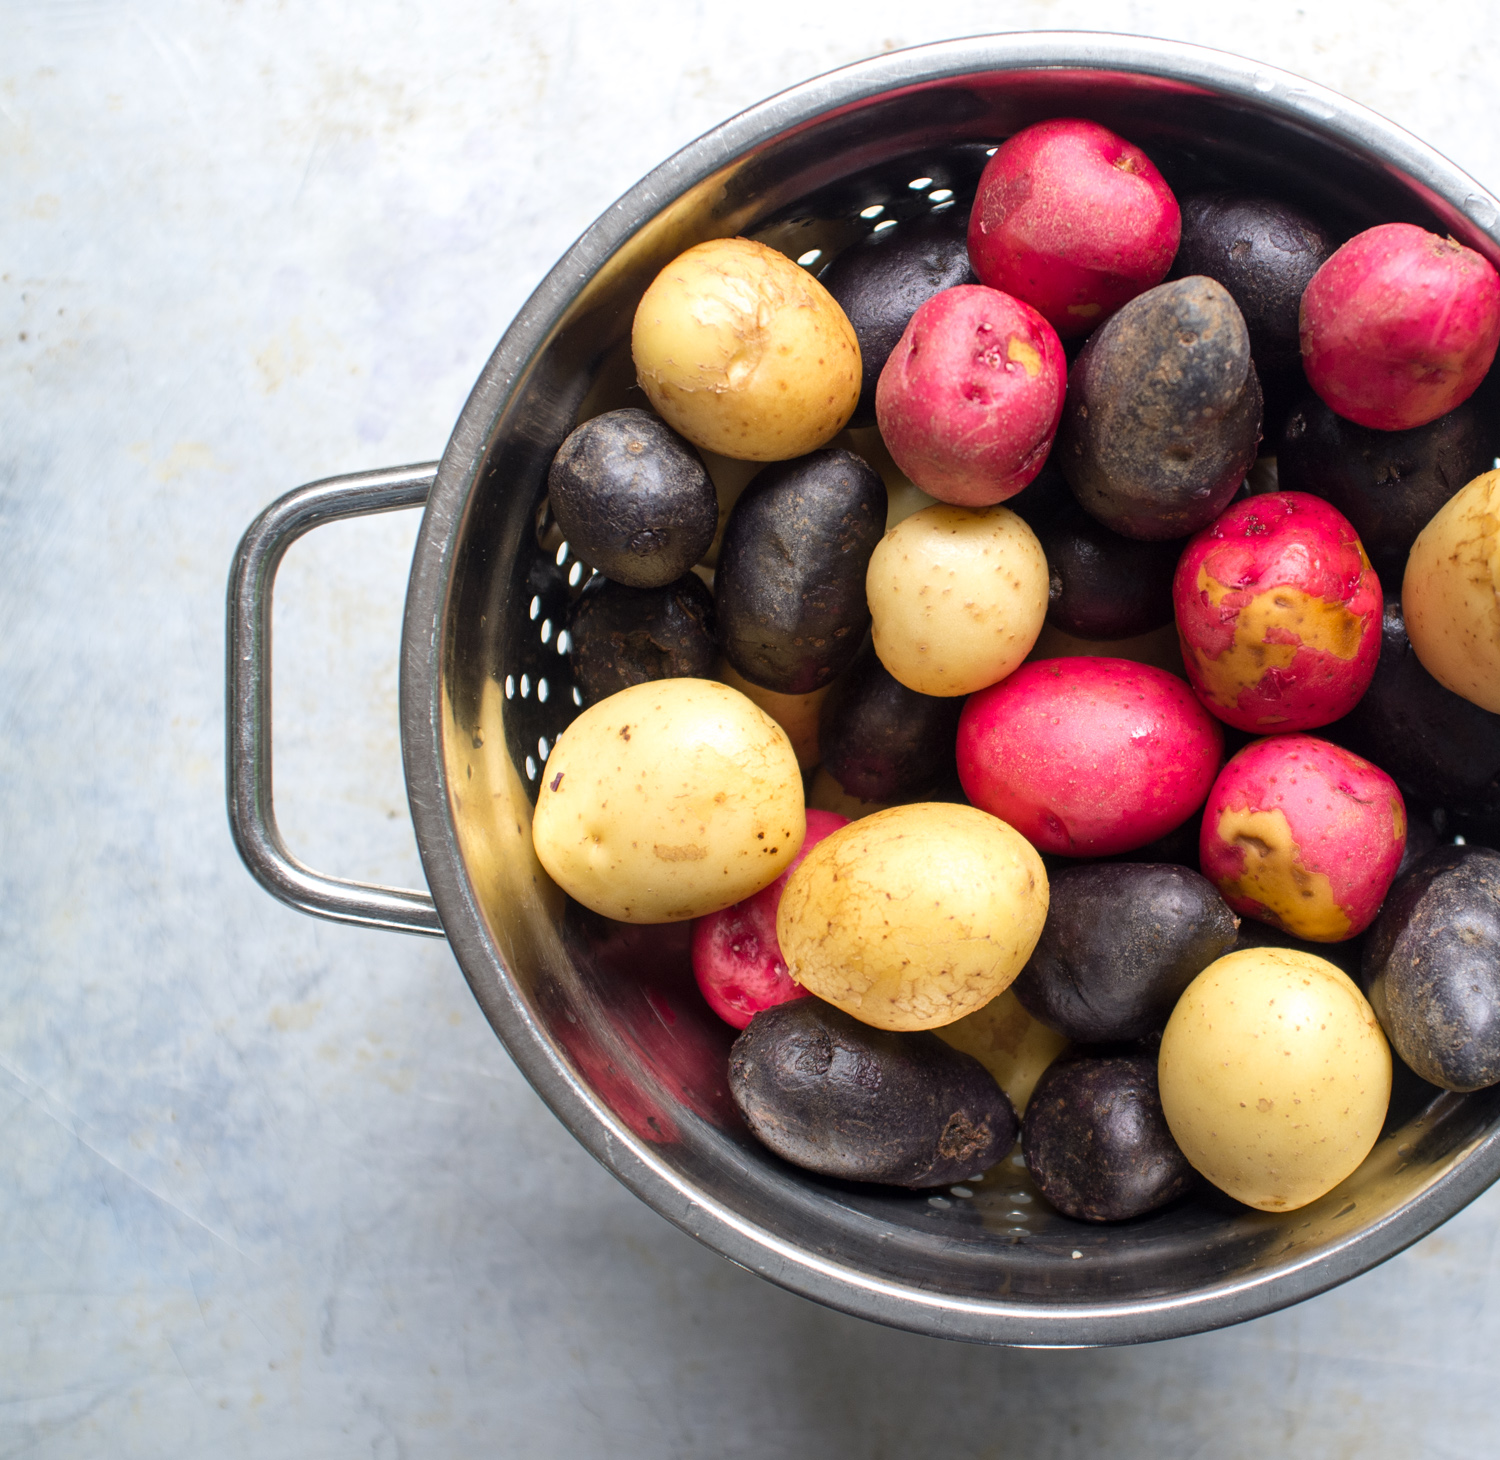
1 lb mini yukon gold potatoes
1/4 cup extra virgin olive oil, more if needed
2 sprigs of fresh rosemary
2 springs of fresh thyme
6 cloves fresh garlic, (I like to leave the garlic whole and with the skins still on, just smash with the back of a knife, this way you can squeeze the garlic out of the skins and toss with the roasted peppers when done).
kosher salt to taste
fresh ground pepper

Directions

1. Preheat oven to 425 F.
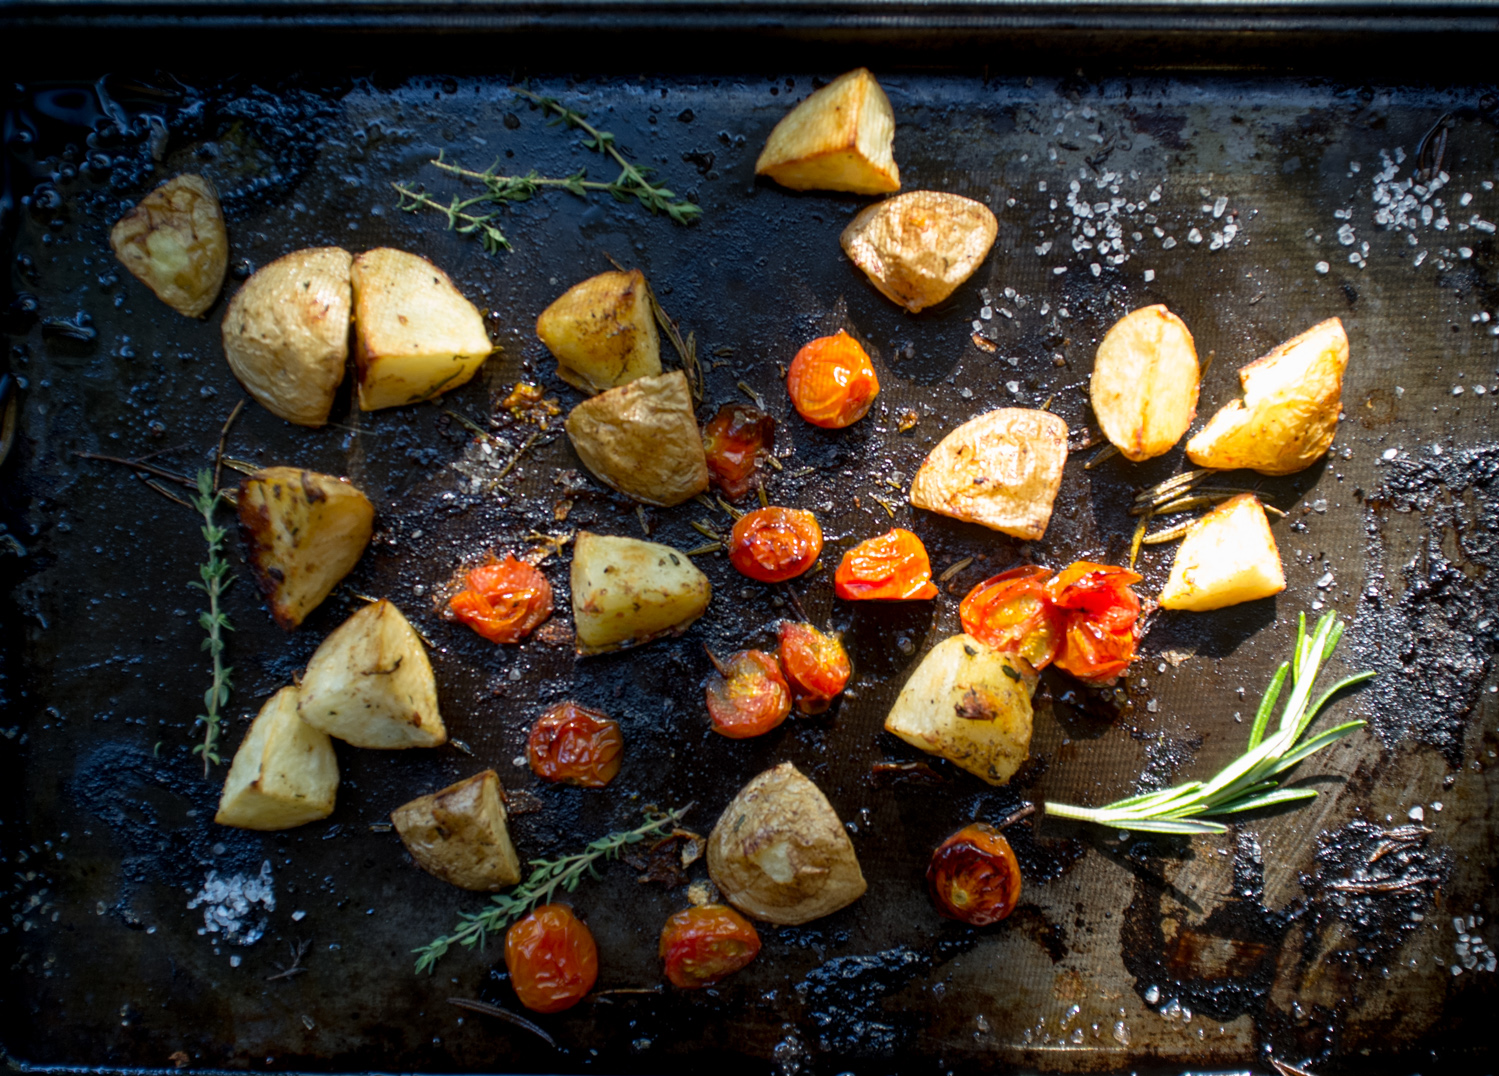
2. Prepare 2 baking sheets with parchment paper, (this will make for an easy clean up). One baking sheet will be for the peppers and the other for the potatoes. Cut larger mini peppers in half, leaving the smaller ones whole. Arrange peppers on cookie sheet.  Cut potatoes in half and arrange on the second cookie sheet.
3. Add 3 cloves of the smashed garlic to each cookie sheet.
4. Drizzle both of the cookie sheets with oil, add rosemary, thyme and toss everything until nicely coated. You will now have two cookies sheets ready to go in the oven.
5. Bake the peppers for 25 to 35 minutes, or until just slightly charred.
6. Bake the potatoes for 35 -45 minutes or until fork tender.  
7. Sprinkle with salt and freshly ground pepper
8. Serve with a crusty baguette.

Cooks Notes:

I added a few cherry tomatoes to baking sheet of my potatoes just because I had some around.
You could also crumble chèvre or feta cheese on top of the peppers.

print recipe
In Appetizers, Sides, Vegan, Vegetarian
Comment

Broccoli Bites: Vegan and Raw - The best thing since kale chips, really!

May 10, 2017 Marla Hertzman

I first tried these Broccoli Bites from Doug's Public Kitchen and loved them.  So I thought well I do have a dehydrator from way back in the day while I was in my dehydrating faze...I made kale chips, apple chips, banana chips and crackers.  Then somehow my dehydrator made its way to the basement with other once-loved kitchen appliances, my crock pot, bread machine and sandwich press have all found a home in the basement too.  Well no more, the dehydrator is back and I am making broccoli bites.  I will admit it is a bit of work; you need to soak the nuts and seeds overnight, so some advanced planning is advised.  If you are looking for a quick snack then open a bag of chips, dehydrating is not a speedy process, after 6 hours my big head of broccoli had reduced to barely two trays and it did not take long to eat the whole batch. I think next time I get a craving I will be heading over to Doug's Public Kitchen.  In the meantime if you have a dehydrator hiding in the basement then try making this crunchy healthy snack.


Broccoli Bites

Broccoli bites are the new kale chips.  
Careful, it is easy to eat the whole batch yourself, I did!

Ingredients:

3/4 cup raw sunflower seeds and/or cashews, soaked overnight and then drained, (I like to use a combinations of both)
1 red bell pepper, chopped into large chunks
1/2 carrot, chopped, chopped into large chunks
1/2 cup nutritional yeast
2 tbsp apple cider vinegar
1 tbsp olive oil
juice and zest of 1 lemon
1/2 tsp salt
1/4 tsp cayenne, (I like them a bit spicy so I added 1/2 tsp))
1/2 tsp garlic powder
1 or 2 tbsp water, (if needed)
1 head of broccoli, cut into bite-size pieces, (about 6 cups)

Directions:

  1. Chop broccoli into bite-sized pieces.
  2.  Put all ingredients except the broccoli, into a food processor and blend until smooth.  If it is too thick add a bit of water.  Depending on your food processor this will take a few minutes to become a thick paste.  
  3. Pour this mixture into a medium sized bowl. Add the broccoli and toss it all together until well-coated.
  4. Spread the broccoli out onto the sheets of your dehydrator.
  5. For my dehydrator I set the temperature between 115 to 125 degrees for about 6 to 8 hours. Following your model’s instructions, dehydrate the broccoli until they’re totally dry and crunchy. Keep at room temperature to store.

Cooks Notes:

Note on storage:  they do tend to lose their crispness.  If you save up those little desicant packets you find in some packaged foods (like kale chips), place one or two of those in the container with the broccoli bites and it extends their shelf life...if you have any left to store!

The time needed to dehydrate the broccoli bites until crispy varies, as it depends on the temperature and humidity levels outside and in your house.  Read the instruction for your brand of dehydrator.  I have an Excalibur Dehydrator. 

If you have any leftover 'sauce'  - it makes a delicious dip for raw veggies. 


PRINT RECIPE
In Raw, Snacks, Vegan, Vegetarian, Appetizers
Comment

BAKED RICOTTA WITH FIGS AND HONEY

April 3, 2017 Marla Hertzman

Creamy fresh ricotta cheese,
figs and rosemary
drizzled with honey .
You need a baguette,
some wine
and friends.
Cheers!


Baked Ricotta with Figs and Honey

This simple little appetizer is easy to pull together. I am in love with the dark earthiness of ripe figs and the creaminess of the ricotta, you must buy the best ricotta you can find and use fresh figs.
Recipe adapted from  Yotam Ottolenghi

Ingredients

500g good quality ricotta (2 cups)
½ tsp Kosher salt
Freshly ground black pepper
2 tbsp olive oil
1 tsp rosemary, chopped
6 fresh figs, cut into quarters or six
1 - 2 tbsp honey, (or more to taste)
Baguette


Directions

1.  Preheat the oven to 350F.
2.  In a medium sized bowl, mix the ricotta cheese with the salt, pepper.
3.  Lightly oil an oven-proof dish and spread the ricotta cheese in the dish, (I used an 8 inch round dish).
4.  Drizzle 2 tbsp olive oil over the cheese and sprinkle with the chopped rosemary.
5.  Bake for about 20 minutes, then remove from the oven and top with the figs, drizzle with the honey and bake again for about 8 to 10 minutes or until hot.  
6.  Serve warm or at room temperature with a really crusty baguette.

Cooks Notes

Do not overcook, the figs should still look like figs when removed from the oven.

print recipe


In Appetizers, Sides, Vegetarian
Comment

EASY MARGHERITA PIZZA WITH CHOPPED TOMATOES, BUFFALO MOZZARELLA AND HONEY WALNUTS

January 30, 2017 Marla Hertzman
pizza_mutti3.jpg
pizza_mutti2.jpg

When I was old enough to start making my own snacks I loved making pizza, we made our own pizzas on bagels, they were called pizza bagels.  We baked them in the toaster oven with a big spoonful of tomato sauce then piled on grated yellow cheese that came from a bag.  By the time it came out of the toaster oven the bagel was mushy from too much sauce and too much cheese, I spent a lot of time picking off burnt cheese that melted on the bottom of the toaster oven, it was a yummy mess.

These days I like to make a healthier and more grown-up version of the pizza bagel. I prefer the soft and chewy texture of naan bread, it crisps up really well in the oven and it holds up to the toppings. To make this pizza I start Mutti Finely Chopped Tomatoes, I love them for the fresh taste and vibrant red colour, just spoon some right from the tin and then layer with slices of soft fresh Buffalo mozzarella, pop it in the oven for about 10 minutes, finish with fresh basil, honey walnuts and eat. So simple and so delicious when you start with quality ingredients - and I'm still trying to figure out how to keep the cheese off the bottom of the toaster oven...


Easy Margherita Pizza with Tomatoes, Buffalo Mozzarella and Honey Walnuts
Simple and delicious.
Serves 2 as a main or 4 as a hearty appetizer.

Ingredients

2 naan bread
6 slices of fresh Buffalo mozzarella cheese
1/2 cup of chopped tomatoes (I used Mutti Popla Finely Chopped Tomatoes)
5-6 leaves basil or fresh mint, chopped
1 clove garlic, (I used my garlic press)
2 Tbsp Olive oil
1 1/2 Tbsp Balsamic Vinegar
Salt & Pepper to taste
1/2 cup walnuts, chopped
1 tsp honey
1 tsp balsamic vinegar

Directions

1.  Mix the garlic with the olive oil in a small bowl, then brush the naan bread with the oil & garlic mixture and place in a 350F oven for 5 minutes.
2. In a small pan over medium low heat toast the chopped walnuts for about 3 minutes, add the honey and balsamic vinegar and stir until coated.  Remove from heat and set aside.
3. Remove the nann bread from the oven and top with the Mutti tomatoes and sliced cheese. Place back in the oven for another 5 minutes, plus a few minutes under the broiler if needed, make sure to keep an eye on it, depending on your oven it may need less or more time.
4. Once the pizza is baked and the edges are golden in colour, remove from the oven, drizzle with a bit of olive oil, salt and pepper, toss on the basil leaves and walnuts, slice and serve.

Cooks Notes

In the winter I sometimes like to use fresh mint if the basil does not look great.
To make this vegan either leave off the cheese or use a vegan 'cheese.'
This nann pizza makes an excellent appetizer, cut into bite size pieces.

 Happy cooking and eating and thanks to Mutti for sponsoring this recipe.

print recipe
In Appetizers, Mains, Sides, Vegan, Vegetarian
1 Comment

Baked Polenta Swiss Chard 'Fries' with a Spicy Tomato Dipping Sauce

December 30, 2016 Marla Hertzman
63064_Passata Strained Tomatoes 700g Canada.jpg
A.W. NEW LOGO MUTTI.JPG
41046 Mutti Finely Chopped Tomatoes 400g Canada ENG side.jpg

When I was asked to taste-test Mutti tomato products it was not until I received some samples and saw the packaging that I instantly realized that I have already been using their products.  I have been making homemade pizza topped with their pizza sauce and loving it.  The Mutti Pizza Sauce is not only is it delicious but it is ready to use right from the can. So I was really pleased to be testing and tasting more of their products. 

I love making this recipe when I need a really great appetizer. Start by preparing the polenta and let it cool, this can be done a day ahead or early in the day to give the polenta time to set. When the polenta has cooled, cut into 'fries' and bake for about 40 minutes until they become golden and crispy on the outside and creamy on the inside.  Dip into Spicy Tomato Dipping Sauce and there you have it...crunch, creaminess, spicy and tomatoey. 

The recipe calls for so few ingredients so it’s important to use quality tomato products made with quality ingredients.  Mutti tomatoes are made from 100% tomatoes from Italy and are GMO-free. The Mutti Passata Strained Tomatoes are in a resealable glass bottle and the Polpa Finely Chopped Tomatoes are perfect to use in recipes that call for fresh tomatoes. 

It being winter here in Toronto I tend to stock my shelves with lots of canned goods.  I love fresh tomatoes and these Mutti bottled and canned tomatoes remind me of how fresh and wonderfully sweet jarred and tinned tomatoes can be and how much I can use them in my daily cooking, all year long.

 Happy cooking and eating and thanks to Mutti for sponsoring this recipe.


BAKED POLENTA SWISS CHARD FRIES WITH A SPICY TOMATO DIPPING SAUCE


Serves 8 as an appetizer.

Ingredients For the Polenta Fries:

1 1/2 cups chopped swiss chard, washed and dried
olive oil for sauteing
1 small cooking onion
2 cups almond milk
3 cups water
2 cups medium or coarse polenta
1 1/4 tsp kosher salt
1/2 tsp ground black pepper
 

Ingredients for the Spicy Tomato Dipping Sauce:

1 jar strained tomatoes, (I use the Mutti Passata Strained Tomatoes)
1 tin chopped tomatoes, (I use the Mutti Finely Chopped Tomatoes)
1/2 cup diced yellow onion
2 cloves of garlic, minced
2 teaspoons extra virgin olive oil
1/4 cup red wine
2 tbsp chopped fresh basil
1 tsp honey (or more to taste)
1/2-1 tsp  red pepper flakes, (I like it really spicy to adjust to your taste)
1/2 tsp salt
1/4 tsp black pepper

Directions for the Polenta Fries:

1. Cut the swiss chard into small bite sized pieces.
2. Melt the olive oil in a large saucepan, add the onion and cook on a medium heat for a few minutes, then ass the chard and sauté for 5 minutes or until tender.
3. In a large saucepan bring the water and almond milk to a boil.
4. Once the liquid is boiling add in the salt, pepper and polenta. Whisk until thickened, cover and cook over a low heat for 10-20 minutes.
5. Grease a 9 x 13 glass baking pan with some olive oil and pour the polenta into the dish, flatten with the a large spoon or spatula.
6. Cover the polenta and refrigerate for a few hours or until firm.  (You could do this a day ahead).
7. When the polenta has cooled and is firm cut into 'fries' and place on a baking sheet lined with parchment paper and lightly oiled.
8. Brush the polenta fries with olive oil and lightly sprinkle with coarse salt.
9. Bake in the oven for about 40 minutes, or until golden and crunchy on the outside, turn using a spatula after 20 minutes. You will know when they are ready when they turn golden
10. Serve hot with the warm and spicy dipping sauce.

Directions for the Spicy Dipping Sauce

1. In a large saucepan over medium high heat, heat the olive oil.
2. Add in the onion and garlic and stir around for about 3 minutes or until the onion has softened.
3. Add in the red wine and cook for another 3 minutes or until the wine comes to a boil.
4. Add in the tomatoes and the remaining ingredients and stir everything together.
5. Reduce the heat to low, cover with a lid and simmer for about 30 to 40 minutes.
6. Remove from the heat and serve with the hot polenta fries.

Cooks Notes:

The polenta can be prepared a day ahead then baked when needed.
The tomato dipping sauce can also be made ahead then warmed when ready to use.

PRINT RECIPE
In Appetizers, Baking, Sides, Snacks
Comment

DELICATA SQUASH & POMEGRANATE SALAD WITH PECANS, GOAT CHEESE AND POMEGRANATE DRESSING

December 21, 2016 Marla Hertzman

This salad is...

Crunchy

A little sweet

Savoury

Nutty

Delicious

Colourful


Delicata Squash and Pomegranate Salad

This salad serves 4

Ingredients for the salad:

1 delicata squash, halved lengthwise and seeded, sliced into ½-inch segments
1 tablespoon extra-virgin olive oil, more if needed
Salt and freshly ground black pepper
1 box or bag of baby spinach or arugula
1/2 cup pomegranates seeds
1/2 cup pecans
Goat cheese, (as much as you like)

Ingredients for the Dressing:

1/3 cup pomegranate juice
1/4 cup apple cider vinegar
1 tsp finely chopped shallot or garlic
1/4 tsp salt
1/4 tsp pepper
1/3 cup olive oil

Directions for the salad:

1. Preheat the oven to 400°F and line a baking sheets with parchment paper.
2.Place the prepared squash on the parchment lined baking sheet and toss with olive oil and several pinches of salt and pepper.
3. Roast until golden brown, 25 to 30 minutes, set aside.
4. Heat a small saucepan over medium heat and add the pecans, toast until they are slightly golden, shaking the pan as they cook for about 5 minutes, set aside.
5. Prepare the salad by putting the greens in a large salad bowl with a pinch of salt and pepper.  Toss in the toasted pecans, sprouts, goat cheese and pomegranate seeds.
6. Pour the dressing over the salad, lightly toss and you are ready to eat.

Directions for the dressing:

1. In a small bowl combine the pomegranate juice, vinegar, shallot, salt and pepper and whisk together.
2. Slowly pour in the olive oil while constantly whisking until the dressing comes together. 

Cooks Notes:

Make this salad vegan by leaving out the cheese.
This salad is also delicious with feta cheese.
You can use walnuts or hazelnuts in place of the pecans.
You can store any leftover dressing in the fridge for up to one week .

Print recipe
In Appetizers, Mains, Raw, Salads, Sides, Vegetarian, Vegan
Comment

Wild Salmon and Sweet Potato Patties with lemon caper dipping sauce

October 21, 2016 Marla Hertzman

I recently had a delicious lunch at Cafe Belong sponsored by Clover Leaf to launch their new line of Wild Selections salmon and tuna. The food was designed by Chef Brad Long and wow did he elevate canned salmon.  We started with three Sockeye Salmon Cherubs, little dumplings of pink salmon sitting atop of a Maple Yogourt Dipping Sauce, and all I could think of was these tasted nothing like the salmon patties that I grew up eating. 

Growing up in our house salmon patties showed up as a monthly dinner. My mother used canned salmon, lots of breadcrumbs and we dipped them in lots of ketchup.  I wanted to create my own version of salmon patties that would make them taste just as great as my mother's and just as updated as Chef Brad Long's. Mine are held together with mashed sweet potato, fresh parsley and lots of lemon zest to keep them bright and a Lemon Caper Dipping Sauce. No ketchup required.

salmon_cloverleaf2.jpg
salmon_cloverleaf1.jpg

Wild Selections is more then just a can of salmon.  You can trace the source of your salmon and tuna products by entering a code found on the packaging to find out the path your fish took to go from ocean to plate. Clover Leaf Wild Selections,  is the first premium line of sustainably caught seafood that directly gives back to our oceans by funding conservation programs.  How cool is that!

salmon_cloverleaf4.jpg
salmon_cloverleaf5.jpg
salmon_cloverleaf8.jpg
tuna_cloverleaf.jpg
salmon_cloverleaf6.jpg
salmon_cloverleaf7.jpg

Wild Salmon and Sweet Potato Patties
Serves: 2 - 3
These little patties are made from wild canned salmon and mashed sweet potato.
Makes 6 mini patties or 4 large.

Ingredients for the Salmon and Sweet Potato Patties:

2 tins of wild salmon, drained
1 large egg, beaten
1/2 cup mashed sweet potatoes
1/4 cup red onion, finely chopped
1/4 cup fresh parsley or dill
1 tbsp dijon mustard
zest from 1 lemon
1/2 tsp salt
1/2 tsp turmeric
1/4 tsp ground black pepper
oil for cooking the patties

Directions:

1. Start by peeling and cutting the sweet potatoes into bite-size pieces and lightly boil for about 20 minutes or until fork tender. Rinse and mash.  Set aside to cool.
2. In a large bowl mix the rest of the ingredients including the mashed sweet potatoes.
3. Form into patties with your hands, 6 small patties or 4 large ones.
4. I like to chill the patties in the fridge for about 15 minutes, this helps them hold together when cooking.
5. In a large pan heat oil over medium-high heat then carefully place the patties in the pan and lower the heat to medium.  Cook the patties for about 5 to 8 minutes per side or until lightly browned.  
6. Serve with Lemon Caper Dipping Sauce.

Ingredients for the Lemon Caper Dipping Sauce:

1/2 cup Greek yogourt or vegan sour cream
1 1/2 tbsp capers, rinsed
1 tbsp lemon zest
1 tbsp fresh lemon juice
salt and pepper to taste

Directions:

1. Mix all ingredients in a small bowl. Serve with the warm salmon patties.


Print recipe
In Mains, Appetizers
Comment

Autumn Apple Pizza with Walnut Pesto-VEGAN

October 5, 2016 Marla Hertzman

Some people love the warm and sunny days of Summer or the newness of Spring but I love the crisp light and fresh smells of Autumn. When I think of our wonderful country Canada I think of Fall in Ontario - and that means crisp mornings, fall colours, pumpkins and of course apples. Honeycrisp are my favourite but I also love McIntosh, Gala and Idared.

Fall also makes me think of good old-fashioned candy apples. As I kid I loved candied apples, well I think it was more of the idea of them, when you actually tried to bit into one, which is kinda impossible and all that red sticky candy got stuck in your teeth I gave up since I could hear my mother...you will get cavities if you eat that.  I don't think I liked them anyways, not as much as apple pie.

But apples are not just for pies... and I am pretty sure that you have lots of recipes for apple pie, but do you have a recipe for a pizza pie with apples?

This Apple Pizza with Walnut Pesto recipe is a little crispy, a little sweet, a little savoury.  If you start with a prepared crust and make the pesto ahead of time, (it keeps well in the fridge), you will have a really quick dinner. All you have left to do is slice the apples and onions and dinner is ready in about 20 minutes.  When the pie comes out of the oven finish with a drizzle of olive oil, balsamic vinegar and freshly ground pepper. And if you have lots of apples left you could always make some candy apples for dessert!

I saw these freshly made candy apples just waiting to be wrapped at Country Produce in Orillia.This is the time of year to go apple picking and Ontario apples are just ripe for picking and eating.  For a list of where to find local visit H…

I saw these freshly made candy apples just waiting to be wrapped at Country Produce in Orillia.

This is the time of year to go apple picking and Ontario apples are just ripe for picking and eating.  For a list of where to find local visit Harvest Ontario, Ontario’s largest directory of agritourism attractions. 

Support local and buy Ontario apples and let's celebrate the season!


Autumn Apple Pizza with Walnut Pesto
The dairy-free pesto that is made with a combination of basil and spinach, making it super green and super healthy.
Serves: 2-3 as a main entree or 4-6 as an appetizer.

For the Pizza Dough:

 Use any Pizza dough recipe you like, store bought or homemade.  I used a whole grain crust for mine.

Ingredients for the Pesto:

1/2 cup walnuts
2 cloves garlic or 1 large
1/4 cup olive oil
2 cups fresh basil
2 cups fresh spinach
salt and pepper to taste
1 Tbsp lime juice

Ingredients to top the Pizza:

1 apple, sliced, (I like using a tart apple)
1/4 cup red onion, thinly sliced
olive oil to brush on the outside crust of the pizza
salt and pepper to taste

Garnish:

drizzle of balsamic vinegar
drizzle of olive oil
lots of freshly ground pepper

Directions:

1. Preheat oven to 450 degrees F.
2. Blend all the ingredients for the pesto in a food processor, taste and adjust seasoning.
3. Roll out the pizza dough into two crusts or one big one.  (I find it is easier to roll out 2 smaller crusts).
4. Spread the pesto evenly on each crust.
5. Layer the apple slices on the pizzas.
6. Top with the sliced red onion.
7. Brush the crust lightly with some olive oil.
8. Bake the pizzas at 425 degrees F for at least 15 minutes, or until the crust is golden.
9. Garnish, cut and serve.

Cooks Notes:

If you don't have time to make your own pizza dough store bought is perfect to use in this recipe.
Feel free to use any kind of apple you like
You could also use a flat bread or Naan bread or gluten-free crust.
This recipe is vegan but you could add cheese, such as Buffalo mozzarella, chèvre or go with classic cheddar.
Store any leftover pesto in a glass jar in the fridge.  


Print Recipe
In Appetizers, Mains, Sides, Vegan, Vegetarian
Comment

Caribbean Grilled Corn with Jerk Butter

August 15, 2016 Marla Hertzman
lime.jpg
grilled_corn4.jpg
corn_grilled1.jpg

I love this time of year when the sun shines and the fresh local vegetables are so easy to cook with and of course – I love grilling.  Grilled corn-on-the-cob is one of my favourite vegetables to cook on the BBQ. The heat of the grill does a great job of charing and caramelizing the cobs which makes the corn so sweet to eat.

But don't forget the butter... 

That's what makes this corn so special. I blended the traditional Caribbean spices; thyme, fresh ginger, scallions, fiery Scotch bonnet peppers, nutmeg and allspice into lots of creamy butter.  And to cut the heat I added a big heaping spoonful of Canadian maple syrup. 

This corn is a huge hit every time I make it, but give your guests a heads up -- cuz its messy to eat, so pass along the napkins!

Summer corn + the big bold flavours of Caribbean spices + Canadian maple syrup = D E L I C I O U S

Happy grillin'!


My recipe is featured in this months Siren Universe, Canada's leading travel and tourism PR Firm.


Caribbean Grilled Corn with Jerk Butter
This recipe will keep you in the moment long after summer is gone and you start dreaming about the Caribbean sun.
Serves: 8

Ingredients: 

For the corn:

  •  8 large corn on the cobs, leave husks on, but peel back and remove the silk. Soak the corn in water for 20 to 30 minutes. This will keep the husk from burning and helps keep the corn crunchy.

For the Jerk Butter:

  • 1 cup butter, unsalted and at room temperature (if you want to make this vegan use coconut oil)
  • 2-inch piece of fresh ginger, finely grated
  • 2 tbsp fresh thyme leaves, chopped, (if you don't have fresh use 1 tbsp dried)
  • 1/2 tsp ground allspice
  • 1/2 tsp nutmeg, (fresh ground if you have it)
  • 1/2 tsp ground black pepper
  • 1 tsp kosher salt
  • 3 cloves garlic, crushed
  • 3 green onions, finely chopped
  • 1/2 scotch bonnet chili, finely chopped, (or more if you like it really hot)
  • 1 tbsp maple syrup
  • zest from 2 limes

For the Garnish:

  • fresh sliced limes for garnish
  • fresh chopped chives and green onion, for garnish

Directions:

  1. Put the softened butter into a small bowl.  Then add all the Jerk Butter ingredients and mix well. Set aside until ready to use.  If making ahead store the butter in the fridge.  
  2. Clean corn by peeling back the husks and removing the silk. Soak the corn in water for 20 to 30 minutes. 
  3. While the grill is heating, brush the corn with a bit of the Jerk butter.  Grill the corn for about 20 minutes, turning often, until the corn is begins to char. Transfer to serving dish, brush on more of the butter and let it melt over the corn.
  4. Garnish with chopped chives and lots of limes for squeezing. 

Cooks Notes:

  • Butter can be made ahead and stored in the fridge until ready to use.
  • Serve with lots of napkins, this is messy!
  • Any leftover butter can be stored in the fridge and used on just about anything that you would use butter for.
  • If you want to make this vegan use coconut in place of the butter.


Print Recipe
In Appetizers, Sides, Vegetarian, Vegan
Comment

Summer Potato Salad with Lemon and Dill

August 8, 2016 Marla Hertzman
potatoes_colourful.jpg
potatoes_colourful1.jpg

These baby new potatoes are all about the colour.  I just added enough mayo, dijon, lemon and dill to make them sing!


Summer Potato Salad with Lemon and Dill

Serves 4 to 6 as a side dish.

Ingredients:

  • 2 pounds baby new potatoes
  • 1/2 cup mayonnaise
  • 2 tbsp dijon mustard or grainy mustard
  • 1 clove garlic or 1 shallot, minced
  • 1 tbsp fresh lemon juice
  • 1/4 cup red onion, diced
  • 1/2 red or yellow pepper, diced
  • 1/2 cup cucumber, diced
  • big handful of fresh dill or any fresh herbs you like, chopped
  • salt and pepper to taste

Directions:

  1. In a large pot, cover the potatoes with water, add a large pinch of salt and boil until just tender, about 25 minutes. Drain and let cool slightly.
  2. In a small bowl make the dressing by mixing together the mayo, mustard, garlic, lemon juice and salt and pepper, set aside.
  3. Quarter or half the potatoes, (depending on size) and transfer them to a large bowl.  Add the dressing and toss.  Then add the onions, peppers, cucumber, dill and mix again.
  4. Taste for seasoning, you may need to add more lemon juice, salt and pepper.
  5. Serve warm or at room temperature.

Cooks Notes:

  • Prepare ahead of time so the flavours can meld.
  • You can make this vegan by using oil in place of the mayo or vegan mayo.
  • If you don't have dill try parsley.
Print Recipe
In Appetizers, Salads, Sides, Vegan, Vegetarian
Comment

Vegetarian Rainbow Wraps with Home-Made HOISIN SAUCE

July 20, 2016 Marla Hertzman

This is a dinner favourite for Yale.

When I was dating Gordy, (many, many and many years ago) -  he introduced me to the Rainbow Chopped in Crystal Fold from the Pink Pearl Chinese Restaurant that was then located on Avenue Road.  It started with a plate of crisp iceberg lettuce, a big spoonful of hoisin and then an even bigger spoonful of filling, folded together and eaten with your hands.  It was all about the crunch of the lettuce, the sweetness of the sauce and the savoury filling.  Once you have eaten this tasty mess its hard to forget.  So when my friend Karen from Nutrilicious shared her recipe with me I knew that this would pass the test with Gordy and the rest of my family.

You might be thinking...why make your own Hoisin Sauce when it is so easy to buy at the supermarket?  For me its all about the sugar, well actually NO REFINED SUGAR in my sauce. Read the ingredients on the bottle of hoisin sauce in your fridge and I am sure the first ingredient is sugar, and lots of it. My recipe is sweetened with molasses or honey and thickened with peanut or almond butter. You may want to double the recipe as it keeps well in the fridge and is delicious as a dipping sauce too.


Vegetarian Rainbow Wraps with Home-Made Hoisin Sauce
Recipe Adapted from Nutrilicious
Serves: 3 to 4

Ingredients for the stir-fry:

  • 2 tsp sesame oil
  • 2 cloves of garlic, minced
  • 2 tbsp minced ginger
  • 3-4 shiitake mushrooms, sliced
  • 1/2 block tofu sliced into strips
  • 2 green onions, chopped
  • 1 -2 carrots grated
  • 4 - 5 cups shredded cabbage (mix of green and purple)
  • lettuce to use for the wraps (I like to use Boston, Butter lettuce)
  • 2 tbsp low-sodium tamari or soy sauce
  • sesame seeds, toasted to sprinkle on top

Directions:

  1. Start by lightly toasting a big handful of sesame seeds, set aside.
  2. Pour 1 tsp of the sesame oil into a large frying pan.  Cook garlic and ginger until soft.
  3. Add shiitake mushrooms and cook 3-4 minutes, until soft.
  4. Add cabbage and carrots and cook for another 4-5 minutes or until cabbage wilts.
  5. Add tofu and continue cooking for about 2 minutes
  6. Stir in green onions. Add soy sauce. Cook until warmed through.
  7. To serve, spread 1 tbsp Hoisin sauce over lettuce. Top with a spoonful of cabbage/tofu mixture and some sesame seeds and roll.
  8. WARNING:  These are messy!

Ingredients for the Hoisin Sauce

  • 4 tbsp tamari soy sauce
  • 2 tbsp peanut butter or almond butter, (without added sugar)
  • 1 tbsp molasses or honey
  • 2 tbsp rice vinegar
  • 1 clove garlic, minced
  • 2 tsp sesame oil
  • 1 tsp hot sauce
  • dash of Chinese five spice powder, (optional)
  • 1/8 tsp black pepper

Directions:

  1. Combine all ingredients until smooth. 

Cooks Notes:

  • Any leftover sauce will keep well in a jar with a tight fitting lid for two weeks in the fridge.
  • This sauce is great for dipping spring rolls, tofu, or vegetable skewers.
  • I just used the sauce to dip BBQ'ed skewers of tofu, pineapple, peppers and red onions.
  • Thought I did not add any crispy noodles to mine next time I will for sure!
print recipe
In Appetizers, Mains, Vegan, Vegetarian
Comment

Vegan Mexican Black Bean Lettuce Wraps with Avocado Lime Dressing. Ready in 20 minutes!

July 5, 2016 Marla Hertzman
lettuce_beanwrap3.jpg

Gordy is hanging out in Kensington Market eating tacos and I am staring into an empty fridge wondering what to eat.

I made these wraps with what I found around the kitchen...a tin of black beans, a jar of salsa, a bag of frozen corn and avocados. I had no tortillas so I used Boston lettuce leaves in place of the wraps.  This recipe is healthy, vegan and gluten-free.

I think when Gordy sees this recipe he will be heading back to Kensington Market to eat more tacos.


Vegan Mexican Black Bean Lettuce Wraps with Avocado Lime Dressing

You won't miss the meat in these vegan wraps.
Serves: 2 to 3

Ingredients for the Filling:

  • one 15 oz. cans black beans, (rinsed and drained)
  • 1/2 cup salsa (I used store bought from the refrigerator section in your grocery store)
  • 1/2 cup corn, fresh or frozen
  • 1/2 tsp. cumin
  • dash of cayenne pepper
  • Boston lettuce, wash and set aside in the fridge wrapped in paper towels until ready to use
  • Lime wedges for squeezing on top

Ingredients for the Avocado Lime Dressing:

  • 1 large ripe avocado
  • 3/4 cup cilantro, stems removed, (or parsley)
  • Juice from 1 lime, or more to taste
  • 1 clove garlic
  • dash of cayenne pepper
  • 1 Tbsp olive oil
  • 2 tsp honey
  • 1/8 tsp salt, or more to taste
  • a bit of water if need to thin out

Directions:

  1. Make the avocado sauce: in a food processor or blender add all sauce ingredients and blend well. Add a touch of water to thin if necessary.  Taste to adjust the seasonings.  Set aside.
  2. In a pan over medium heat, add black beans, (mash some of the beans with a potato masher), corn, salsa, cumin and cayenne. Heat for about 5 minutes stirring occasionally, until heated through. 
  3. While the beans are heating, chop and prepare your toppings. 
  4. Assemble the tacos, spoon the black bean mixture in the centre of the lettuce leaves, drizzle a small amount of avocado sauce over the top, and add your toppings.

Toppings are all optional:

  • hot sauce
  • chopped cilantro
  • sprouts
  • chopped onions
  • yogourt or sour cream
  • olives
  • pickled jalapeno peppers

Cooks Notes:

  • You can use filling in corn wrap or any wrap you like.
  • If you have any leftover avocado sauce store in the fridge and use as a dip or salad dressing.
print recipe
In Appetizers, Mains, Vegan, Vegetarian
Comment

Grapefruit Radicchio Salad

May 31, 2016 Marla Hertzman
grapefruit_salad.jpg
grapefruit_salad3.jpg

All you need for this salad is some colour.

Purple

Pink

Yellow

and

Green.


Grapefruit and Radicchio Salad
Serves 6 as an appetizer or side dish.

Ingredients for the Salad:

  • 2 heads of radicchio, sliced lengthwise from base
  • 4 medium pink grapefruits, peeled and sliced any way you like
  • 4 green onions, chopped
  • a big handful of fresh mint or basil, or both
  • 2 tbsp pumpkin seeds, lightly toasted
  • 2 tbsp sunflower seeds, lightly toasted
  • 1/2 tsp salt
  • freshly ground black pepper, to taste

Ingredients for the dressing:

  • 3 tbsp olive oil
  • 1 tbsp maple syrup or honey
  • 1 tsp dijon mustard
  • 1 tbsp grapefruit juice, or more to taste

Directions:

  1. Combine all salad ingredients in a large bowl.
  2. Mix together the dressing, taste and adjust seasoning, then drizzle over salad.
  3. Toss and serve.

Cooks Notes:

  • Can be prepared for up to 30 minutes before serving.
  • Delicious with goat of feta cheese crumbled on top.
print recipe
In Appetizers, Mains, Raw, Salads, Sides, Vegan, Vegetarian
Comment

Paella with Lots of Veggies and chickpeas

May 11, 2016 Marla Hertzman

So yesterday I was doing my grocery shopping minding my own business when I was (accidentally) splatted with a broken jar of beets by a lady with the cart beside mine. Normally I would have made her feel that is was OK that the back of my pants were splattered purple and my shoes stained, but my anger got the best of me and I yelled at the lady and I yelled at the manager - both disappeared real fast, (sorry). Another shopper walking by told me to get a life and handed me a TIDE stick.

So why am I telling you this...on my way to the cash register (fuming) -  was a beautiful display of asparagus, I grabbed a bunch and thought - life is OK when fresh asparagus is in season. When I got home I tried out the the TIDE stick an it worked magically.

I also tried out this delicious recipe for a Vegan Paella. I used my cast iron pan. but if you have a paella pan go ahead and use it, but no special pan is required, just a few tricks... make sure your pan is wide enough so the rice cooks evenly and and do not stir the rice, just let the rice do its thing and soak up all the flavours and broth.  I made mine with organic white rice, next time I will try making it with brown.  

P.S ...I forgot to add the chickpeas in this photo and I now will be carrying a TIDE stick in my purse.

Read my past blog post about making traditional Paella


Paella with Lots of Veggies
Serves 6

Ingredients:

  • 2 tbsp. olive oil or more if needed
  • 1 red or yellow bell pepper, chopped, about 1 cup
  • 6 green onions, thinly sliced, about 1 cup
  • 3 cups vegetable broth 
  • 3 cloves garlic, minced 
  • 1 tsp. crumbled saffron threads
  • pinch of cayenne pepper
  • 1 cup short-grain white or brown rice
  • 1 cup fresh or frozen baby peas or corn or both
  • 1 cup halved grape or cherry tomatoes
  • 1 cup pitted green and black olives
  • 10 stalks of asparagus, trimmed
  • 1 lemon, cut into wedges
  • ¼ cup chopped fresh parsley
  • 1 tin of chickpeas, drained, (optional)
  • salt and pepper to taste

Directions:

  1. Heat oil in large nonstick skillet or cast iron pan over medium heat. Add peppers, green onions and garlic, cook 5 minutes. Stir in broth, saffron and cayenne pepper bring to a boil. Add rice, stir once and reduce heat to medium-low and simmer covered for 10 minutes.
  2. Add asparagus, peas, tomatoes, olives and chickpeas over rice. Cover and cook for about 8 minutes, or until rice is tender. Remove from heat, and let rest, covered for 5 minutes. Season with salt and pepper.
  3. Garnish with grilled artichokes, lemon wedges and parsley.

Cooks Notes:

  • You can use broccoli, zucchini or green beans if asparagus are not in season.
  • This is great with grilled artichokes and fresh corn grilled or straight of the cob.
  • If you want to try using brown rice you will have to adjust the cooking time.
  • I love to serve this at the table from my cast iron pan.
Print Recipe
In Mains, Vegetarian, Vegan, Appetizers
Comment

Ginger, Carrot & Sesame Latkes (Pancakes)

March 8, 2016 Marla Hertzman

Latkes in March?  Hanukkah is not any time soon but these latkes are so delicious that I am sharing this recipe from my sister-in-law Linda Rossman.  Actually I would say they are more of a pancake or fritter with an asian twist… made with lots of fresh ginger that adds heat, sesame seeds for crunch and no potatoes. Just lots of carrots, how healthy is that!  These bite-sized latkes make a great appetizer, I would serve these as is or with a dip made of equal parts mayo, plum sauce and a dash of hot sauce.  

latkes_linda3.jpg
latkes_linda2.jpg

Guest Post by my sister-in-law Linda Rossman.

Latkes - golden, crispy fried potato pancakes - are a tradition during the Jewish holiday of Hanukkah. This winter celebration commemorates the miracle of the oil in 168 BCE, when a small flask of holy oil  miraculously burned for eight days when the Jewish warriors known as the Maccabees rededicated the holy Temple in Jerusalem after their victory over the Syrian-Greeks. Fried foods like potato pancakes ("latkes" in Yiddish)  and doughnuts (an Israeli tradition) are traditional  treats because they are cooked in oil and remind us of the miracle of the holiday.

I make latkes ever year, for our holiday party.   A few years ago, I decided to search for a healthier variation and Google yielded  this sesame-ginger-carrot version. The secret ingredient is the extra 1 or 2 tbsp. of ginger I added to the original recipe - more is definitely better! Using matza meal gives them a special flavour too, but if you don’t have, cracker meal, breadcrumbs or flour can be used as substitute. These can be served hot or cold and a dip or sour cream accompaniment is entirely optional. They always draw rave reviews. Make two batches - you won't be sorry.


Ginger, Carrot & Sesame Latkes (Pancakes)

(recipe adapted by Linda Rossman from a now-forgotten Internet site!)

This recipe makes 20 bite-size pancakes.

Ingredients:

  • 2 tbsp sesame seeds
  • 2 cups shredded carrots
  • ½ cup finely chopped scallions
  • 3 or 4 tbsp grated fresh ginger
  • 1 clove garlic, crushed and pressed
  • 2 tbsp lemon juice
  • ¼ cup matzah meal 
  • 2 large eggs
  • 1 tsp salt
  • 1 tsp baking powder
  • canola oil for frying

Directions:

  1. Toast the sesame seeds in a dry skillet over low heat, stirring, until golden (about 2 minutes).
  2. Combine carrots, scallions, ginger, lemon juice and garlic in a large bowl or food processor; stir to blend (or pulse in machine a few times). Add matza meal, beaten eggs, sesame seeds and salt; stir to blend (or pulse in machine, retaining lumpy texture).
  3. Place spoonful of mixture into hot oil, fry until golden and crispy – turn once.
  4. Serve warm or cold, with sour cream or a dip (optional).

Cooks Notes:

  • Can be made ahead and reheated or serve at room temperature.
  • These can also be frozen.  Reheat from frozen in a 400 degree oven until heated through.

Thank you Linda for sharing your recipe.

Print Recipe

In Appetizers, Sides, Vegetarian
Comment

Winter Cabbage Slaw with Hazelnuts and Pomegranate Seeds

January 12, 2016 Marla Hertzman
pom_coleslaw5.jpg
pom_coleslaw3.jpg
hazelnut4.jpg

I have lots of kitchen gadgets.  I have tools for testing if baked goods are done, squeezers, peelers, graters and zesters, whisks and brushes, thermometers and timers, mashers and nutcrackers, melon ballers and scoopers, blenders and juicers, (you get the idea).  But my favourite tool is from my sister-in-law Linda Rossman, it is called a Aril Removal Tool, a tool for pitting pomegranates and it was designed and made in Israel. It is made up of three parts, a cup, grate and cover.  You start by cutting the pomegranate in half and place it cut side own over the grate, cover it and with a heavy spoon (I use a heavy ladle) you hit the top and voilà, the seeds and juice fall into the cup. How great is that!  

Thank you Linda!


Winter Cabbage Slaw with Hazelnuts and Pomegranate Seeds

Serves 4 as a side dish

The sweet-tart taste of the pomegranate pairs well with savoury foods.

Ingredients:

For the Slaw:

  • 1/4 white cabbage
  • 1/4 red cabbage
  • 1 large beet
  • 2 medium carrots
  • seeds from one pomegranate
  • 1/4 hazelnuts, chopped and toasted

For the Dressing:

  • 1 lime, juice and zest
  • 1 tbsp Dijon mustard
  • ½ cup extra virgin olive oil
  • 1 tbsp honey (or more to taste)
  • 1 tsp freshly ground black pepper
  • 1 tsp fine sea salt

Direction for the Slaw:

  1. Using a food processor shred the cabbage, beet and carrots.
  2. Lightly toast the hazelnuts in small saute pan, set aside.
  3. Remove seeds from pomegranate, set aside.
  4. Toss the vegetables with the dressing.  This can be done ahead of time.
  5. Just before serving top with pomegranate seeds and toasted hazelnuts.

Directions for the Dressing:

  1. Zest and juice lime into a small bowl.
  2. Whisk in remaining ingredients.
  3. Taste, you may need more oil, honey or lime juice, all depends on how much juice releases from your lime.
  4.  Refrigerate until ready to use.

Cooks Notes:

  • This makes a great salad for grilled fish or baked tofu cubes.
  • Try any nuts or seeds you like.
  • Top with chopped fresh herbs or chopped chives. 
  • You can use lime in place of lemon in the dressing.


print recipe


In Appetizers, Mains, Raw, Salads, Vegan, Vegetarian
Comment

Lacy Latkes for Hanukkah

December 6, 2015 Marla Hertzman

No food says Hanukkah more than the latke, it can be made as many ways as there are Bubbies. My mother's latke recipe was handed down from her mother Jennie: grated potatoes, eggs, a a handful of matzo meal, salt and pepper, fried in lots and I mean lots of oil, so much that you could smell the latkes cooking before you got off the elevator to her apartment. I remember watching my grandmother peel and grate the potatoes by hand. Me, I like to keep the skin on and use my food processor.

When making latkes there is always discussion about the right way to make them...russet or yellow, flour or matzo meal, onions or no onions, processed or grated, corn or peanut oil...I still try and follow my grandmother's recipe but with something a little extra...I add sweet potatoes for a for colour and a crunchy texture.  I think this makes a really pretty latke.

At Hanukkah time my mother and her brother Syd each had their own plate of latkes, my mother said she would eat six latkes and more if she was allowed. I am not sure if I could eat six, but I know that Zachary and Gordy could.  Now off to make some apple sauce.

Chag Sameach and Happy Hanukkah.


Lacy Latkes

This recipe makes about 20 to 25 latkes that are crispy with golden edges and moist interiors.

Ingredients:

  • 8 medium potatoes, peeled

  • 1 small sweet potato, peeled (optional), sometimes I use and sometimes I don’t!

  • 2 onions, finely chopped

  • 3 eggs, beaten

  • 1/3 cup matzo meal, you might need more depending of the size of your potatoes

  • salt and pepper to taste (lots)

  • vegetable oil for frying

  • applesauce and sour cream for topping

Directions:

  1. Using a food processor with your grating blade, grate the potatoes. Try and squeeze out as much liquid as you can but I do not work to hard at this.

  2. Add potatoes to a very large bowl and add in the onion, egg, matzo meal, salt and pepper.

  3. In a large frying pan heat oil over medium heat, make sure to add enough oil to cover the bottom of the pan.

  4. Add a big spoonful of latke mixture into the hot pan - do not overload the pan, I like to cook four at a time for about 4 to 5 minutes on each side or until golden. Make sure to push them down with your spatula. and cook or until golden brown. You will need to add more oil between batches. (Don't be afraid to use too much oil).

  5. Drain well paper towels, (you will need a lot of these).

  6. If not serving right away they can be reheated or I like to make them a few days ahead and put in the freezer. When reheating place the frozen latkes on cookie sheet lined with parchment paper and bake for about 10 to 15 minutes at 400 F until hot. Drain well on paper towels.

  7. Serve with home-made apple sauce and sour cream.

Print Recipe
In Appetizers, Mains, Sides, Vegan, Vegetarian
Comment

Apple and Arugula Flatbread

December 4, 2015 Marla Hertzman

I love taking my time walking around grocery stores. It doesn’t matter if it is a big chain store or my neighbourhood fruit store, if you pass me and I don’t say hello it is because I am busy reading labels or looking for the kohlrabi. Really...most of the time I rush through grocery shopping, but last week I found myself wandering the aisles at McEwan. That is fun for me.

McEwan is a shopping adventure that starts the moment you enter.  It did not take long to covet some fruity olive oil, bars of dreamy chocolate, jars of McEwan's own preserves and beautiful canisters of tea. Nothing better then a cupboard full of jars of goodness, I am ready for anything. This is where a good shopper (that's me) knows to have some quality stuff stashed in the pantry and freezer for days when there is no soup simmering on the stove. 

 This Apple and Arugula Flatbread is easy and only take a few minutes to throw together.  The flavours are a twist on the classic pairing of apples and cheese.  Made with store-bought naan that I topped with McEwan Apple Sauce... instead of tomato sauce, thin slices of apples in place of pepperoni and creamy Mozzarella di Bufala instead of shredded cheese. This is sweet and savoury 'pizza' that I promise you won’t get from delivery and it takes less then 30 minutes to make! 

mcewans3.jpg
mcewans2.jpg
mcewans1.jpg
mcewans.jpg

McEwan apple sauce is more hearty and chunky than the usual store-bought applesauce and comes in a cute mason jar.

mcewans_store2.jpg
mcewans_store3.jpg
mcewans_store1.jpg
mcewans_store.jpg

Apple and Arugula Flatbread

Amounts here do not have to be exact

Serves 4 as an appetizer

Ingredients:

  • Naan bread or any ready made crust
  • apple sauce, (I used McEwan's Apple Sauce, it is hearty and chunky)
  • Mozzarella di Bufala, sliced 
  • apple, thinly sliced
  • red onion, thinly sliced
  • handfuls of arugula

Drizzle of olive oil and salt and pepper to taste.

Directions:

  1. Preheat oven to 400 F
  2. Place Naan or flatbread on a pizza pan or cookie sheet.
  3. Top with apple sauce, cheese, apples and onion slices.
  4. Bake for 10 minutes or until the cheese is melted.
  5. Top with arugula, a drizzle of olive oil and salt and pepper.

Cooks Notes:

  • Go ahead and try this recipe with your own homemade pizza dough or baguette.
  • There are so many kinds of flatbread to try, Middle Eastern pita bread, Mexican tortillas, Italian focaccia and they all freeze well.
  • These flatbreads make a wonderful party appetizer or light meal.
  • Use any cheese such as ricotta or chevre.
  • Top with baby spinach.
  • If you have any fresh herbs sprinkle some on top, fresh thyme, basil or parsley (finely chopped) would be delicious.
  • Add a green salad and you will have a super quick meal.
  • I like to finish the flatbread with a drizzle of really good fruity olive oil, fresh cracked black pepper and very coarse salt.
Print Recipe

  McEwan is  located at the Shops of Don Mills. 38 Karl Fraser Road in Toronto M3C 0H7 | T: 416-444.6262

This post was sponsored by McEwan, the opinions expressed here are my own.

In Appetizers, Mains, Sides, Vegetarian
Comment

Roasted Delicata Stuffed Squash with tahini sauce

November 12, 2015 Marla Hertzman

Growing up my mother always cooked squash.  I remember eating butternut squash smothered in butter and brown sugar, baked until golden and gooey.  As we grew more sophisticated in our tastes spaghetti squash showed up on our plates that my mother tried to pass off as 'spaghetti' but we knew better. I just discovered delicate squash - I am now in love -- it is one of the tastiest of the winter squash, with flavours of sweet potatoes and corn and the skin is edible too so no need to peel them.  I think it’s just about the perfect fall veggie.

Everything I love to eat is stuffed into this squash. 


Roasted Delicata Stuffed Squash with Tahini Sauce

Serves 4

Ingredients for squash and stuffing:

  • 2 delicate squash, washed and cut in half, remove seeds
  • 2 tablespoons za'atar
  • 2 cups beans, drained and rinsed well, ( I used cannellini beans) 
  • 1  shallot, diced
  • 1 clove garlic, minced
  • 4 cups of kale, ( take out middle stem and chop, I used purple kale but you could use any variety)
  • 1 to 2 tbsp extra virgin olive oil
  • 1 tsp ground cumin
  • 1/8 tsp cayenne pepper
  • 1/2 cup quinoa or rice,  cooked
  • salt and pepper to taste
  • pomegranate seeds, for garnish
  • pomegranate molasses to drizzle (here is my recipe to make your own)

Ingredients for the Tahini Sauce:

  • 1/4 cup tahini paste
  • 1 tablespoon fresh lemon juice
  • 1 clove garlic, (I used my garlic press)
  • salt and pepper to taste
  • water to thin out, start with a 1/4 of a cup

Directions for the squash and stuffing:

  1. Preheat oven to 400° .
  2. On a cookie sheet lined with parchment paper, or a glass pyrex place squash cut side up, and drizzle with olive oil, salt the za'atar.
  3.  Place in oven and bake for about 40-50 minutes or until squash is ready.  Remove from oven and set aside.
  4. I like to start preparing the filling while the squash is baking in the oven. First cook the quinoa or rice following the package directions.  You will need a 1/2 cup of cooked quinoa or rice.  
  5.  Then in a large skillet add the olive oil, shallots and garlic and sauté until soft.  Add the cumin, cayenne pepper, salt and pepper.  Then add the chopped kale and cook until slightly wilted.  Add in the beans and quinoa and mix well. Taste and adjust seasonings
  6. Stuff each squash half with about 1/2 cup of the stuffing, depending on the size of your squash.
  7. Serve warm or with the tahini sauce, pomegranate molasses and pomegranate seeds on top. Feel free to add a dash of extra za'atar on top too.

Directions for the Tahini Sauce:

  1. Place all ingredients in a small bowl , and mix with a fork until well combined. Gradually stir in small amounts of additional water until the desired consistency is achieved.
  2. Taste and adjust seasonings.

Cooks Notes:

  • This recipe works well with any beans, try chickpeas or white kidney beans.
  • You could also use swiss chard or spinach in place of the kale.
  • I like to make my own pomegranate molasses as the store bought ones are make with lots of sugar, mine is sweetnend with honey.  Though I do keep a store bought bottle on hand when I don't have time to make my own. Here is my recipe.
  • The tahini sauce can thicken up if not used right away, thin out with a little water or some lemon juice if it becomes to thick.
Print recipe
In Appetizers, Mains, Sides, Vegan, Vegetarian
Comment

Roasted Carrots with Du Puy Lentils and Aioli

August 21, 2015 Marla Hertzman

As a child my father took me to St. Lawrence Market on Saturday mornings.  I always stayed close by, afraid I would get lost pushed along by the shoppers.  I knew this was a special place, much different then the stores along Eglinton that my mother shopped at. Upon entering I was always surprised at the lack of sunlight, the smell of sawdust and raw meat  - it made my nose tickle. I learned to eat olives here, there were big barrels, you filled a cardboard box and ate a few too.  My father seemed to know everyone who worked behind the counters, always a taste, a joke, a complaint about the weather. The trip ended when I was sure my father could not possibly carry any more bags, but we never left without sharing a sweet bun, hot chocolate for me and coffee for my father.

When at St. Lawrence Market make sure you shop the Farmers Market, (Saturday's) for the freshest fruits and veggies, you can also find beeswax candles, local honey, cheese, bread and eggs. Then head over to the North Market for the biggest selection of meats and fish.  We always stop for lunch. Gordy gets the side bacon (not peameal) on a bun, (surprise) and I get the raw wrap, (surprise) from the Cruda Cafe or try Busters for their grilled fish sandwich.  When you get home and start unpacking all your goodies you will be thinking did I really buy all this…

Thank you  St. Lawrence Market for the memories and these heirloom carrots.


Roasted Carrots with Du Puy Lentils and Lemon Aioli

I like to roast the carrots just long enough to get a few caramelized edges.

Serves 6 as a side dish

Ingredients:

For the Lentils:

  • 1 tablespoons olive oil
  • 1/2 cups onion, diced
  • 1 clove of garlic, minced
  • 3 cups vegetable stock or water
  • 2 cups uncooked Du Puy lentils, rinsed (I sometimes use the black Beluga lentils, they work well in this recipe).
  • a few sprigs of fresh thyme

For the Carrots:

  • 2 pounds of  heirloom carrots , washed (do not peel)
  • 2 tablespoons olive oil
  •  a few sprigs of fresh thyme
  • salt and pepper

For the Lemon Aioli:

  • 1 garlic clove, mashed
  • 1 large egg yolk
  • zest from half a lemon
  • 2 teaspoons fresh lemon juice
  • 1/2 teaspoon Dijon mustard
  • 1/4 cup extra-virgin olive oil
  • 3 tablespoons vegetable oil

Directions:

For the Lentils:

  1. Heat a medium saucepan over medium-high heat and add 1 tablespoon olive oil to pan along with the onion and garlic, sauté for about 5 minutes.
  2. Add stock or water, thyme and lentils.  
  3. Bring to a boil.  Cover and reduce heat and simmer for about 40 minutes or until lentils are tender, but not mushy. Set aside and let lentil cool.

For the Carrots:

  1. Preheat oven to 400 degrees.
  2. Wash carrots, no need to peel if they are super fresh. I like to leave the tops on for presentation. 
  3. Place carrots on baking sheet covered with parchment paper in a single layer and toss with 2 tablespoons of oil and the thyme. You may need to use two baking sheets.
  4. Bake for about 20 minutes, then turn carrots over and continue baking for about 15 minutes or until carrots begin to caramelize.

For the Lemon Aioli:

  1. Whisk together egg yolk, lemon juice, garlic and mustard in a bowl.
  2. Slowly add oil, a very small amount at a time, whisking constantly until the oil is well blended and the mixture is emulsified.
  3. Add the salt, pepper and lemon zest.
  4. Taste and adjust seasoning.
  5. If mixture is to thick a few drops of water or lemon juice to get the consistency you want.
  6. Store in fridge until ready to use.

To Assemble:

  1. Place lentils on serving dish, arrange carrots on top and drizzle with aioli.

Cooks Notes:

You can serve this at room temperature.

Print Recipe


In Appetizers, Sides, Vegan, Vegetarian
Comment
← Newer Posts Older Posts →

LOVE THY CARROT IS THE FOOD BLOG OF MARLA HERTZMAN


APPETIZERS

BAKING

BREAKFAST

DESSERTS

MAINS

MUFFINS

RAW

SALADS

SIDES

SNACKS

SOUPS

VEGAN

VEGETARIAN

VEGGIE BURGERS


INSTAGRAM

Hot and Spicy Tofu. 🌶 This was pretty much a big bowl of veggies that needed using up in my fridge. 🥢 For all things delicious and healthy to eat ➡️ visit www.lovethycarrot.com
.
.
.
.
#stirfryveggies #vegan #homemadefood #vegan #veganfood #plantba

LET'S CONNECT


Subscribe

We respect your privacy.

Thank you!

carrot.png

 Toronto Food Blogs