• home
    • Appetizers
    • Breakfast
    • Baking
    • Desserts
    • Mains
    • Muffins
    • Raw
    • Salads
    • Sides
    • Snacks
    • Soups
    • Vegan
    • Vegetarian
    • Veggie Burgers
  • Work With Me
  • Info
  • BUY MY HOME-MADE BONE BROTHS
  • Instagram
Menu

love thy carrot

Street Address
City, State, Zip
Phone Number

love thy carrot

  • home
  • Recipes
    • Appetizers
    • Breakfast
    • Baking
    • Desserts
    • Mains
    • Muffins
    • Raw
    • Salads
    • Sides
    • Snacks
    • Soups
    • Vegan
    • Vegetarian
    • Veggie Burgers
  • Work With Me
  • Info
  • BUY MY HOME-MADE BONE BROTHS
  • Instagram

Vegan Double Chocolate Oat Zucchini Brownies

December 16, 2022 Marla Hertzman

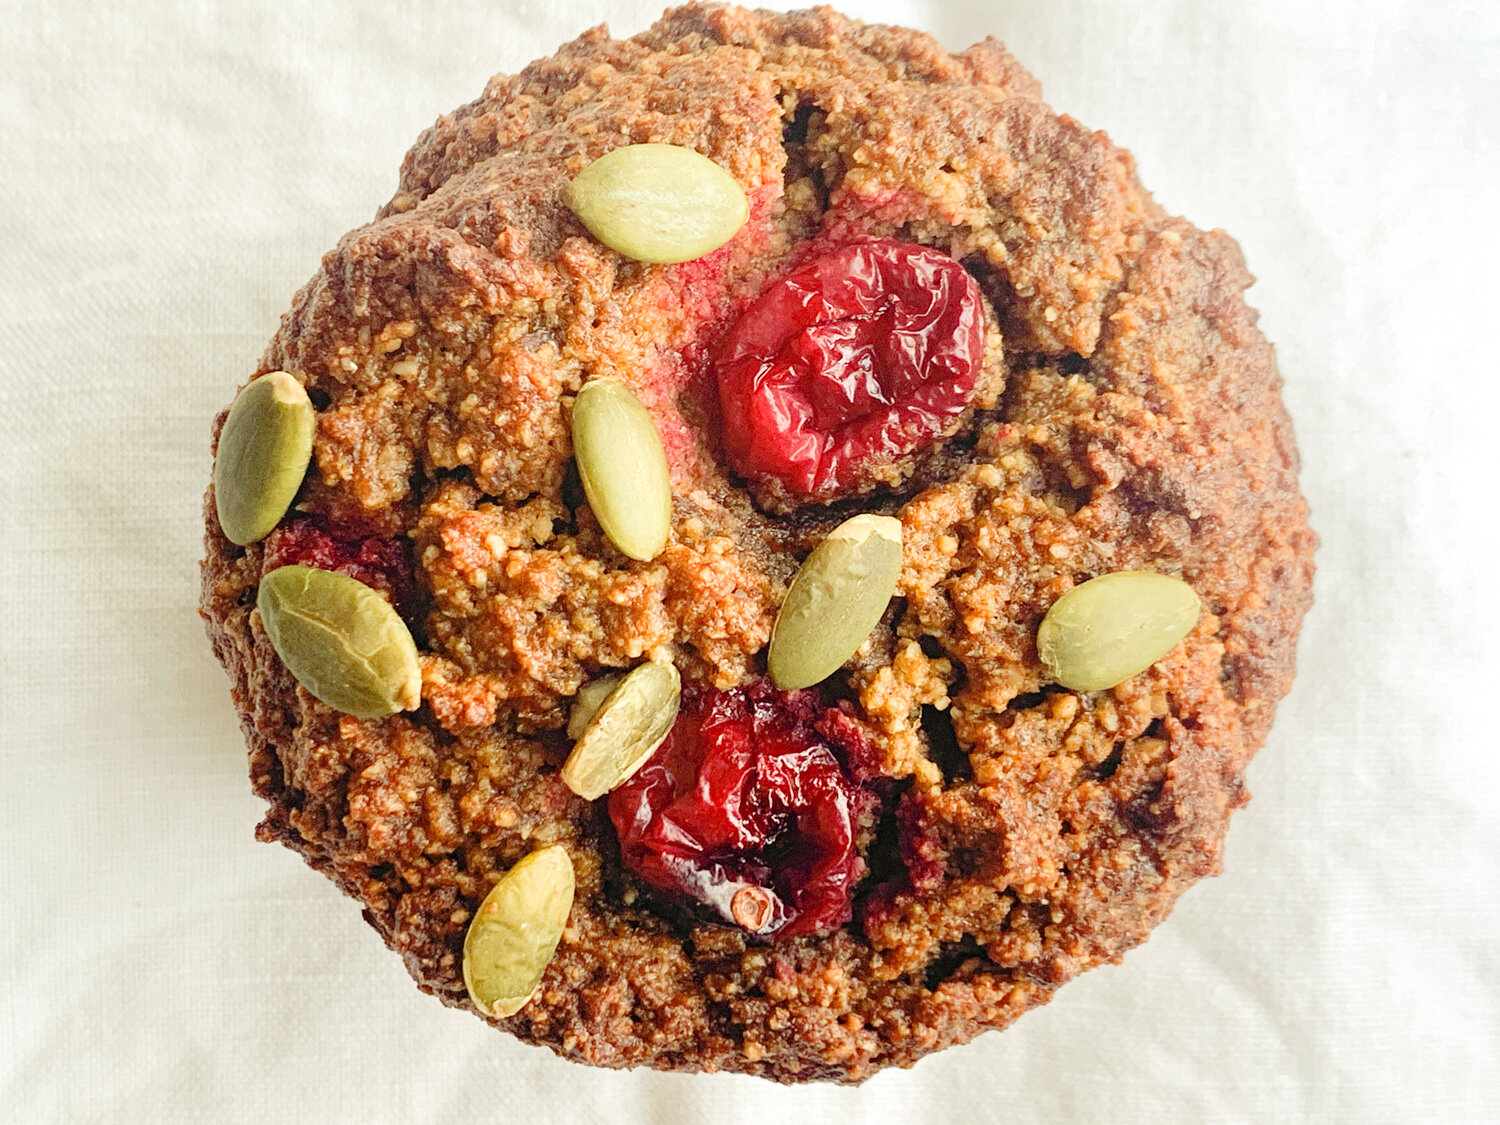
Trust me. You don’t have to be vegan, vegetarian or a heath nut to love these brownies.
But you do have to be in love with everything chocolate.
These brownies are decadent, fudgy, easy to make and you only need one bowl!

You can see my recipe featured on Oats Everday.


Vegan Double Chocolate Oat Zucchini Brownies
This recipe makes 12 brownies.
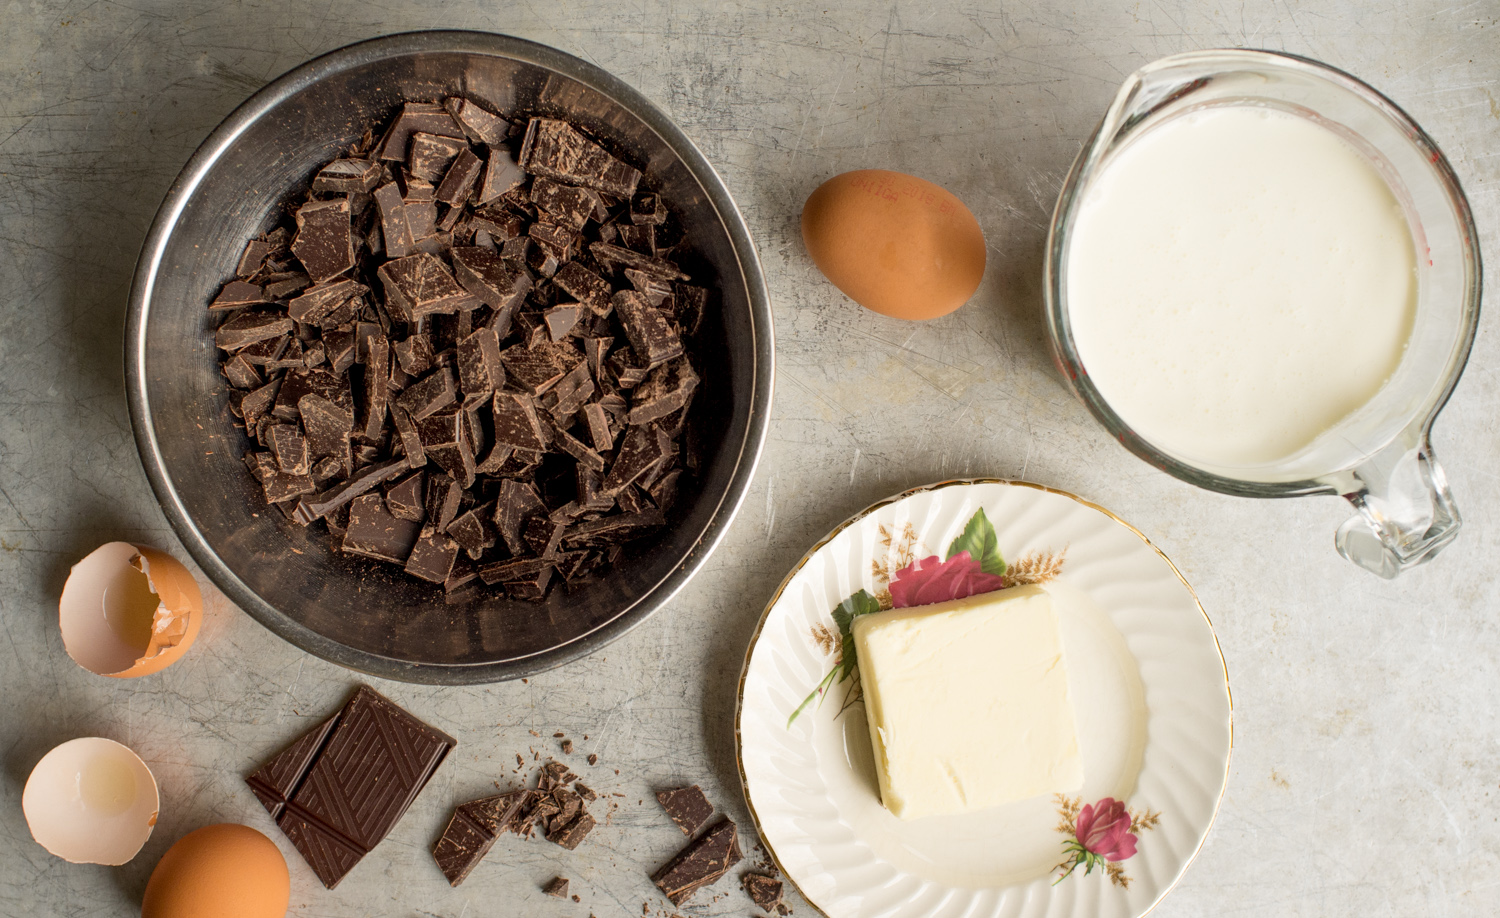
Ingredients

1/2 cup smooth peanut butter or almond butter
1/4 cup honey
1/2 cup unsweetened applesauce
1 teaspoon vanilla
1/2 cup unsweetened cocoa powder
3/4 cup old fashioned oats
1 teaspoon baking soda
1/2 teaspoon instant coffee or espresso powder, (optional)
1/4 teaspoon salt
1 1/2 cups shredded zucchini
1/2 cup dark chocolate chips

Directions 

1. Preheat oven to 350 degrees F.
2. Lightly spray an 8x11-baking pan with non-stick cooking spray.
3. Place oats in food processor and process until finely ground. Set aside.
4. In a large bowl mix together the nut butter, applesauce, honey and vanilla until smooth.
5. Add in zucchini, cocoa powder, ground oats, baking soda, instant coffee and salt; mix until well combined. Fold in half of the chocolate chips.
6. Pour batter into prepared baking pan and sprinkle remaining chocolate chips over the top. Bake for 25-30 minutes or until tooth pick inserted into middle comes out clean.
7. Cool brownies in the pan on a wire rack until completely cooled, then cut into squares and enjoy!

Cooks Notes
Brownies can be stored in the fridge.

print recipe
In Baking, Desserts, Snacks, Vegan, Vegetarian
Comment

Vegan Pumpkin Muffins, Gluten-Free and Sugar-Free

March 20, 2021 Marla Hertzman
pumpkin_muffin.jpg

What makes a good muffin?
A crispy top.
Texture.
Moist on the inside.
Naturally sweetened.
Lots of inclusions.

If this is your list too, then make these muffins.


Vegan Pumpkin Muffins, Gluten Free and Sugar Free

Ingredients
These muffins are vegan, gluten free.
This recipe makes 10 muffins

2 tbsp ground flax mixed into 3 tbsp water, this is your ‘flax egg’
1/3 cup almond milk mixed with 1 tsp apple cider vinegar
1 1/2 cups oat flour
1 cup almond flour
1 tsp baking soda
1/2 tsp baking powder
2 tsp cinnamon
1/2 tsp cloves
1/2 tsp ginger
1/4 tsp nutmeg
1/4 tsp salt
3/4 cup pumpkin puree, unsweetened
1/4 cup pure maple syrup
2 tsp vanilla extract
2 tbsp tahini
1/2 - 1 cup - of mix in’s: like chocolate chips, dried cranberries, fresh or frozen fruit, nuts or any dried fruit you like, (I used frozen cranberries for this batch).
handful of pumpkin seeds for garnish

Directions

1. Preheat the oven to 350°F and line muffin tin with muffin liners.
2. In a small bowl, combine ground flax and water. Stir and let sit for 10 minutes to "gel."
3. In a measuring cup, combine the almond milk and apple cider vinegar then set aside.
4. In a medium mixing bowl, add the oat flour, almond flour, baking soda, baking powder, cinnamon, cloves, ginger, nutmeg and salt; stir together
5. In another mixing bowl, combine the pumpkin puree, maple syrup, vanilla and almond milk, tahini and flax egg mix until well combined and batter has a smooth consistency.
6. Add the dry ingredients to the wet ingredients and fold everything together until just combined. Stir in the cranberries or your choice of mix-in’s.
7. Portion the batter out into the prepared muffin tin and top with a sprinkle of pumpkin seeds. Bake for 30 - 35 minutes or until a toothpick inserted into the centre of a muffin comes out clean.
8. Let cool in pan for 5 minutes before transferring to a cooling rack. Let cool an additional 10 minutes before enjoying.

Cooks Notes
If you don’t have tahini you could use any nut butter or melted coconut oil.

print recipe
In Baking, Breakfast, Desserts, Muffins, Vegan
Comment

Lemon Blueberry Donuts - Paleo, dairy free, grain free and gluten free

May 29, 2020 Marla Hertzman
lemon_bluedonut.jpg

When Covid-19 hit I stocked up on cans of beans, bags of rice and tins of tuna. But as the stay-home order continued a packaged arrived at my door with a donut pan. Was this for me? Apparently so, ordered by my in-house taste tester with the intentions of learning to bake. Well guess who’s doing the baking?

I know that years from now after this donut pan is packed away there will come a time when I happen upon it and remember with sadness the losses and also some happiness in the small things, like making donuts. In the meantime move over Tim Horton’s there is a new donut in town.

Stay safe everyone!


Lemon Blueberry Donuts - Paleo
This recipe makes 10 - 12 donuts
Dairy free, grain free and gluten free.

Ingredients: 

2 cups almond flour
1/2 tsp baking soda
pinch of salt 
zest of one lemon
3 eggs
1/4 cup unsweetened applesauce
1/4 cup honey 
1 tsp vanilla extract
2-3 tbsp fresh squeezed lemon juice
1 cup blueberries, fresh or frozen

Directions: 

1. Preheat oven to 325 degrees and grease donut tin. (I like to use coconut oil for greasing the pan).
2. In a medium bowl, combine the almond flour, baking soda, salt and lemon zest. In a separate bowl, combine the eggs, applesauce, honey, vanilla extract and lemon juice. 
3. Add the dry ingredients to the wet ingredients and mix until well combined. 
4. Add in blueberries and fold in.
5. Spoon into the donut pan.
6. Place in the oven and bake for 14 to 16 minutes until lightly golden.
7. Let cool before glazing the donuts.

Ingredients for the Glaze

2 tbsp coconut oil melted
1 tbsp fresh lemon juice
2 tbsp maple syrup 
1-2 tbsp coconut cream (see cooks note)

Directions for the Glaze

1. In a medium bowl, whisk together the melted coconut oil with maple syrup until smooth, then add the lemon juice, and coconut cream and continue mixing until very smooth.
2. Dip one side of each donut in glaze and place on parchment paper.
3. Serve right away or store in the refrigerator for later.  

Cooks Notes

You can find coconut cream in the grocery section beside tins of coconut milk.
You can also use the thick cream that is on the top of a tin of coconut milk, just discard the water.

Print Recipe


In Baking, Desserts, Snacks, Vegetarian
1 Comment

Lemon Poppyseed Muffins, Sugar-Free, Gluten Free and Paleo

May 15, 2020 Marla Hertzman
lemonpopyseed_muffin4.jpg
lemonpopyseed_muffin3.jpg

A vintage recipe with a modern twist.
Nothing adds more pop to your day then a lemon poppyseed muffin and this song…

Provided to YouTube by Universal Music Group Sunshine, Lollipops And Rainbows · Lesley Gore Lesley Gore Sings Of Mixed-Up Hearts ℗ 1963 The Island Def Jam Mu...


Lemon Poppyseed Muffins
Not too sweet, a bit tart and super moist.
This recipe makes 9 muffins.

Ingredients

Wet Ingredients
2 tbsp lemon zest (from about 2 lemons)
2 tbsp fresh lemon juice (about 1 lemon)
1/3 cup plant based milk (I use unsweetened almond milk)
1/4 cup maple syrup or honey
1/4 cup coconut oil, melted and cooled
3 eggs
1 tsp vanilla extract

Dry Ingredients
2 1/2 cups almond flour
1/2 cup tapioca or arrowroot starch
1 tsp baking powder
1/2 tsp baking soda
1/4 tsp salt
2 tbsp poppy seeds

Directions

1. Preheat the oven to 350 degrees F.
2. Line muffin pan with paper liners.
3. In a large bowl, combine the wet ingredients and whisk until smooth.
4. Then add the dry ingredients to the wet ingredients. Stir until just combined.
5. Spoon batter into prepared muffin pan.
6. Bake muffins at 350 degrees F. for 14 to 16 minutes or until slightly golden and a toothpick inserted in the centre comes out clean.
7. Let muffins to cool for a few minutes before transferring to a cooling rack.

print recipe
In Baking, Breakfast, Desserts, Muffins, Snacks, Vegetarian
Comment

Grain Free Chocolate Chip Cookies - Sugar-Free, Dairy-Free and made with Sunflower Seed Butter

January 27, 2020 Marla Hertzman
grainfree_cookies.jpg

I am personally declaring sunflower seed butter the new almond butter - I am adding it to my yogourt, smoothies and spreading it on my toast. You can bake with it too.

I first tasted these cookies when Yale baked up a batch. Made with almond flour, sweetened with maple syrup and held together with a big scoop of sunflower seed butter. Sunflower seed butter is packed with protein, healthy fats, vitamin E and magnesium. It is also a great alternative for someone who has a tree nut allergy.*

grain_pumpkinseed.jpg

I can’t keep these cookies in the cookie jar for too long - I keep finding my personal in-house taste-tester in the kitchen with his hand in the cookie jar! Only 2 1/2 cookies left!

The recipe comes from Yale’s friend, home baker and Holistic Nutritionist, Nicole. You can find the original recipe and more on her blog: Nutritiously Nicole.

And how sweet it is when your daughter bakes and brings you cookies! Thanks Yale, you can bake for me anytime and thanks Nicole for sharing your recipe. xox


Grain Free Chocolate Chip Cookies
This recipe makes about 16 cookies.
You can find the original recipe at: Nutritiously Nicole

Ingredients:

1 cup sunflower seed butter
1 cup almond flour
1 tsp baking soda
1/4 tsp salt
1/2 cup maple syrup
1 tsp vanilla
1 egg
1/2 cup dark chocolate chips, I used the I use Kresda or Lilly’s brand
Optional:  2 scoops unflavoured collagen powder

 Directions:

1. Preheat oven to 350 F
2. Line a baking sheet with parchment paper.
3. In a medium bowl mix together the sunflower seed butter, almond flour, baking soda, salt and collagen powder (if using).
4. Then add in the maple syrup, vanilla, egg and chocolate chips. Mix well.
5. Using a cookie scooper or your hands, form into a ball and then flatten slightly.
6. Bake for 12- 13 minutes.
7. Cool on rack.
8. Store cookies in an air-tight container.

Cooks Notes
When you bake with sunflower seed butter and baking soda, your cookies can come out green.
*If you have any tree nut allergies, check with your doctor if you can eat sunflower seeds.

PRINT RECIPE


In Baking, Breakfast, Desserts, Muffins, Snacks, Vegetarian
Comment

Paleo Double Chocolate Banana Muffins, grain-free, gluten-free, dairy-free

July 27, 2019 Marla Hertzman
chocolate_bananamuffin1.jpg

My most requested muffin recipe is here.
These fudgy paleo muffins are super rich and decadent.
They have chocolate.
They have banana.
They require one bowl to make

To quote my in-house taste-tester.. “You would never know they are healthy”.

Next time I will be doubling up the batch!


Paleo Double Chocolate Banana Muffins
Grain-free, gluten-free, dairy-free and sweetened with honey.
This recipe makes 9 muffins.

Ingredients

2 medium sized ripe bananas, the more brown spots on your bananas the better
1/4 cup honey
2 tsp vanilla extract
2 eggs, room temperature
1/4 cup coconut oil, melted and slightly cooled
2 cups almond flour
3 tbsp coconut flour
1/3 cup cacao powder
1 tsp baking soda
1/4 tsp salt
1 cup chocolate chips, I use Kresda or Lilly’s

Directions

1. Preheat the oven to 350°F and line a muffin tin with 9 muffin liners.
2. In a large bowl, mash the bananas, then add the honey and vanilla and stir.
3. Add in the eggs and coconut oil and mix until well combined.
4. To the same bowl add in the almond flour, coconut flour, cocoa powder, baking soda and salt.
5 Stir just until combined and then fold in the chocolate chips.
6. Bake for 18 minutes or until a toothpick inserted in the centre comes out clean.
7. Let the muffins cool before removing from pan.

Cooks Notes

I keep these muffins in the fridge or you can freeze them.
Cold eggs can be warmed in minutes by putting them in a bowl of warm water.
You could substitute maple syrup in place of the honey.

print recipe
In Baking, Breakfast, Desserts, Muffins, Vegetarian
Comment

Blueberry Oatmeal Sugar-Free Muffins

June 10, 2019 Marla Hertzman
blueberry_glutenfreemuffin1.jpg
blueberry_glutenfreemuffin.jpg

I am always on the search for a good muffin and to me that means a big fat muffin like the ones you see in all the coffee shops that you just know are loaded with enough calories, fat and sugar to bomb your day. These Blueberry Oatmeal Muffins deliver; they are gluten-free, dairy-free, sugar-free, homemade and just big enough to make your eyes pop. I like to think of these muffins as a bowl of oatmeal to go, so pack one in your purse, (or fanny-pack) then you always have a healthy snack, that’s what I do.

The secret to this super moist muffin is to start by putting the oats in a bowl, add the milk, give it a quick stir and let the oats soak for about 20 to 30 minutes or until the liquid is absorbed. This method helps to make the muffins moist, so do not skip this step!

And now that my in-house taste tester is looking in the fridge for healthy snacks I am being asked… can I eat this? I can say proudly say YES. So what did he think? He said ‘the muffins are delicious and even took one to snack on while at the coffice and asked me ‘what are we testing next week’…‘oat and pea milk,’ I answered, stay tuned!


Blueberry Oatmeal Sugar-Free Muffins
This recipe makes 10 to 12 muffins
These muffins are perfect for a grab and go breakfast or snack.

Ingredients

1 cup almond milk, or any milk you like
1 cup old-fashioned whole rolled oats
1 1/4 cups gluten free flour
1 tsp baking powder
1/2 tsp baking soda
1/2 tsp cinnamon
1/2 tsp salt
1/2 cup coconut oil, melted and slightly cooled
1/2 cup honey or maple syrup
1 egg, large
1 tsp vanilla extract
1 cup fresh or frozen blueberries, if using frozen do not thaw

Directions

1. Preheat oven to 425°F. Line a muffin time with liners or spray lightly with oil, I like to use liners then I don’t have to worry about my muffins getting stuck in my old and favourite muffin tin.
2. Soak the oats in milk for about 20 to 30 minutes or until the oats soak up all the liquid.
3. In a large bowl add the flour, baking powder, baking soda, cinnamon, and salt and mix until well combined.
4. In small bowl mix the melted coconut oil, honey, egg, and vanilla.
5. Add the wet ingredients to the dry along with the soaked oats and blueberries. Fold everything together gently just until combined.
6. Spoon the batter into the muffins tin, filling almost to the top. Sprinkle each muffin with some oats. Bake for 5 minutes at 425, then reduce the oven temperature to 350°F. Bake for an additional 15 to 18 minutes or until a toothpick inserted in the center comes out clean. Allow the muffins to cool fin the pan before removing.

Cooks Notes

Soaking the oats in the milk helps to make the muffins moist and tender, so don't skip that step.
I like to keep my muffins in the fridge but they will stay fresh in an airtight container for about a week or you can store in the freezer.

print recipe


In Baking, Breakfast, Muffins, Vegetarian, Snacks, Desserts
1 Comment

SUGAR FREE AND GLUTEN FREE DOUBLE CHOCOLATE CHIP COOKIES - warning these cookies are so good you may find yourself craving kale!

March 30, 2019 Marla Hertzman
keot_cookiemilk.jpg

I may have created a monster and it’s my own fault. After years of eating kale, quinoa and chickpea pasta guess who wants in? Now I get to share my big salads and spinach smoothies with the one I love. How nice is that! And it all started with this cookie. My in-house taste tester can’t get enough of these cookies; if this is what it means to give up sugar count me in! So in he is and I can see yoga classes in his future!


Sugar Free and Gluten Free Double Chocolate Chip Cookies
This recipe makes 12 cookies
Sugar free and gluten free! Perfect for a Keto diet.
Pour yourself a glass of almond milk and eat some cookies.

Ingredients

1 cup almond butter, smooth
4 tbsp cocoa powder, unsweetened
1/3 cup granulated sweetener - erythritol or monkfruit
1 large egg
1 1/2 tsp instant espresso powder, optional
1/3 cup sugar free chocolate chips
3 tbsp almond milk unsweetened, if needed

Directions

1. Preheat oven to 350 F. Prepare a baking sheet with parchment paper.
2. In a medium size bowl, mix almond butter, cocoa powder, sweetener, egg and espresso powder until well-combined. 
3. If mixture is very thick you can thin it with up to 3 tbsp of milk, adding a bit at a time.
4. Mix in chocolate chips.
5. Roll the dough (or use a small ice cream scoop) to make 12 balls and place on a baking tray. Press down with your hands into round cookies.
6. Bake 10-12 minutes. Let them cool completely for at least 10 minutes on the cookie sheet before placing on a cooling rack.
7. Store in an airtight container. On the counter the cookies stay soft, in the fridge they become a bit crispy. Enjoy.

Cooks Notes

The cookie dough should be soft and hold together enough so you can roll into balls.
Almond butter should be at room temperature to make mixing easy.
No almond milk in the fridge, use any milk you have.
Look for sugar free chocolate chips; I have been able to find two brands at my health food store, Lily’s and Krisda.
If you cannot find sugar free chocolate chips try chopping up a bar of dark chocolate, look for 85% or higher.
When looking for a sugar free sweetener look for erythritol or monk fruit.

print recipe


In Baking, Breakfast, Desserts, Snacks, Vegan, Vegetarian
Comment

Hamantaschen for Purim from Flo's Kitchen

March 20, 2019 Marla Hertzman

The bakers, my mother-in-law Florence and her sous chef Simon, with sticky hands and rolling pin.

View fullsize Copy of The recipe inspired by the Namoi Cookbood
View fullsize humantaschen5.jpg
View fullsize humantaschen4.jpg
View fullsize humantaschen7.jpg

I love to look at well-used cookbooks, it is where you find a cook's secrets. This is my mother-in-law Florence Hertzman's tried and true Naomi Cookbook, and the reading is riveting … Page 35 for Sweet and Sour Meatballs has a few ketchup stains and recipe adjustments, Brisket on page 32 has the initials 'LS' which I think is code for Linda Sue (her daughter), must be her favourite brisket.  Page 107, Apple Sauce Cake with Topping is 'very good' and Almond Macaroons on page 141 has a note, 'watch out, we added 1 cup of flour!'…dated from 1976.  

The Jewish holiday of Purim is just a few days away and part of the tradition is a triangular filled cookie called a hamantaschen (literally, Haman's hat) which brings me to page 180, Purim Recipes.  It is on this page that more notes are added and floury finger prints live on.

 It is fun to watch Flo with her apron around her neck, sticky dough and rolling pin, bring this recipe to life.

This post was originally posted in 2015.


Grandma Flo's Hamantaschen Recipe

Inspired from the Naomi Cookbook by Hadassah WIZO Organization of Canada HADASSAH: Naomi Chapter of Toronto.

 Makes about 24 hamantaschen, depending on size. Traditionally filled with prunes or mohn, (poppy seeds) but go ahead and add whatever filling you like, dates, apricots, apples and cherries are all delicious.

Ingredients

For the Dough:

3 cups flour
3 eggs, (medium)
1/2 cup sugar
3/4 cup butter or margarine
1/4 tsp salt
3 tsp baking powder

Directions:

1. Stir together baking powder, flour, sugar and salt; cut in shortening.
2. Add well beaten eggs and mix well to a soft dough.
3. Allow dough to sit for 10 minutes before rolling.
4. Roll out on floured board to a quarter inch thickness.
5. Cut with large, round cookie cutter.
6. Put a spoonful of desired filling in centre and pinch together to form triangular pocket.
7. Brush with egg, put on well greased pan and bake 12 to 15 minutes in 400 degree oven.

 Ingredients for  the Poppy Seed Filling

1/2 lb of poppy seeds
1/2 cup honey
lemon zest of half a lemon or 1 tsp vanilla
1/2 cup sugar

Directions for the Poppy Seed Filling

1. Scald poppy seeds with boiling water two or three times.
2. Put in food processor and blend for a few seconds.
3. Add sugar, honey and lemon zest or vanilla and blend well.

Ingredients for the Prune Filling:

1 lb large prunes, pitted
1 tbsp lemon juice
zest from one lemon
1/2 cup sugar

Directions for the Prune Filling

1. Stew prunes until soft.
2. Put in food processor with sugar and lemon and lemon zest.
3. Blend until just combined.
4. If too mussy add 2 tbsp of chopped nuts.

print recipe


In Baking, Snacks, Vegetarian, Desserts
Comment

Moringa Latte

February 12, 2019 Marla Hertzman
moringa_tea.jpg
moringa1.jpg
moringa2.jpg

I first discovered moringa at a farmers market in Florida. It was tucked in with all the other fresh herbs. I had never seen or heard of moringa but after talking with the farmers who were excited to share the benefits of the plant I bought a bunch to add to my salads and smoothies. Moringa needs a lot of sunshine and warm weather to grow. So if you live in a warm climate you could try growing it in your garden but here in Canada it will be a challenge, so you will definitely need a visit to your local health food store where you can find it in a powdered form.

This superfood comes from the moringa tree and is often called the “miracle” tree for lots of good reasons. It’s packed with vitamins and minerals and a few leaves or a spoonful of moringa will be more than enough to give you a daily nutritional boost. Moringa leaves are high in protein and a good sources of Vitamins A, B, and C. They also have high levels of calcium, iron, and potassium, making it ideal for anyone looking to increase their nutrient intake.

Try adding moringa to smoothies, juices, or stir a spoonful into a bowl of yogourt or oatmeal. It can also be used to make a tea, just mix moringa powder into hot water with a slice of lemon and honey. I have not tried baking with moringa but I am playing around with a Moringa Morning Muffin Muffin recipe - coming soon.

To make this latte I am using powdered moringa, it is a vibrant green colour and has a bright earthy rich taste. When mixed with some almond milk and honey it is deliciously warming; perfect for this mid-February stay at home snowy day.


Moringa Tea Latte
Serves 2

Ingredients

1 1/2 tbsp moringa powder
3 cups plant based milk
2 tsp maple syrup, honey, stevia or any sweetener your like to use
1 tsp coconut oil

Directions

1. In a small pot over medium heat, combine all ingredients and whisk thoroughly until well-combined.
2. Just before the boiling point remove from heat.
3. Blend well with a whisk to make it a bit frothy.
4. Pour into two mugs and enjoy.

print recipe
In Breakfast, Snacks, Vegan, Vegetarian, Desserts
Comment

CHOCOLATE POTS

November 21, 2018 Marla Hertzman
chocolatePot5.jpg
chocolatePot6.jpg
chocolatePot.jpg
chocolatePot1.jpg
chocolatePot2.jpg

Silky and smooth.
Five ingredients.
Five minutes.

This is not the Snack Pack Pudding cups you ate as a kid! And this is not my usual healthy version of my childhood favourite, this is the recipe I make when friends come for dinner and I want to spoil them.

These mini pots of chocolate are perfect for prepping ahead of time - they need to set in the fridge for a few hours. Just before serving I add a touch of whipped cream, a sprinkling of shaved chocolate and the magic happens; one spoonful and your guests will love you forever.

My in house taste-tester Gordy was hanging around - as you can imagine the spoons and spatulas I used were licked clean!


Chocolate Pots
This dessert will satisfy any chocolate craving.  All I can say is decadent!
This recipe serves 8

Ingredients

2 cups heavy cream
3/4 lb. semisweet or bittersweet chocolate, at room temperature, coarsely chopped
4 large egg yolks
3 tbsp dark rum, or any liquor you like or even some strong coffee or espresso, (should be at room temperature)
3 tbsp unsalted butter

Directions

1. In a medium saucepan, heat the cream just until bubbles appear around the edge. Remove the pan from the heat, then add the chocolate and let stand for 1 minute, then stir until smooth.
2. Whisk the egg yolks in a small bowl, then add in a 1/2 cup of the melted chocolate and cream and whisk. With a spatula scrape this mixture back into the saucepan with the melted chocolate and cream and whisk constantly until smooth. Once smooth stir in the rum and butter.
3. Pour the mixture into eight 1/2-cup ramekins and refrigerate until chilled, at least 4 hours.

Cooks Notes

I used 70% dark chocolate, but use any bittersweet chocolate you like.
The chocolate pots can be made ahead and refrigerated overnight.
These pots will keep for a few days in the fridge.
Serve topped with grated or shaved chocolate and a spoonful of whipped cream.

print recipe
In Desserts, Snacks, Vegetarian
Comment

Pumpkin Loaf, Gluten Free, Dairy Free and Sugar Free - Made with almond and coconut flour. All In One Bowl!

October 4, 2018 Marla Hertzman
pumpkin_loaf2.jpg
pumpkin_loaf3.jpg

I love this time of year.
Fall and
falling leaves,
orange
and red.
Cozy sweaters,
cinnamon sticks
and pumpkins.


Pumpkin Loaf
This recipe makes one loaf.
Soft and moist with a deep pumpkin flavour and best of all you only need one bowl.

Ingredients

3/4 cup pumpkin, I used organic canned pumpkin
1/4 cup maple syrup
1/4 cup melted coconut oil, let cool a bit
3 eggs
1 cup almond flour
1/4 cup coconut flour
1/2 tsp sea salt
1/2 tsp baking soda
1 tsp cinnamon
1/4 tsp ground ginger
1/4 tsp nutmeg
1/4 tsp allspice
1/4 tsp cloves
handful of pumpkin seeds, (optional)


Directions

1. Preheat oven to 325 F.
2. Combine all wet ingredients in a bowl and mix.
3. Add the dry ingredients to the wet ingredients. Stir until well-combined.
4. Pour the mixture into a greased loaf pan.
5. Sprinkle with a handful of pumpkin seeds on top.
6. Bake for 45–60 minutes.

Cooks Notes
Feel free to add in a handful of your favourite chocolate chips.

Print Recipe
In Baking, Breakfast, Desserts, Muffins, Vegan, Vegetarian, Snacks
Comment

Dark Chocolate Cake and gastronomy aboard the Victory II with Victory Cruise Lines

August 18, 2018 Marla Hertzman
vanilla_chocolatecake3.jpg
cruise_veganchocolatecake2.jpg
My own version of the mini chocolate cake, straight from the oven.

My own version of the mini chocolate cake, straight from the oven.

I just had a great nine days aboard the Victory II with my sister in law, Judi.  We cruised and toured and dined our way along the St Lawrence Seaway, Great Lakes and passed through 17 Locks and 7 cities.  So what did it matter that I have been to all the ports before? It didn't.  Sailing on the Victory II put a new spin on the sights and they way I look at our beautiful country.  It was fun to be a tourist with people who have never been to Toronto or some of the cities we visited - I personally felt responsible for the sunny days, gourmet food, beautiful sunsets and winning at Name That Tune!

So what does chocolate have to do with cruising? Lots to a chocolate lover!  The food aboard the Victory II was well prepared and beautifully served. We had a tour of the galley and was surprised that all the food we ate come from such a small but well organized space.  We ate well and tried really hard to leave room for dessert, especially if chocolate was on the menu.  I tried a delicious Mousse au Chocolate, (sugar-free option), it was smooth and creamy, I did not miss the sugar and yes there was a cherry on top, and it was a real cherry! I also loved the mini chocolate cake paired with vanilla ice cream, I know it sounds simple but simple is hard to pull off, it has to be perfect and perfectly delicious is what we had.

Now that I am home I really wanted to try and recreate the chocolate cake. My version is gluten-free, dairy-free and sugar-free and the ice cream is made with coconut milk.  Ok, so maybe my recipe is not as much fun as what we ate on the ship, but I am home now and need to fit back into my jeans. 

For a full review of the Victory ll Great Lakes Adventure have a look at the article written by my sister-in-law Judi Cohen for Quirky Cruise. 


Some of the delicious food we ate.

cruise_shrimpcocktail.jpg
cruise_lamb.jpg
cruise_macandcheese.jpg
cruise_dessert.jpg
cruise_tea1.jpg
cruise_tea.jpg
cruise_lunch salad.jpg
victory_coctail1.jpg
cruise_tea2.jpg
victory_lobster.jpg
victory_sunset.jpg
victory_salad.jpg
victory_cookies.jpg
victory_dessert.jpg
victory_icecream.jpg
victory_wine.jpg
victory_menu.jpg
victory_dinner.jpg
victory_strawberries.jpg
victory_postcard.jpg

Mini Dark Chocolate Cake
This recipe makes 4 mini cakes.
I used 125ml porcelain ramekins

Ingredients

2/3 cup almond milk
1 1/2 tsp vinegar
1/2 cup pure maple syrup
1/4 cup vegetable or melted coconut oil, ( I used coconut oil)
2 tsp pure vanilla extract
1/3 cup cocoa powder
1 cup of gluten free flour (I used Bob's Red Mill)
1 tsp instant espresso (optional)
1/2 tsp salt
3/4 tsp baking powder

Directions

1.  Preheat oven to 350 F.
2. Grease 4 round baking ramekins.
3.  Mix together the milk, vinegar, maple syrup, oil and vanilla extract, set aside for 10 minutes.
4.  Stir together the remaining ingredients in a separate bowl until well mixed.
5.  Pour wet into dry, stir just until evenly mixed, and transfer to the greased ramekins.
6.  Bake 20 to 25 minutes on the middle rack, or until cake is done.
7.  Let cool before removing.  Remove by running a knife around the edges and gently turn over and remove cakes.

Cooks Notes

Make sure the almond milk, maple syrup and coconut oil are at room temperature.
You can prepare ahead of time and then bake just before serving for a warm dessert.  Just remember to wait at least 10 minutes before removing from ramekins.  

PRINT RECIPE
In Vegan, Vegetarian, Snacks, Desserts, Baking
Comment

Banana Almond Flour Muffins

April 30, 2018 Marla Hertzman
banana_almondflourmuffins.jpg

I am dreaming of muffins...


Banana Almond Flour Muffins
Delicious, healthy, quick, and easy.
This recipe make 8 muffins

Ingredients

2 cups almond flour
1 tsp ground flax seed
1 tsp chia seeds
1/2 tsp baking soda
1 tsp cinnamon
4 eggs
2 tbsp honey
1 tsp apple cider vinegar
1 tsp vanilla
1 ripe banana, mashed

Directions

1. Preheat oven to 350 degrees F.
2. Line muffin cups with paper liners.
3. Mix almond four, flax seed, chia seeds, baking soda and cinnamon together in a small bowl.
4. Whisk eggs, honey, apple cider vinegar and vanilla together in a separate bowl.
5. Stir almond meal mixture into egg mixture until batter is just mixed. Add the mashed banana into batter.
6. Divide the batter into the prepared muffin cups.
7. Bake in the preheated oven until slightly browned, about 20 -25 minutes. Cool muffins in pan for at least 20 minutes before removing from pan.

Cooks Notes:

These muffins freeze well.

print recipe
In Baking, Breakfast, Desserts, Muffins, Snacks
Comment

Banana Bread made with Almond Flour, sweetened with maple syrup & a surprise - Golden Berries

March 18, 2018 Marla Hertzman
banana_loaf.jpg
goldenberries1.jpg
goldenberries.jpg

This just might be the best banana bread! It’s really easy to make, naturally sweetened and I added some golden berries - just for something unexpected. 

These little orange golden berries are sweet like a raisin and tart like cranberries.  They are called gooseberries when they're fresh and golden berries when dried.  They are rich in vitamins, minerals, and antioxidants.  They have fibre, protein, and phosphorus.  I am adding them to oatmeal at breakfast and salads at lunch. 

This loaf is moist and a bit sweet and has a tangy kick from the golden berries.


Banana Bread made with Almond Flour and Golden berries
This recipe makes 1 loaf

Ingredients

3 large ripe bananas
2 eggs
1 tsp vanilla extract
3 tbsp pure maple syrup
2 cups almond flour
1 tbsp baking powder
1/4 tsp salt
2 tsp cinnamon
1/4 tsp nutmeg
1/3 cup golden berries
handful of hemp hearts for sprinkling on top, (optional)

Directions

1. Preheat the oven to 350 degrees F and lightly oil a loaf pan. (I used melted coconut oil).
2. In a food processor add the bananas and process until they are mashed.
3. Add the eggs, vanilla, maple syrup, baking powder, salt, cinnamon and nutmeg to the processor and blend until well combined.
4. Add the almond flour and give a few quick pulses, just until the flour is combined.
5. Add in the golden berries and again give a few quick pulses.
6. Pour banana bread mixture into the prepared loaf pan and with a spatula spread the batter evenly.
7. Sprinkle with a handful of hemp hearts and a few more golden berries.
8. Bake for 40 to 50 minutes.
9. Allow bread to cool for 30 minutes before removing from loaf pan.

Cooks Notes

This loaf keeps well in the fridge for a week.
You can also slice and store in the freezer.
If you don't have golden berries you could use cranberries or any other dried fruit you like. 

Print Recipe
In Baking, Breakfast, Desserts, Muffins, Snacks, Vegetarian
Comment

Bee Pollen Energy Balls with Dates and Chia Seeds

January 30, 2018 Marla Hertzman
beepollen_ball2.jpg

I often get asked about healthy snacks.
What do I eat when I have a sweet tooth?
These Bee Pollen Energy Balls are my new favourite treat and all you need are a few simple ingredients.
I love the sweetness of the dates, the crunch of the nuts and the energy from the bee pollen.
Bonus:  Bee Pollen is an excellent source of protein, carbohydrates, fat, vitamins and minerals including potassium, calcium, magnesium, zinc and iron and it's nutritious too.
Keep these in the fridge or freezer and when you need a burst of energy you will be ready for action.

Enjoy and have a ball!


Bee Pollen Energy Balls with Dates and Chia Seeds
This recipe makes about 10 energy balls

Ingredients

1 cup walnuts or pecans, soaked at least 6 hours or overnight, rinsed well
2 tbsp bee pollen
1/2 tsp coconut oil
10 dates, (you may need more)
1 tbsp maple syrup or honey
1/4 tsp salt
1 tbsp chia gel (chia seeds soaked in water for at least an hour)
1/2 tsp vanilla
1/2 tsp cinnamon
Optional toppings:  bee pollen, hemp hearts and flaked unsweetened coconut 

Directions

1.  Soak the dates if dry.  I like to soak for about 10 minutes in warm water, drain and dry well.
2. Make the chia gel by adding 1 tbsp of chai seeds to 3 tbsp of water, let sit for 10 minutes or until gel-like.
3.  Put all ingredients into a food processor and process until well mixed.  The mixture will start to gather around the blade, you may need to scrape off with a spatula and continue processing until well combined.
4.  Transfer the mixture to a medium sized bowl and shape into balls by rolling in your hand.
5.  If you like a bit more crunch then roll in bee pollen, hemp hearts or unsweetened coconut.
6.  Store in the fridge or freezer until firm, then eat.

Cooks Notes

Be sure to keep any unused bee pollen refrigerated or in the freezer to avoid spoilage. 
If you have allergies, check with your doctor before using bee pollen.
I like to keep in the freezer.

print recipe
In Breakfast, Desserts, Raw, Snacks, Vegan, Vegetarian
1 Comment

Dark Chocolate Bark - Delicious Meets Healthy This Holiday

December 10, 2017 Marla Hertzman
chocolate_bark8.jpg
chocolate_bark4.jpg
chocolate_bark5.jpg

My day isn't complete unless it ends with chocolate. A few squares of dark chocolate here, a warm mug of hot chocolate there, a handful of cacao nibs... I can't get enough of it. I have my own chocolate drawer that is well-stocked, always, with my favourite dark chocolate bars. Enough said.

Now that we are in the midst of the holiday season, my better self is telling me to stop eating sweets. Despite these good intentions, everywhere you go people are offering you sugary treats that are simply too hard to resist; peppermint, candy canes, white chocolate, milk chocolate and cookies in all shapes and forms. While this is all fun, after a few days of indulgence it's time to get back to eating healthy.

This Dark Chocolate Bark has come to my rescue...made with organic cacao powder, coconut butter, coconut oil, sweetened with maple syrup and covered with handfuls of nuts and dried fruit.  I just feel better knowing that the ingredients are all good for me and that I will be snacking on the healthy side.

Happy holidays and eat lots of chocolate!

Any combination of topping will do, here are some ideas to make this chocolate bark your own: chopped almonds, pistachio nuts, pumpkin seeds, sesame seeds, chopped dried fruit, peppermint extract, hemp seeds, cranberries and chia seeds.


Dark Chocolate Bark
This recipe is sweetened with maple syrup and is vegan, paleo-friendly and dairy free. 

Makes enough for 6-8 servings. 

Ingredients

1/4 cup cacao butter
1/2 cup coconut oil
3/4 cup cacao powder
1/2 cup maple syrup
1 tsp vanilla extract
1 tsp cinnamon
2 tbsp goji berries
1/4 cacao nibs
1/4 cup coconut chips
2 tbsp currants
1/3 cup cashews or your favourite nuts
pinch of salt

Directions

1. Line a 9 x 13 pan with parchment paper and set aside.
2. Melt the cacao butter and coconut oil together in a bowl over a pot of hot water.
3. Add the cacao powder, maple syrup, vanilla, cinnamon and salt  to the oils and mix until very smooth.
4. Pour the chocolate mixture into the parchment lined pan and sprinkle with the goji berries, cacao nibs, coconut, currants and cashews.
5. Place in the fridge or freezer for 30 minutes until hard.
6. I like to break it up with my hands into pieces.
7. Store in the fridge or freezer in an airtight container.

Cooks Notes

Because the chocolate bark is made with coconut oil and coconut butter this chocolate melts very easily so it’s better to keep it in the refrigerator or freezer until serving.
The 9 x 13 pan makes for a very thin bark, if you like it thicker use a smaller pan.

PRINT RECIPE


In Baking, Desserts, Snacks, Vegan, Vegetarian
Comment

Honey Cake with Plums and Plum Compote for Rosh Hashanah or Anytime...

September 15, 2017 Marla Hertzman
plum_cake.jpg
plum_cake1.jpg
plum_cake2.jpg

A visit to the Leslieville Farmers’ Market inspired me to make this plum cake for Rosh Hashanah. At the market I bought a basket of purple onions, purple potatoes, purple cabbage and purple plums. I just read that purple fruits and veggies are good for you; so that means so is this cake!

Our Rosh Hashanah dinner begins with apples dipped in honey, chicken soup, matzah ball, brisket, fish, kugel, and on and on...what would a Jewish holiday be without a table full of food? So by the time we get to dessert we are stuffed. When I serve this cake I tell my family that it is a healthy cake; and I really mean it!  It is gluten-free and sweetened with just a bit of honey, a perfectly sweet way to end Rosh Hashanah dinner. Have a healthy holiday, Shana Tova.

And don't forget to try some of my other holiday recipes...

Macaroons
Romanian Eggplant Salad
This is my Great-Grandmother Gefilte Fish
My Mother's Potato Kugel
My Favourite Chicken Soup
Latkes From My Mother's Kitchen
Challah, Jewish Egg Bread


Honey Cake with Plums and Plum Compote
This recipe makes 1 10-inch round cake and will serve 8.

Ingredients for the Plum Cake
8 tablespoons melted coconut oil, slightly cooled
½ cup honey
6 eggs
1 tsp vanilla extract
1 cup almond flour, packed
1/2 cup gluten free flour, packed or buckwheat
1 tsp salt
1 tsp baking soda
6 to 8 plums, cut in half, pits removed

Directions for the Plum Cake
1. Preheat oven to 325 degrees.
2. Grease cake pan with some coconut oil. I used a 10 in round pan.
3. In large bowl combing the eggs, cooled coconut oil, vanilla and honey.  Mix well.
4. Add the flours, salt and baking soda, stir until combined.
5. Pour into a greased 10 - inch round cake pan.
6. Top with the sliced plums. (The plums will sink to the bottom of the pan while in the oven).
7. Bake for 30 - 35 minutes, or until golden brown.
8. Let cool before serving and serve with the warm compote.

Ingredients for the Plum Compote:
10 plums, sliced and pitted
1/3 cup honey, the amount of honey you use depends on how sweet or sour the plums are. Taste and add more honey if needed.
1 tsp vanilla
pinch of salt
splash of balsamic vinegar
1/4 cup water

Directions for the Plum Compote
1. Combine plums, water and honey in a saucepan.  Bring to a low boil.
2. Add vanilla, a splash of balsamic vinegar and a pinch of salt.
3. Stir over low heat until plums are very tender and compote thickens, stirring often and tasting to see if more honey is needed.  
4. Cook for about 20 minutes until or until plums are soft and have started to break apart.  Remove from heat and let cool.
5. To serve slice cake and top with the plum compote.  You can serve the compote warm or at room temperature.

Cooks Notes
Any leftover compote store in an airtight container for up to one week.
I have tested this recipe using both gluten free flour and buckwheat flour, the cake in the photo is made with buckwheat flour.
If the compote seems a bit to thin after it has cooked, it will thicken as it cools.

PRINT RECIPE
In Baking, Desserts, Snacks, Vegetarian
Comment

Two-Bite Brownies, Super delicious and surprisingly healthy. Vegan and Sugar Free Too!

August 16, 2017 Marla Hertzman

Two bites to happiness!


Two-Bite Brownies

This recipe makes about 12 to 14 mini brownies.
These healthy brownies have no flour or added sugar and are sweetened with dates.  My secret ingredient is adding shredded zucchini.
I first tasted these brownies made by my friend and healthy baker Karen from Nutrilicious.

Ingredients

coconut oil to grease the muffin tins
1 cup madjool dates
1/4 cup water
1/2 cup almond butter or any nut butter
3/4 cup zucchini, shredded and squeeze lightly in your hand the excess moisture
1 tbsp ground golden flax seed
5 tbsp cacao powder
1/2 tsp baking soda
2 tsp vanilla extract
2 tsp balsamic vinegar
1/4 tsp salt

Directions

1.  Preheat the oven to 250ºF.
2.  Grease a mini muffin tin with coconut oil. 
3.  In a food processor add the dates, water and zucchini and process until the dates have broken down.
4. Add in the almond butter, ground flax, cacao powder, baking soda, vanilla, vinegar and salt and process again until the batter comes together.  It will be a bit wet and sticky.
5. Using a tablespoon spoon the batter evenly into the mini muffin tin; you can fill to the top and then smooth the tops gently with a spoon.
6. Bake for about 18 to 20 minutes, they will seem slightly under done when you take them out.  Let cool for 15-30 minutes before removing from pan.

Cooks Notes

I like to keep these in the fridge in an air-tight container, they become dense and super moist.
These mini brownies freeze well, if you have any left!

PRINT RECIPE
In Baking, Desserts, Snacks, Vegan, Vegetarian
Comment

Banana Bread with Cacao Nibs - A Superfood for Chocolate Lovers!

July 19, 2017 Marla Hertzman

Gather your ingredients because we are making a healthier version of Chocolate Chip Banana Bread. I bake lots of loafs and muffins and like to vary the ingredients depending on what I have in the kitchen.  What I love about this recipe is that it is made with the most delicious superfood, cacao nibs and full of “good for you” ingredients.

If you have never baked with cacao nibs then this is the recipe to try. You will have to make a trip to your local health food store to buy them.

You may be thinking, no chocolate chips...?  

This recipe uses cacao nibs; which are essentially pieces of raw chocolate without anything added to it.  It is the purest form of chocolate available.  Cacao nibs contain no sugar and very little fat, they are high in fibre and less processed than chocolate and loaded with antioxidants. 

This is the ingredient list on my package of Cacao Nibs: Organic Cacao Nibs

...and this is the ingredient list on my package of conventional Chocolate Chips: Semi-Sweet Chocolate (Sugar, Chocolate, Cocoa Butter, Milkfat, Soy Lecithin, Natural  and artificial Flavors).  

Try cacao nibs and try this recipe!


Banana Bread with Cacao Nibs
Enjoy this cacao nibs recipe and bake healthy!

This recipe makes 1 loaf

Ingredients

1/2 cup almond flour
1/2 cup coconut flour
1 tablespoon arrowroot starch  
1 1/4 teaspoon baking soda
1/2 teaspoon salt
1/2 teaspoon vanilla
2 tablespoons coconut oil, (melted and slightly cooled)
4 eggs, (room temperature)
4 very ripe bananas
1/2 cup cacao nibs 

Directions

1. Preheat the oven to 350°F. Grease a standard size glass loaf pan with coconut oil. 
2. In a medium sized mixing bowl, add all the dry ingredients and mix well.
3. In a separate bowl, cream together the bananas, coconut oil, and vanilla, then add in the eggs and mix until well blended.
4. Add the dry ingredients to the wet, stir until all ingredients are mixed well. Fold in the cacao nibs. 
5. Spoon the batter into the loaf pan. Bake for 45 - 50 minutes until lightly golden on top.
6.  Allow to cool completely before slicing. 

Cooks Notes:

Because this recipe only uses the bananas to add sweetness you must use very ripe bananas. 
BTW - Cacao nibs do not melt!

Print Recipe
In Baking, Breakfast, Desserts, Snacks, Vegetarian
Comment
Older Posts →

LOVE THY CARROT IS THE FOOD BLOG OF MARLA HERTZMAN


APPETIZERS

BAKING

BREAKFAST

DESSERTS

MAINS

MUFFINS

RAW

SALADS

SIDES

SNACKS

SOUPS

VEGAN

VEGETARIAN

VEGGIE BURGERS


INSTAGRAM

Hot and Spicy Tofu. 🌶 This was pretty much a big bowl of veggies that needed using up in my fridge. 🥢 For all things delicious and healthy to eat ➡️ visit www.lovethycarrot.com
.
.
.
.
#stirfryveggies #vegan #homemadefood #vegan #veganfood #plantba

LET'S CONNECT


Subscribe

We respect your privacy.

Thank you!

carrot.png

 Toronto Food Blogs