• home
    • Appetizers
    • Breakfast
    • Baking
    • Desserts
    • Mains
    • Muffins
    • Raw
    • Salads
    • Sides
    • Snacks
    • Soups
    • Vegan
    • Vegetarian
    • Veggie Burgers
  • Work With Me
  • Info
  • BUY MY HOME-MADE BONE BROTHS
  • Instagram
Menu

love thy carrot

Street Address
City, State, Zip
Phone Number

love thy carrot

  • home
  • Recipes
    • Appetizers
    • Breakfast
    • Baking
    • Desserts
    • Mains
    • Muffins
    • Raw
    • Salads
    • Sides
    • Snacks
    • Soups
    • Vegan
    • Vegetarian
    • Veggie Burgers
  • Work With Me
  • Info
  • BUY MY HOME-MADE BONE BROTHS
  • Instagram

Yellow Lentil Soup with Coconut Milk, vegan

October 29, 2018 Marla Hertzman

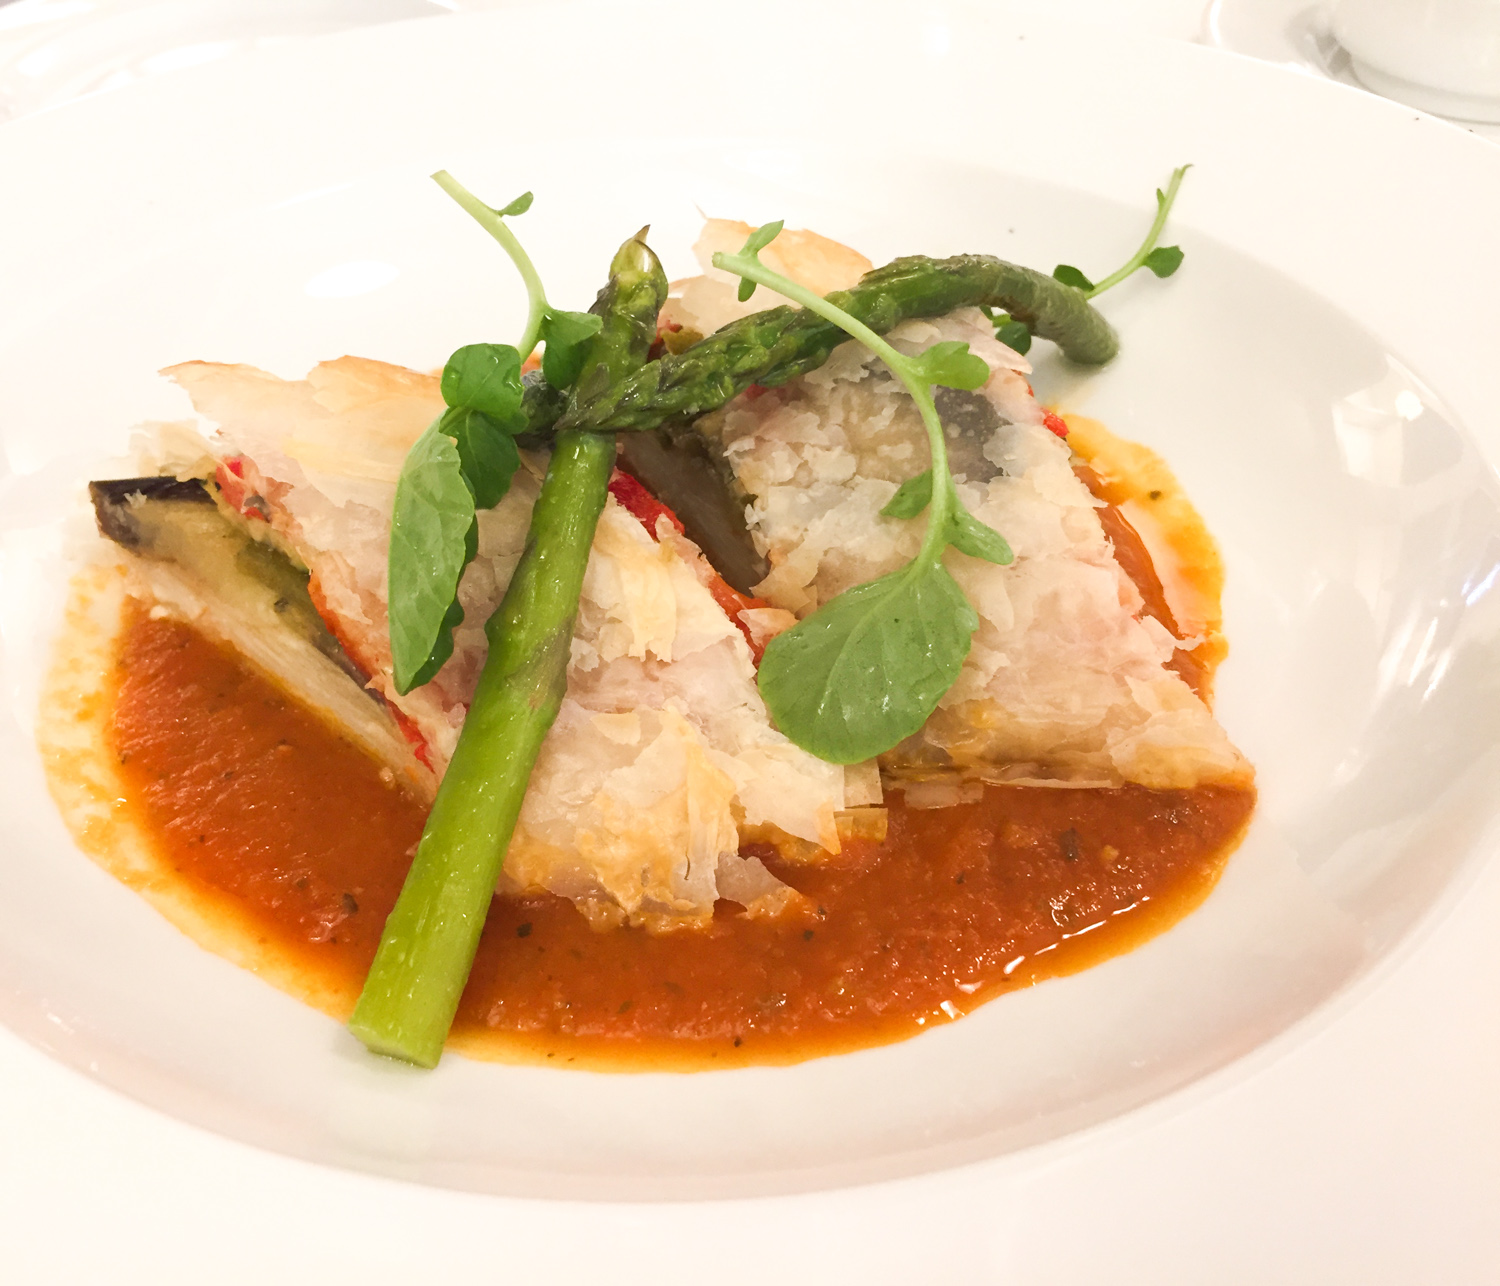
I will say it loud and clear, I LOVE TO COOK AND I LOVE TO EAT. Cooking allows me the freedom to make just what I like and want to eat. I hear this over and over ...it takes to long to make healthy food, all the shopping, chopping and prep.

I have a few tips to make cooking at home FUN, think creative, you are creating something that should taste and look good enough to eat.

Set the tone! Start with a well-organized workspace and for me that means music on, tea kettle on or glass of wine, ingredients, knives and pots on the counter, ready to be used.

Have a well-stocked pantry. A cupboard filled with canned tomatoes, canned and dried beans, coconut milk, nuts, seeds, honey, maple syrup and an assortment of spices.

My fridge always has veggies like carrots, red and green cabbage, celery, onions, shallots, white and sweet potatoes and garlic. Fruits like bananas, apples. pears, lemons, limes and I always have an avocado or two ripening on the counter.

In my freezer are bags of frozen fruit for smoothies, vegetables like corn, peas and chopped spinach that can be added last minute to soups and stews.

During the week I fill in with the fruits and veggies that have a shorted shelf life.

Now on to this soup recipe. I love this soup because you can make this with what you have in your pantry and it’s easy to substitute the veggies. If you don’t have fresh spinach in the fridge, frozen works or any fresh leafy green veggies, like kale or chard. As for the rest of the ingredients I used red lentils for fibre, (and they cook up fast) and added the turmeric for the beautiful colour and its antioxidants. The coconut milk gives it the creamy texture and the dark leafy greens are a good source of many vitamins.

So with a bit of creativity and smart shopping you can stock your pantry and fridge and start cooking healthy beautiful meals filled with good ingredients and most important your LOVE..best ingredient ever.


Yellow Lentil Soup with Coconut Milk
Makes 6 servings.
This soup will warm and fill you up with all that is good for you.

Ingredients:

olive oil for sautéing
1 large onion, diced
3 large garlic cloves, minced
2 tsp ground turmeric
1 1/2 tsp ground cumin
1 tsp cinnamon
1/2 tsp curry powder
1/4 tsp ground cardamom
1 can tomatoes, with juices, 26 ounce tin
1 can coconut milk, 15 ounce tin
1 cup uncooked red lentils, rinsed and drained
6 cups water or vegetable broth
1 tsp salt, or more to taste
freshly ground black pepper, to taste, 
1/4 tsp cayenne pepper, to taste, (I like a little heat so I used more)
2 cups baby spinach, kale or swiss chard chopped and remove the stems if using kale or chard
squeeze of lime juice, add just before serving

Directions:

1. In a large pot, add the oil, onion, and garlic. Add a pinch of salt, stir, and sauté over medium heat for 4 to 5 minutes until the onion softens.
2. Stir in the turmeric, cumin, cinnamon, and cardamom until combined. Continue cooking for about 1 minute, or until you smell all the spices.
3. Add the diced tomatoes (with juices), can of coconut milk, red lentils, water or broth, salt, and pepper and cayenne pepper.
4. Stir to combine. Increase heat to high and bring to a boil.
5. Once soup starts to boils, reduce heat to medium-high, and simmer, uncovered, for about 30 minutes. 
6. Add in the spinach or whatever green you choose.
7.  Taste and adjust for salt and pepper. If soup is to thick add more water or broth.
8. Just before serving add a squeeze of lime or serve on lime wedges on the side.

PRINT RECIPE
In Appetizers, Mains, Sides, Vegan, Vegetarian, Soups
Comment

MUSHROOM SOUP WITH A SPLASH OF SHERRY AND A DRIZZLE OF TRUFFLE OIL

October 21, 2018 Marla Hertzman
mushroom_soup4.jpg

Earthy
Woodsy
Nutty
Rich

No, I am not describing my husband!

But if you love mushrooms then you know what I am talking about. Whenever I make this soup I am often asked for the recipe.  You will be surprised how easy it is to make.  I love how recipes with the least ingredients can taste quite complex. Mushrooms do just that.

You can make this soup a day in advance of when you want to serve it. This gives the soup some time to develop great flavours.  And if you really want to up your soup into pretentious (and deliciousness), drizzle a few tiny drops of truffle oil over the soup just before serving, (or truffle salt if you have some). And please do not omit the dried wild mushrooms, they are loaded with deep flavours and are an essential to this soup. I use a mix of dried porcini, oyster and shiitake. You can usually find dried mushrooms in the produce section at the grocery store in small packages. Any combination of fresh mushrooms work in this recipe.

 So, invite some friends over and enjoy this soup with people you love! And don’t forget to give your hubby seconds!

A note on Truffle Oil

When buying truffle oil is important to distinguish between real and synthetic. Most brands make a canola or olive oil blend with truffle flavouring. Real truffle oil is made by adding edible truffles to an olive oil and allowing the flavours to infuse over several days. Look for a high quality truffle oil and be prepared to pay for it. But don’t worry when you see how small the bottle is; you only need a few drops or a drizzle to experience the intense smell and delicious taste.

Oops…I just noticed that I forgot to drizzle the truffle oil for the photo!


Mushroom Soup with Sherry and Truffle Oil
This recipe serves 6

Ingredients

2 Tbsp olive oil or butter, a bit more if needed or a mix of both - if you want to keep if vegan omit the butter
1 ½ pounds of brown mushrooms or a variety of mushrooms
1 medium onion, thinly sliced
1 large carrots, chopped
1 stalk of celery, chopped
3 cloves garlic, finely minced
¼ cup dried mushrooms, covered and soaked in warm water for about 15 minutes
5 sprigs of fresh thyme, leaves only
5 cups of water
salt and pepper to taste
chives or flat leaf parsley for garnish
a big splash of sherry to taste
truffle oil a few drops to garnish, optional

Directions

1. In a large saucepan, melt 2 tablespoons butter or olive oil over medium heat and add the onion, celery and garlic. Cook for 5 minutes until the onion is soft and translucent.
2. Then add the fresh mushrooms, dried mushrooms (with the water they were soaking in, taking care not add any of the dirt which may be in the bottom), carrots, thyme and more oil or butter if necessary.
3. Let the mixture cook over medium heat for about 8 to 10 minutes taking care that the onion doesn’t take on any brown colour.
4. Stir in the water and bring to a boil.
5. Immediately reduce the heat and simmer (covered) for about an hour.
6. Let soup cool for a few minutes then transfer to a blender or food processor and carefully blend at high speed until smooth. Do this in stages and remember to hold the blender lid down.
7. When blended, return the mix to the pot, season with salt and pepper, and bring up to a simmer again. Add the sherry, mix well, and serve immediately with a drizzle of truffle oil and a sprinkle of fresh chives.

Cooks Notes

I do not blend the whole pot of soup, I do about half the soup as I like my soup to have some texture and some sliced mushrooms to bite into.
I like to make this soup a day ahead, I find the flavours more intense.  But it is delicious the same day too.
If you are making in advance you may need to add a bit of water when reheating to thin out the soup.

Print Recipe
In Soups, Vegan, Vegetarian
Comment

Pumpkin Loaf, Gluten Free, Dairy Free and Sugar Free - Made with almond and coconut flour. All In One Bowl!

October 4, 2018 Marla Hertzman
pumpkin_loaf2.jpg
pumpkin_loaf3.jpg

I love this time of year.
Fall and
falling leaves,
orange
and red.
Cozy sweaters,
cinnamon sticks
and pumpkins.


Pumpkin Loaf
This recipe makes one loaf.
Soft and moist with a deep pumpkin flavour and best of all you only need one bowl.

Ingredients

3/4 cup pumpkin, I used organic canned pumpkin
1/4 cup maple syrup
1/4 cup melted coconut oil, let cool a bit
3 eggs
1 cup almond flour
1/4 cup coconut flour
1/2 tsp sea salt
1/2 tsp baking soda
1 tsp cinnamon
1/4 tsp ground ginger
1/4 tsp nutmeg
1/4 tsp allspice
1/4 tsp cloves
handful of pumpkin seeds, (optional)


Directions

1. Preheat oven to 325 F.
2. Combine all wet ingredients in a bowl and mix.
3. Add the dry ingredients to the wet ingredients. Stir until well-combined.
4. Pour the mixture into a greased loaf pan.
5. Sprinkle with a handful of pumpkin seeds on top.
6. Bake for 45–60 minutes.

Cooks Notes
Feel free to add in a handful of your favourite chocolate chips.

Print Recipe
In Baking, Breakfast, Desserts, Muffins, Vegan, Vegetarian, Snacks
Comment

Concord Grape Chia Seed Jam

September 27, 2018 Marla Hertzman
grape_chiajam.jpg

Growing up there was only one jam in our house and it was Welch’s Concord Grape Jelly eaten in a peanut butter and jelly sandwich. I can still see the jar in the fridge, smudged with grape fingerprints and always some peanut butter mixed into the the jar… I asked my brother Lawrence …”how did that happen?“ There is still nothing as good as biting into a gooey PB&J sandwich to make you feel warm and safe. I still love the combo, but times have changed and now I try to eat less sugary foods, though I still crave the taste of grape jelly. My recipe has no refined sugar, no pectin and is ready in about 20 minutes. It may not be as sweet or as purple as Welch’s but it will still make you and your peanut butter happy.

Try my recipe for Strawberry Chia Jam and Home-Made Almond Butter.


Concord Grape Chia Seed Jam
This is super easy to make.
This recipe will make 1 jar.

Ingredients

3 cups concord grapes
2 tbsp maple syrup
2 tbsp chia seeds
zest of 1/2 a lemon

Directions

1. In a medium saucepan on medium high heat, add in the grapes and cook the fruit until it starts to break down and the grapes begin to bubble and simmer, they will start to release some juices, about 5 to 10 minutes.
2. Turn the heat down and add the maple syrup and chia seeds. Cook another 5 minutes, stirring frequently. Add in the lemon zest and remove from heat and let cool. The jam will still be a bit runny, but as it cools it will start to thicken.
3. Once the jam has cooled to room temperature, transfer it to a jar. Store in the fridge for about 2 weeks.

Cooks Notes

The jam will thicken further and become more set once it has completely chilled.
This jam is not a shelf stable. Use within 2 weeks and keep refrigerated.
Jam can also be frozen.

Print Recipe


In Sides, Vegan, Vegetarian
2 Comments

Peach and Blueberry Muffins, Sugar Free and Gluten Free

September 11, 2018 Marla Hertzman
blueberryPeachMuffin.jpg
blueberryPeachMuffin4.jpg
blueberryPeachMuffin1.jpg
blueberryPeachMuffin2.jpg

Life is a peach.
With a few blueberries tossed in.


Peach Blueberry Muffins
You will love these naturally sweetened muffins
Recipes make 9 muffins

Ingredients

1 cup brown rice flour
1/2 cup oats
2 tsp baking powder
2 tsp cinnamon
1/2 tsp salt
2 eggs
1/4 cup almond milk
1/4 cup maple syrup
2 tsp pure vanilla extract
1/2 cup melted coconut oil, slightly cooled
3/4 cup blueberries
3 peaches, finely chopped

Directions

1. Preheat oven to 350 degrees. Grease a muffin tin with coconut oil or line with paper muffin cups. (I like to use paper cups).
2. In a large bowl combine flour, oats, baking powder, cinnamon and salt.
3. In a separate bowl, combine eggs, almond milk, maple syrup and vanilla. Stir in the coconut oil to the wet mixture. Then add the dry mixture to the wet and mix.
4. Fold in the blueberries and chopped peaches.
5. Measure into muffin tins. They do not rise a lot, so you can fill the batter up to the top. Bake for 30-35 minutes. 

Cooks Notes

I use regular oats, not quick cooking.

PRINT RECIPE
In Baking, Muffins, Vegetarian
Comment

Dark Chocolate Cake and gastronomy aboard the Victory II with Victory Cruise Lines

August 18, 2018 Marla Hertzman
vanilla_chocolatecake3.jpg
cruise_veganchocolatecake2.jpg
My own version of the mini chocolate cake, straight from the oven.

My own version of the mini chocolate cake, straight from the oven.

I just had a great nine days aboard the Victory II with my sister in law, Judi.  We cruised and toured and dined our way along the St Lawrence Seaway, Great Lakes and passed through 17 Locks and 7 cities.  So what did it matter that I have been to all the ports before? It didn't.  Sailing on the Victory II put a new spin on the sights and they way I look at our beautiful country.  It was fun to be a tourist with people who have never been to Toronto or some of the cities we visited - I personally felt responsible for the sunny days, gourmet food, beautiful sunsets and winning at Name That Tune!

So what does chocolate have to do with cruising? Lots to a chocolate lover!  The food aboard the Victory II was well prepared and beautifully served. We had a tour of the galley and was surprised that all the food we ate come from such a small but well organized space.  We ate well and tried really hard to leave room for dessert, especially if chocolate was on the menu.  I tried a delicious Mousse au Chocolate, (sugar-free option), it was smooth and creamy, I did not miss the sugar and yes there was a cherry on top, and it was a real cherry! I also loved the mini chocolate cake paired with vanilla ice cream, I know it sounds simple but simple is hard to pull off, it has to be perfect and perfectly delicious is what we had.

Now that I am home I really wanted to try and recreate the chocolate cake. My version is gluten-free, dairy-free and sugar-free and the ice cream is made with coconut milk.  Ok, so maybe my recipe is not as much fun as what we ate on the ship, but I am home now and need to fit back into my jeans. 

For a full review of the Victory ll Great Lakes Adventure have a look at the article written by my sister-in-law Judi Cohen for Quirky Cruise. 


Some of the delicious food we ate.

cruise_shrimpcocktail.jpg
cruise_lamb.jpg
cruise_macandcheese.jpg
cruise_dessert.jpg
cruise_tea1.jpg
cruise_tea.jpg
cruise_lunch salad.jpg
victory_coctail1.jpg
cruise_tea2.jpg
victory_lobster.jpg
victory_sunset.jpg
victory_salad.jpg
victory_cookies.jpg
victory_dessert.jpg
victory_icecream.jpg
victory_wine.jpg
victory_menu.jpg
victory_dinner.jpg
victory_strawberries.jpg
victory_postcard.jpg

Mini Dark Chocolate Cake
This recipe makes 4 mini cakes.
I used 125ml porcelain ramekins

Ingredients

2/3 cup almond milk
1 1/2 tsp vinegar
1/2 cup pure maple syrup
1/4 cup vegetable or melted coconut oil, ( I used coconut oil)
2 tsp pure vanilla extract
1/3 cup cocoa powder
1 cup of gluten free flour (I used Bob's Red Mill)
1 tsp instant espresso (optional)
1/2 tsp salt
3/4 tsp baking powder

Directions

1.  Preheat oven to 350 F.
2. Grease 4 round baking ramekins.
3.  Mix together the milk, vinegar, maple syrup, oil and vanilla extract, set aside for 10 minutes.
4.  Stir together the remaining ingredients in a separate bowl until well mixed.
5.  Pour wet into dry, stir just until evenly mixed, and transfer to the greased ramekins.
6.  Bake 20 to 25 minutes on the middle rack, or until cake is done.
7.  Let cool before removing.  Remove by running a knife around the edges and gently turn over and remove cakes.

Cooks Notes

Make sure the almond milk, maple syrup and coconut oil are at room temperature.
You can prepare ahead of time and then bake just before serving for a warm dessert.  Just remember to wait at least 10 minutes before removing from ramekins.  

PRINT RECIPE
In Vegan, Vegetarian, Snacks, Desserts, Baking
Comment

Zucchini Kale Quiche With A Sweet Potato Crust

June 27, 2018 Marla Hertzman
quiche_sweetpotato.jpg
quiche_sweetpotato1.jpg
quiche_sweetpotato4.jpg
quiche_sweetpotato3.jpg

Food brings people together - no matter how far apart you are. This recipe was posted by my friend Shelley who moved to Israel in the early 80's.  Fast forward a few decades and continents and thanks to Facebook I can see what she's up to and what she's been eating.  And it's all healthy! 

Shelley eats grain-free and created this delicious quiche.
You can find the original recipe at Galilee Green.


Zucchini And Kale Quiche With A Sweet Potato Crust
Serves 4 to 6
What makes this recipe special is the sweet potato crust.

Ingredients:

2 medium sweet potatoes, peeled and sliced thin
1 tbsp olive oil
1/3 cup of minced yellow onion
2 - 3 cloves garlic, minced
2 cups of shredded zucchini
2 cups of chopped kale, make sure to remove the stem
1/4 cup canned coconut milk or coconut cream
5 eggs
1/2 tsp salt
1/2 tsp pepper
1/4 tsp ground nutmeg
1  tomato, sliced, (optional)
a sprinkle of dried rosemary, (optional)
goat cheese, (optional)

Directions

1.  Preheat the oven to 400 degrees.
2. Lay out the sliced sweet potatoes in a pie dish in a crust-like fashion.
3. Brush some olive oil onto the sweet potato slices with a silicone basting brush.
4. Bake the sweet potato crust for 20 minutes.
5. While the sweet potato crust is baking, put 1 tbs of olive oil onto a large frying pan over medium heat.
6. Put the the minced onion and garlic in the pan, mix them into the olive oil and let them cook 3 1/2 minutes.
7. Add the shredded zucchini and kale to the pan, mix them into the onions and then let it all cook for 4 minutes, stirring every so often
8. Set the veggies aside.
9.  Then, in a medium bowl, mix the eggs, coconut milk or cream, salt, pepper, and nutmeg together with a whisk.
10. Mix the zucchini and kale into the egg mixture and then pour the whole thing into the sweet potato crust
11. Top the quiche with the sliced tomatoes. If you want, sprinkle with some dried rosemary.
12. Reduce the oven heat to 375 degrees.
13. Put the whole thing into the oven and bake for 40 minutes. Let the quiche rest for 15 minutes.
14.  Slice and Enjoy!


In Appetizers, Mains, Vegan, Vegetarian
Comment

Cauliflower Smoothie with Blueberries and Cinnamon

April 4, 2018 Marla Hertzman
bluberry_cauliflowersmoothie1.jpg
bluberry_cauliflowersmoothie4.jpg

I tested this smoothie on my number one taste tester - Gordy; and I didn't dare tell him that it was made with cauliflower because I knew what his reaction would be. NO thanks. So with a twinkle in my eye, I presented him with this beautiful blue smoothie. I sensed a bit of hesitation, I know he is thinking there is more to this smoothie then just blueberries.  I waited and happily heard music to my ears...seconds please.  So there you have it, proof that cauliflower hides behind all the (healthy) deliciousness in this smoothie.


Cauliflower Smoothie with Blueberries and Cinnamon
For the record cauliflower adds zero taste to your smoothie, what it does add is a super creamy texture, and if you use frozen cauliflower and frozen blueberries you may just believe that you are feasting on a milkshake.
Serves 2

Ingredients

1 cup fresh or frozen cauliflower florets
1 cup loosely packed greens of choice, I used swiss chard
1 cup frozen blueberries
1 tsp cinnamon
2 tbsp hemp hearts
pinch of salt
1 tsp vanilla extract
1 ripe banana
water, (about 1 cup)

Directions

1.   Add all ingredients to blender, add a cup or so water, then blend until very smooth.
2.  Add more water if needed and blend again.
3.  Drink and enjoy!

Cooks Notes

I used frozen cauliflower for this smoothie. I have made it with fresh cauliflower and it was just as delicious, I add a few ice cubes to make it colder and thicker.  Just so you know frozen cauliflower is lightly steamed.  When I use fresh I don't bother cooking the cauliflower first.  
You can use fresh blueberries too.
Store any leftovers in the fridge.

print recipe
In Breakfast, Raw, Snacks, Vegan, Vegetarian
Comment

Banana Bread made with Almond Flour, sweetened with maple syrup & a surprise - Golden Berries

March 18, 2018 Marla Hertzman
banana_loaf.jpg
goldenberries1.jpg
goldenberries.jpg

This just might be the best banana bread! It’s really easy to make, naturally sweetened and I added some golden berries - just for something unexpected. 

These little orange golden berries are sweet like a raisin and tart like cranberries.  They are called gooseberries when they're fresh and golden berries when dried.  They are rich in vitamins, minerals, and antioxidants.  They have fibre, protein, and phosphorus.  I am adding them to oatmeal at breakfast and salads at lunch. 

This loaf is moist and a bit sweet and has a tangy kick from the golden berries.


Banana Bread made with Almond Flour and Golden berries
This recipe makes 1 loaf

Ingredients

3 large ripe bananas
2 eggs
1 tsp vanilla extract
3 tbsp pure maple syrup
2 cups almond flour
1 tbsp baking powder
1/4 tsp salt
2 tsp cinnamon
1/4 tsp nutmeg
1/3 cup golden berries
handful of hemp hearts for sprinkling on top, (optional)

Directions

1. Preheat the oven to 350 degrees F and lightly oil a loaf pan. (I used melted coconut oil).
2. In a food processor add the bananas and process until they are mashed.
3. Add the eggs, vanilla, maple syrup, baking powder, salt, cinnamon and nutmeg to the processor and blend until well combined.
4. Add the almond flour and give a few quick pulses, just until the flour is combined.
5. Add in the golden berries and again give a few quick pulses.
6. Pour banana bread mixture into the prepared loaf pan and with a spatula spread the batter evenly.
7. Sprinkle with a handful of hemp hearts and a few more golden berries.
8. Bake for 40 to 50 minutes.
9. Allow bread to cool for 30 minutes before removing from loaf pan.

Cooks Notes

This loaf keeps well in the fridge for a week.
You can also slice and store in the freezer.
If you don't have golden berries you could use cranberries or any other dried fruit you like. 

Print Recipe
In Baking, Breakfast, Desserts, Muffins, Snacks, Vegetarian
Comment

Bee Pollen Energy Balls with Dates and Chia Seeds

January 30, 2018 Marla Hertzman
beepollen_ball2.jpg

I often get asked about healthy snacks.
What do I eat when I have a sweet tooth?
These Bee Pollen Energy Balls are my new favourite treat and all you need are a few simple ingredients.
I love the sweetness of the dates, the crunch of the nuts and the energy from the bee pollen.
Bonus:  Bee Pollen is an excellent source of protein, carbohydrates, fat, vitamins and minerals including potassium, calcium, magnesium, zinc and iron and it's nutritious too.
Keep these in the fridge or freezer and when you need a burst of energy you will be ready for action.

Enjoy and have a ball!


Bee Pollen Energy Balls with Dates and Chia Seeds
This recipe makes about 10 energy balls

Ingredients

1 cup walnuts or pecans, soaked at least 6 hours or overnight, rinsed well
2 tbsp bee pollen
1/2 tsp coconut oil
10 dates, (you may need more)
1 tbsp maple syrup or honey
1/4 tsp salt
1 tbsp chia gel (chia seeds soaked in water for at least an hour)
1/2 tsp vanilla
1/2 tsp cinnamon
Optional toppings:  bee pollen, hemp hearts and flaked unsweetened coconut 

Directions

1.  Soak the dates if dry.  I like to soak for about 10 minutes in warm water, drain and dry well.
2. Make the chia gel by adding 1 tbsp of chai seeds to 3 tbsp of water, let sit for 10 minutes or until gel-like.
3.  Put all ingredients into a food processor and process until well mixed.  The mixture will start to gather around the blade, you may need to scrape off with a spatula and continue processing until well combined.
4.  Transfer the mixture to a medium sized bowl and shape into balls by rolling in your hand.
5.  If you like a bit more crunch then roll in bee pollen, hemp hearts or unsweetened coconut.
6.  Store in the fridge or freezer until firm, then eat.

Cooks Notes

Be sure to keep any unused bee pollen refrigerated or in the freezer to avoid spoilage. 
If you have allergies, check with your doctor before using bee pollen.
I like to keep in the freezer.

print recipe
In Breakfast, Desserts, Raw, Snacks, Vegan, Vegetarian
1 Comment

Dark Chocolate Bark - Delicious Meets Healthy This Holiday

December 10, 2017 Marla Hertzman
chocolate_bark8.jpg
chocolate_bark4.jpg
chocolate_bark5.jpg

My day isn't complete unless it ends with chocolate. A few squares of dark chocolate here, a warm mug of hot chocolate there, a handful of cacao nibs... I can't get enough of it. I have my own chocolate drawer that is well-stocked, always, with my favourite dark chocolate bars. Enough said.

Now that we are in the midst of the holiday season, my better self is telling me to stop eating sweets. Despite these good intentions, everywhere you go people are offering you sugary treats that are simply too hard to resist; peppermint, candy canes, white chocolate, milk chocolate and cookies in all shapes and forms. While this is all fun, after a few days of indulgence it's time to get back to eating healthy.

This Dark Chocolate Bark has come to my rescue...made with organic cacao powder, coconut butter, coconut oil, sweetened with maple syrup and covered with handfuls of nuts and dried fruit.  I just feel better knowing that the ingredients are all good for me and that I will be snacking on the healthy side.

Happy holidays and eat lots of chocolate!

Any combination of topping will do, here are some ideas to make this chocolate bark your own: chopped almonds, pistachio nuts, pumpkin seeds, sesame seeds, chopped dried fruit, peppermint extract, hemp seeds, cranberries and chia seeds.


Dark Chocolate Bark
This recipe is sweetened with maple syrup and is vegan, paleo-friendly and dairy free. 

Makes enough for 6-8 servings. 

Ingredients

1/4 cup cacao butter
1/2 cup coconut oil
3/4 cup cacao powder
1/2 cup maple syrup
1 tsp vanilla extract
1 tsp cinnamon
2 tbsp goji berries
1/4 cacao nibs
1/4 cup coconut chips
2 tbsp currants
1/3 cup cashews or your favourite nuts
pinch of salt

Directions

1. Line a 9 x 13 pan with parchment paper and set aside.
2. Melt the cacao butter and coconut oil together in a bowl over a pot of hot water.
3. Add the cacao powder, maple syrup, vanilla, cinnamon and salt  to the oils and mix until very smooth.
4. Pour the chocolate mixture into the parchment lined pan and sprinkle with the goji berries, cacao nibs, coconut, currants and cashews.
5. Place in the fridge or freezer for 30 minutes until hard.
6. I like to break it up with my hands into pieces.
7. Store in the fridge or freezer in an airtight container.

Cooks Notes

Because the chocolate bark is made with coconut oil and coconut butter this chocolate melts very easily so it’s better to keep it in the refrigerator or freezer until serving.
The 9 x 13 pan makes for a very thin bark, if you like it thicker use a smaller pan.

PRINT RECIPE


In Baking, Desserts, Snacks, Vegan, Vegetarian
Comment

Sweet Potato Shoestring Fries with Chipotle Mayo Dipping Sauce

November 13, 2017 Marla Hertzman
sweetpotato_fries.jpg
sweetpotato_fries3.jpg

Fries = happy food.

I ate them as a kid sprinkled with salt and slathered in ketchup.  I still love fries but nowadays I make my own using sweet potatoes and I a spicy dipping sauce.

I love this orange root vegetable for lots of reasons, it is one of the most nutritious foods in the vegetable kingdom, filled with fibre as well as containing a variety of vitamins and minerals including iron, calcium, selenium, and they're a good source of most of our B vitamins and vitamin C. One of the key nutritional benefits of sweet potato is that they are high in an antioxidant known as beta-carotene, which converts to vitamin A when we eat them and gives the sweet potatoes its vibrant orange colour.

I made this for my personal in house taste-tester Gordy and when I pulled them from the oven…” what happened to my potatoes?” But once these shoestring fries were dipped in the mayo all was good in my house.

For this recipe you will need:
a spiralizer
sweet potatoes
pink salt
olive oil
and a very hot oven.

They are:
crunchy
slightly sweet
a little salty
and you won’t be able to stop eating them! 

Toss the spiralized sweet potatoes directly on a cookie sheet and drizzle with oil and whatever spices you like.  I am a purist, just salt for me. No deep-frying which makes them easy to make, and healthy too - just a hot oven.  You will need to really watch the cooking time as they burn quickly towards the end of cookings so keep checking on them and giving them a quick toss or two.  While they bake you will have just enough time to whip up the Chipotle Mayo Dipping Sauce.

Eat fries, be happy!


Sweet Potato Shoestring Fries with Chipotle Mayo Dipping Sauce
These delicate, crunchy sweet potato fries are the perfect side dish and are far healthier than french fries!
This recipe makes 2 serving.

Ingredients for the Sweet Potato Fries

1 large sweet potato
1 - 2 tablespoon extra virgin olive oil
pink salt, to taste 

Directions for the Sweet Potato Fries

1. Preheat the oven to 400 degrees. Spread the sweet potatoes on a large baking sheet covered with parchment paper. Drizzle with the olive oil and salt.
2. Bake for 15 minutes, then take out of the oven and toss.
3. Bake for another 15 minutes, now is the time to keep checking the fires to make sure they don't burn. You will get some areas that will start to brown quickly just removed them as they become done and put the rest of them back in the oven.
4. Serve with the chipotle mayo.

Ingredients for the Chipotle Mayo Dip

1 cup mayonnaise, I like Vegenaise but use your favourite brand
1 tsp minced canned chipotle chili in adobo sauce, plus 1 tsp sauce
zest from half a lime
2 tsp lime juice

Directions for the Chipotle Mayo

1. In a bowl, mix mayo, chipotle, adobo sauce, lime zest and lime juice.
2. Cover and chill until ready to use.

Cooks Notes

I do not bother to peel the sweet potatoes, I just wash them really well.
Use the smallest blade for spiralzing.

Print Recipe


In Appetizers, Sides, Vegan, Vegetarian
8 Comments

Quinoa Salad with Pomegranate Seeds and a Maple Lime Dressing

October 17, 2017 Marla Hertzman
quinoa_pom.jpg
quinoa_pom3.jpg

This is my new favourite quinoa salad. It is filled with colours that will make you happy its autumn.


Quinoa Salad with Pomegranate Seeds and Maple Lime Dressing
A fresh, crunchy salad with a delicious maple lime dressing
This recipe serves 6.

Ingredients

For the Quinoa Salad
1 cup dry quinoa, rinsed well
1/4 cup red onion, diced
1/2 cup red or yellow pepper, diced
1/4 cup pine nuts
1/4 sunflower seeds
3/4 cup pomegranate seeds
3/4 cup cooked chickpeas, drained and rinsed, (optional)
1/2 cup chopped parsley or fresh mint, (sometimes I use a combination of both if I have some on hand)

For the dressing
juice from 1 lime, you may need more depending on how juicy your lime is.
2 tbsp maple syrup
1/4 cup olive oil
salt and pepper to taste

Directions

1.  Prepare quinoa according to package instructions. 
2  While quinoa is cooking, drain and rinse the chickpeas. Chop the onion, peppers and parsley and remove the seeds from the pomegranate.  Set aside.
3.  In a small bowl prepare the dressing by whisking together the lime juice, olive oil, maple syrup, salt and pepper.  Taste the dressing, it should be a bit sweet from the maple syrup and have a bit of tang from the lime.  You may need to add more maple syrup or lime to you liking.
4.  Pour the dressing over the quinoa, (I like to do this while the quinoa is still warm) and mix.  Add in the veggies and pomegranate seeds. Taste again for seasonings. Just before serving toss in the pine nuts and sunflower seeds. 
5.  You can prepare ahead of time and store in the fridge.  I like to serve this quinoa salad at room temperature.  

Cooks Notes
To learn how I get the seeds out of a pomegranate have a look at my recipe for Winter Cabbage Slaw with Hazelnuts and Pomegranate Seeds.
Any leftover can be stored in the fridge for up to 2 days.
You can use any nuts and seeds you like in place of the pine nuts and sunflower seeds.  I like to use raw unsalted nuts. You can lightly toast them it you want, it will add a bit more of a crunch.

Print Recipe
In Appetizers, Salads, Sides, Vegan, Vegetarian
Comment

Honey Cake with Plums and Plum Compote for Rosh Hashanah or Anytime...

September 15, 2017 Marla Hertzman
plum_cake.jpg
plum_cake1.jpg
plum_cake2.jpg

A visit to the Leslieville Farmers’ Market inspired me to make this plum cake for Rosh Hashanah. At the market I bought a basket of purple onions, purple potatoes, purple cabbage and purple plums. I just read that purple fruits and veggies are good for you; so that means so is this cake!

Our Rosh Hashanah dinner begins with apples dipped in honey, chicken soup, matzah ball, brisket, fish, kugel, and on and on...what would a Jewish holiday be without a table full of food? So by the time we get to dessert we are stuffed. When I serve this cake I tell my family that it is a healthy cake; and I really mean it!  It is gluten-free and sweetened with just a bit of honey, a perfectly sweet way to end Rosh Hashanah dinner. Have a healthy holiday, Shana Tova.

And don't forget to try some of my other holiday recipes...

Macaroons
Romanian Eggplant Salad
This is my Great-Grandmother Gefilte Fish
My Mother's Potato Kugel
My Favourite Chicken Soup
Latkes From My Mother's Kitchen
Challah, Jewish Egg Bread


Honey Cake with Plums and Plum Compote
This recipe makes 1 10-inch round cake and will serve 8.

Ingredients for the Plum Cake
8 tablespoons melted coconut oil, slightly cooled
½ cup honey
6 eggs
1 tsp vanilla extract
1 cup almond flour, packed
1/2 cup gluten free flour, packed or buckwheat
1 tsp salt
1 tsp baking soda
6 to 8 plums, cut in half, pits removed

Directions for the Plum Cake
1. Preheat oven to 325 degrees.
2. Grease cake pan with some coconut oil. I used a 10 in round pan.
3. In large bowl combing the eggs, cooled coconut oil, vanilla and honey.  Mix well.
4. Add the flours, salt and baking soda, stir until combined.
5. Pour into a greased 10 - inch round cake pan.
6. Top with the sliced plums. (The plums will sink to the bottom of the pan while in the oven).
7. Bake for 30 - 35 minutes, or until golden brown.
8. Let cool before serving and serve with the warm compote.

Ingredients for the Plum Compote:
10 plums, sliced and pitted
1/3 cup honey, the amount of honey you use depends on how sweet or sour the plums are. Taste and add more honey if needed.
1 tsp vanilla
pinch of salt
splash of balsamic vinegar
1/4 cup water

Directions for the Plum Compote
1. Combine plums, water and honey in a saucepan.  Bring to a low boil.
2. Add vanilla, a splash of balsamic vinegar and a pinch of salt.
3. Stir over low heat until plums are very tender and compote thickens, stirring often and tasting to see if more honey is needed.  
4. Cook for about 20 minutes until or until plums are soft and have started to break apart.  Remove from heat and let cool.
5. To serve slice cake and top with the plum compote.  You can serve the compote warm or at room temperature.

Cooks Notes
Any leftover compote store in an airtight container for up to one week.
I have tested this recipe using both gluten free flour and buckwheat flour, the cake in the photo is made with buckwheat flour.
If the compote seems a bit to thin after it has cooked, it will thicken as it cools.

PRINT RECIPE
In Baking, Desserts, Snacks, Vegetarian
Comment

Coconut Curried Cauliflower, Carrot and Parsnip Soup

September 6, 2017 Marla Hertzman
caulifower_currysoup2.jpg
caulifower_currysoup.jpg
caulifower_currysoup1.jpg

I love how the soup changes colour when you add the coconut milk. 


Coconut Curried Cauliflower, Carrot and Parsnip Soup
This soup makes 4 to 6 serving

Ingredients

1 large head of cauliflower, chopped
olive oil
1 tsp sea salt
1 leek, chopped
4 large carrots, chopped
2 large parsnip, chopped
2 tablespoons ginger, chopped
3 garlic cloves, crushed with your knife
1 tsp ground turmeric (or a 1/2-inch piece turmeric root, chopped)
2 tbsp Thai curry paste
8 cups of water or vegetable broth
1 – 15 ounce can coconut milk
salt, to taste
chopped nuts, hemp hearts and a squeeze of fresh lime juice to garnish 

Directions

1.  Preheat the oven to 400 degrees. Line two baking sheets with parchment paper or foil.
2.  Put the chopped cauliflower on one of the baking sheets, drizzle with 1 tablespoon of olive oil and sprinkle with salt. Roast the cauliflower for 30 to 40 minutes, or until it is soft and caramelized. On the second baking sheet put the chopped carrots and parsnip, drizzle with more oil and sprinkle with salt. Roast for about 20 to 30 minutes or until soft and lightly caramelized.
3.  While the vegetables are roasting, start making the soup.  In a large pot over medium-high heat add 2 tablespoons of oil, add the onion and sauté for 5 minutes. Then add the ginger and garlic and cook for 2 minutes. Add the turmeric and Thai curry paste and cook until you start to smell the curry, about 2 more minutes. Add the water or stock and turn up the heat to high and bring to a boil.
4.  As soon as the vegetables are cooked remove from the oven add them to the pot, gently simmer for 10 minutes.
5.  Using a food processor or blender, blend the soup until it is very smooth.  I like to use my blender and I do this in small batches.
6.  Add the coconut milk and season to taste with salt and a bit of pepper.
7.  Serve with chopped nuts, hemp hearts and fresh lime.

Cooks Notes

If you like a spicy soup you could add more curry paste.
Do not use light coconut milk, it is just a watered down version of coconut milk.

Print Recipe


In Appetizers, Soups, Vegan, Vegetarian
Comment

Beet Noodles with Spicy Almond Sauce

August 24, 2017 Marla Hertzman

I love that my noodles are actually beets.  If you are gluten-free or grain-free or just want to eat more vegetables then replacing pasta with veggie noodles is a great way to up your daily intake of vegetables. And now you can buy them ready to eat at the grocery store. No beet stained fingers...Harvest Fresh is doing all the work for you!

Spiralized beets taste slightly sweet and have a great crunch. They are fun to eat, a pretty colour and loaded with all things that are good for you... nutrients like vitamins B and C, iron, manganese, copper, magnesium, and potassium. There is more, they are rich in antioxidants that are especially important for the body’s natural detoxification.

Now to this one-dish meal; start by sautéing the beets in lots of garlic and fresh ginger.  You can prepare the sauce ahead of time, then when you are ready to eat toss the beet spirals with the sauce and dinner is ready.  This recipe is as flavourful and nutritious as its bold ruby beet colour. Happy twirling!

Want to know about he health benefits of beetroot and blood pressure - keep consuming beets and read this article.


Toppings
cilantro or parsley, chopped
crushed almonds or cashews
thinly sliced green onions
lime wedges

Directions
1. Start by making the sauce.  Mix all ingredients in a small bowl and whisk to combine, set aside.
2. In a large pan (big enough to hold the whole package of beet spirals), heat oil over medium hight heat and add the garlic and ginger. Then add the full package of beet spiral and cook for about 5 to 7 minutes or until just tender.
3. Turn down the heat and add in a good amount of the Spicy Almond Sauce, just enough to coat the noodles.  Toss well and heat through.
4. Serve in bowls and top with more sauce, cilantro, crushed nuts, green onions and lime wedges.
5. Don't forget the chopsticks!

Cooks Notes
You can add protein to this dish, tofu or tempeh.
The sauce can be prepared ahead of time.
Any leftover sauce keeps well in the fridge.

Red Beet Noodles with Spicy Almond Sauce
Serves 2
This recipe is vegan and delicious!

Ingredients

For the Beets
1 package Harvest Fresh Beet Spirals
1/2 yellow pepper, thinly slices
2 tbsp olive oil or coconut oil
1 clove garlic, minced
1 tbsp fresh ginger, minced

For the Spicy Almond Sauce
1/3 cup almond butter, (or any nut butter you like), room temperature
1 tbsp tamari or soy sauce
1 tbsp rice wine vinegar or apple cider vinegar
1/2 tsp chili flakes, (more if you like it really hot)
2 tsp fresh lime juice
1 small cloves garlic, minced
2 1/2 tps warm water, (more if needed)
2 tsp sesame oil

PRINT RECIPE

Now you can buy all kinds of spiralized vegetables ready to eat from Harvest Fresh.
Thank you Harvest Fresh for sending me this colourful package of deliciousness.

Beets_harvestfresh.png
In Mains, Sides, Vegan, Vegetarian
1 Comment

Two-Bite Brownies, Super delicious and surprisingly healthy. Vegan and Sugar Free Too!

August 16, 2017 Marla Hertzman

Two bites to happiness!


Two-Bite Brownies

This recipe makes about 12 to 14 mini brownies.
These healthy brownies have no flour or added sugar and are sweetened with dates.  My secret ingredient is adding shredded zucchini.
I first tasted these brownies made by my friend and healthy baker Karen from Nutrilicious.

Ingredients

coconut oil to grease the muffin tins
1 cup madjool dates
1/4 cup water
1/2 cup almond butter or any nut butter
3/4 cup zucchini, shredded and squeeze lightly in your hand the excess moisture
1 tbsp ground golden flax seed
5 tbsp cacao powder
1/2 tsp baking soda
2 tsp vanilla extract
2 tsp balsamic vinegar
1/4 tsp salt

Directions

1.  Preheat the oven to 250ºF.
2.  Grease a mini muffin tin with coconut oil. 
3.  In a food processor add the dates, water and zucchini and process until the dates have broken down.
4. Add in the almond butter, ground flax, cacao powder, baking soda, vanilla, vinegar and salt and process again until the batter comes together.  It will be a bit wet and sticky.
5. Using a tablespoon spoon the batter evenly into the mini muffin tin; you can fill to the top and then smooth the tops gently with a spoon.
6. Bake for about 18 to 20 minutes, they will seem slightly under done when you take them out.  Let cool for 15-30 minutes before removing from pan.

Cooks Notes

I like to keep these in the fridge in an air-tight container, they become dense and super moist.
These mini brownies freeze well, if you have any left!

PRINT RECIPE
In Baking, Desserts, Snacks, Vegan, Vegetarian
Comment

Mashed Chickpea Salad that tastes like tuna - really!

August 5, 2017 Marla Hertzman

I grew up eating tuna sandwiches -  on rye bread, open-face on a bagel or packed between two slices of challah.  It had to be Clover Leaf white albacore tuna, that was the only kind my mother bought and she still does. Tuna was my go to sandwich, but as I have long ago learned eating too much tuna is not so good for you, but hey...chickpeas are.

This chickpea salad is a great substitute. What I love about this recipe is that once you mash up the chickpeas, add in the veggies for a little crunch and mayo for creaminess you have a hearty filling for your sandwich.  Chickpeas are packed with protein, low in fat and filled with fibre, manganese, iron and folate. 

 This may not be the sandwich I grew up with but it sure is tasty and I think my mother would approve!


Mashed Chickpea Salad
Chickpeas are a great source of plant-based protein.
This will make enough for about 3 big sandwiches.

Ingredients:

  • 1 can chickpeas, rinsed, (15-ounce tin)
  • 2 stalks celery, finely chopped
  • 2 green onions, thinly sliced, (or you could use red onion)
  • 1/4 cup finely chopped dill pickle, (use a bit more if you like pickles)
  • 1/4 cup finely chopped red or yellow pepper
  • 3 tbsp mayonnaise, (I like Vegenaise but if you love Hellmann's then why not)
  • 2 tsp yellow mustard
  • 2 tsp fresh lemon juice, (start with a bit and add more to taste)
  • 1/2 tsp salt, or more to taste
  • ground black pepper

Directions

1. Pulse the chickpeas in a food processor until broken down, but not totally mushy.
2. Add in the celery, green onions, pickles, peppers, mayonnaise and pulse a few times.
3. Transfer to a medium sized bowl and stir in the mustard, lemon juice, salt and pepper.
4. Taste and adjust seasoning, you may need more salt or lemon juice or more mayo, depending on your tastes.
5. Serve on your favourite bread or add a scoop on top of your salad.

Cooks Notes

This keeps well in the fridge for about 3 to 4 days.
 

print recipe
In Mains, Vegan, Vegetarian
Comment

Banana Bread with Cacao Nibs - A Superfood for Chocolate Lovers!

July 19, 2017 Marla Hertzman

Gather your ingredients because we are making a healthier version of Chocolate Chip Banana Bread. I bake lots of loafs and muffins and like to vary the ingredients depending on what I have in the kitchen.  What I love about this recipe is that it is made with the most delicious superfood, cacao nibs and full of “good for you” ingredients.

If you have never baked with cacao nibs then this is the recipe to try. You will have to make a trip to your local health food store to buy them.

You may be thinking, no chocolate chips...?  

This recipe uses cacao nibs; which are essentially pieces of raw chocolate without anything added to it.  It is the purest form of chocolate available.  Cacao nibs contain no sugar and very little fat, they are high in fibre and less processed than chocolate and loaded with antioxidants. 

This is the ingredient list on my package of Cacao Nibs: Organic Cacao Nibs

...and this is the ingredient list on my package of conventional Chocolate Chips: Semi-Sweet Chocolate (Sugar, Chocolate, Cocoa Butter, Milkfat, Soy Lecithin, Natural  and artificial Flavors).  

Try cacao nibs and try this recipe!


Banana Bread with Cacao Nibs
Enjoy this cacao nibs recipe and bake healthy!

This recipe makes 1 loaf

Ingredients

1/2 cup almond flour
1/2 cup coconut flour
1 tablespoon arrowroot starch  
1 1/4 teaspoon baking soda
1/2 teaspoon salt
1/2 teaspoon vanilla
2 tablespoons coconut oil, (melted and slightly cooled)
4 eggs, (room temperature)
4 very ripe bananas
1/2 cup cacao nibs 

Directions

1. Preheat the oven to 350°F. Grease a standard size glass loaf pan with coconut oil. 
2. In a medium sized mixing bowl, add all the dry ingredients and mix well.
3. In a separate bowl, cream together the bananas, coconut oil, and vanilla, then add in the eggs and mix until well blended.
4. Add the dry ingredients to the wet, stir until all ingredients are mixed well. Fold in the cacao nibs. 
5. Spoon the batter into the loaf pan. Bake for 45 - 50 minutes until lightly golden on top.
6.  Allow to cool completely before slicing. 

Cooks Notes:

Because this recipe only uses the bananas to add sweetness you must use very ripe bananas. 
BTW - Cacao nibs do not melt!

Print Recipe
In Baking, Breakfast, Desserts, Snacks, Vegetarian
Comment

Roasted Eggplant with Honey and Chiles

June 23, 2017 Marla Hertzman

When I think of eggplant I am reminded of the eggplant parmesan my mother use to make.  The eggplant was cut into thick slices, cooked in oil then baked in the oven smothered with tomato sauce and thick slices of mozzarella cheese.  I don't really remember the flavour of the eggplant, but the gooey cheese was pretty tasty.   
What I find so delicious about roasting eggplant in the oven is with just a few ingredients you can really taste the sweet and smoky flavours that magically happen in just about 30 minutes.  How to eat:  scoop out the eggplant and spread on a warm baguette or use as a dip for veggies.  I love the heat of the peppers, but be careful it can be hard to judge how spicy they are until you bite into them.  


Roasted Eggplant with Honey and Chiles
Serves 4 as an appetizer or a side dish

Ingredients

4 or 5 baby eggplants, halved, or 2 regular eggplants
5 fresh green Thai chiles, halved lengthwise
1/4 cup honey or maple syrup
2 tablespoons olive oil
salt and freshly ground pepper

Directions

1. Preheat oven to 400 degrees.
2. Prepare a baking sheet with parchment paper.
3 . Toss eggplants and chiles with the honey and oil.  (I do this directly on the cookie sheet).
4. Roast eggplants (skin sides up) and chiles until the eggplant is golden, about 20 minutes. Turn eggplant over and roast about 10 more minutes or until the eggplant is soften. (Keep an eye on the chiles, they may be done after 20 minutes, just remove from the baking sheet and set aside.)
5. Season with salt and pepper and serve.

What to do with these baby eggplants...

Give each guest there own eggplant and have them scoop out the filling and spread on a baguette.
Serve as a side dish on top of some peppery arugula with some crumbled soft cheese like chevre or feta.

PRINT RECIPE
In Appetizers, Sides, Vegan, Vegetarian
Comment
← Newer Posts Older Posts →

LOVE THY CARROT IS THE FOOD BLOG OF MARLA HERTZMAN


APPETIZERS

BAKING

BREAKFAST

DESSERTS

MAINS

MUFFINS

RAW

SALADS

SIDES

SNACKS

SOUPS

VEGAN

VEGETARIAN

VEGGIE BURGERS


INSTAGRAM

Hot and Spicy Tofu. 🌶 This was pretty much a big bowl of veggies that needed using up in my fridge. 🥢 For all things delicious and healthy to eat ➡️ visit www.lovethycarrot.com
.
.
.
.
#stirfryveggies #vegan #homemadefood #vegan #veganfood #plantba

LET'S CONNECT


Subscribe

We respect your privacy.

Thank you!

carrot.png

 Toronto Food Blogs