MY FAVOURITE CHICKEN SOUP

I have been recovering from surgery and many of my friends and family brought me lots of good food to eat, especially soup.  Over the past month I have eaten butternut squash soup, celery soup, leek and potato soup, lentil soup, peas soup and many different variations of chicken soups.  Just writing about soup makes me feel better!  So I thought I would share with you my favourite chicken soup recipe.  Thank you to everyone who brought me soup, muffins, treats, healthy food, books, flowers and good wishes!  This recipe is for you. xo

I have been buying my chicken from Sanagan’s Meat Locker in Kensington Market.

Ingredients:

  • 1 whole chicken, 3-4 lbs- I like organic or naturally raised
  • 2 large yellow onions, unpeeled and quartered
  • 6 carrots, cut into large chunks
  • 4 stalks celery with leaves, cut into thirds
  • 2 parsnips, cut into large chunks
  • 1/4 of a head of cabbage cut in big chunks
  • 2 inches of fresh pealed ginger
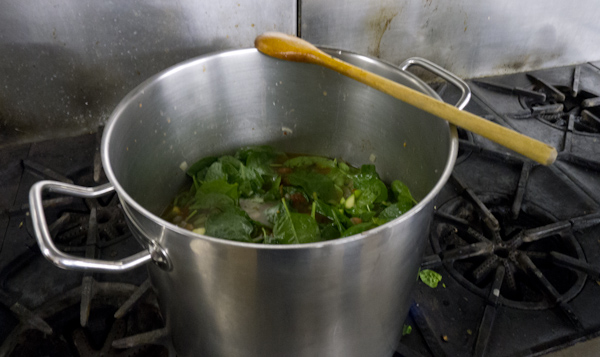
  •  big handful of fresh parsley
  •  big handful of fresh dill
  • 6 cloves of garlic, unpeeled
  • 2 tablespoons kosher salt
  • 2 teaspoons whole black peppercorns

 Directions:

  1. Place the chickens in a large stockpot. Cover with lots of water and bring to a boil over medium high heat.
  2. Let the chicken boil for 10-15 minutes, skimming the foam and particles that rise to the surface of the water.

  3. Then add the onions, carrots, celery, parsnips, cabbage, parsley, dill, garlic, and seasonings to the pot. Add 1 tbsp kosher salt to the water. Bring back to a boil.

  4. Simmer, uncovered, for 2 to 3 hours.

  5. When the chicken is done, turn off the heat. Use a pair of tongs to carefully pull the chicken from the broth. Put it on a plate. Taste the chicken broth and season with additional salt and pepper, if desired. Allow the chicken and the broth to cool.

  6. Carefully strain the broth into another pot through a mesh strainer. Reserve the carrots to add back to the soup; discard the spices, herbs, garlic, cabbage and onions.

  7. When the soup is completely cool, skim the fat from the top of the broth, it will come off in a gel-like layer.

  8. Add the chicken in small pieces back into the soup broth with the carrots. Heat and serve with some added dill.

Cooks Notes:

I sometimes discard the carrots and add some fresh ones back into the soup.

BLACK BEANS AND RICE YOUR WAY

The first time I had this delicious black bean recipe was in 2007 at friends Jeff Berman and Sue Dandos’ home, they both love to cook and right away I asked if they would share the recipe.  To my surprise the recipe was from Gourmet Magazine , (final issue published was November 2009 ).  This recipe has become one of my go-to vegetarian dinners. I have made a few additions and changes along the way, I use a long grain brown rice and when in a rush canned beans and sometimes a spoonful of store-bought salsa and a big handful of sunflower seeds. Steamed spinach on top for my daily greens completes this dish.  So now I know why the recipe is called black beans and rice your way… this is my way.

We have eaten many delicious meals with Jeff and Sue but sometimes it is the simple food that you remember most.

Black Beans and Rice Your Way

Serves4

  • Active time:45 min
  • Start to finish:2 1/4 hr (1 hr if using pressure cooker; includes making black beans)

For the roasted sweet-potato cubes:

  • 1 lb sweet potatoes, peeled and cut into 1/2-inch cubes
  • 2 tablespoons olive oil
  • 1/2 teaspoon salt

For the rice and beans:

  • 2 1/4 cups water
  • 1 1/2 cups long-grain white rice
  • 4 to 4 1/4 cups Kemp’s black beans (when I don’t have time to soak the beans organic canned black beans work really well)

For the toasted pumpkin seeds:

  • 1 cup hulled (green) pumpkin seeds (also called pepitas; not toasted)
  • 2 teaspoons olive oil

Toppings:

  • cubes of avocado tossed with lime juice; tomatillo salsa; lime wedges; chopped white onion; fresh cilantro sprigs

Roast sweet-potaote cubes:

  • Put oven rack in middle position and preheat oven to 450°F.

  • Toss sweet potatoes with oil and salt, then spread in 1 layer in a large shallow baking pan. Roast, stirring and turning over once or twice, until tender and browned, 35 to 40 minutes.

Cool rice while sweet potatoes roast:

  • Bring water, rice, and salt to a boil in a 2- to 3-quart heavy saucepan, then reduce heat and cook, tightly covered, until rice is tender and water is absorbed, about 15 minutes. Let stand, covered, off heat 5 minutes, then fluff with a fork.

Toast pumpkin seeds while reice is cooking:

  • Toast pumpkin seeds in a dry 10- to 12-inch heavy skillet (not nonstick; preferably cast-iron) over moderate heat, stirring, until seeds are puffed and pale golden, 3 to 4 minutes. Transfer to a bowl and stir in oil and salt to taste.

To serve:

  • Reheat black beans, thinning with water if necessary, then serve along with rice, sweet potatoes, pumpkin seeds, and accompaniments, each in a separate bowl.

MY MOTHERS’S LATKES

 These are my mother’s latkes and they are the best.  Latkes are a lot of work and I could make them, but something special happens when you are an adult and your mother still cooks the traditional Jewish food you love.  These latkes are make with arthritic hands, an old food processor, and lots of love!

All during Hanukkah friends love to share their latkes techniques, do you use matzoh meal or flour, peanut or corn oil, yukon gold or baking potatoes, hand grated or food processor. Then there are the friends who share their recipes of latkes made with sweet potatoes, zucchini, carrots…Me, I am a latke purist. A  latke should be made with simple ingredients, yukon gold potatos, onion, egg, salt, matzoh meal, and be fried in  lots of oil, served with homemade applesauce and sour cream.

Latkes from my  Mother’s Kitchen

Ingredients:
4 medium potatoes, cut in wedges
1 large onion, cut in wedges
3 tablespoons matzoh meal
1 teaspoon salt
2 eggs
vegetable oil for frying (lots)
applesauce, sour cream

Directions:

  1. Spread grated potatoes and onion on a kitchen towel and roll up jelly-roll style. Twist towel tightly to wring out as much liquid as possible. Transfer potato mixture to a bowl and stir in egg and salt.
  2. Place shredding disc of food processor into mixing container. Closely pack potato and onion wedges into feed tube.
    Process while using food pusher to press potatoes and onion onto shredding disc. Transfer to mixing bowel.
  3. Place steel cutting blade into container.
  4.  Add  matzoh meal and salt,and eggs. When necessary scrape down sides of mixing container with rubber spatula .
  5. Add shredded potatoes and onion and process for a few seconds until mixed.
  6.  In one or two 12-inch skillets, heat oil to a depth of approximately 1/4 inch.
  7. Drop potato mixture by large spoonfuls into the oil. Flatten each mound slightly and fry in batches over medium-high heat until golden brown on both sides.
  8. Drain on paper towels, changing the towels frequently as they absorb the oil.
  9. To keep the finished pancakes warm and crisp while you fry the rest (or to reheat them if they were fried in advance), place them on a rack set over a cookie sheet in a preheated 300 degree oven.
  10.  Between batches add more oil to the skillet if needed, and make sure that it is hot enough before dropping in more potato mixture.

Serve hot with applesauce and sour cream.

YELLOW CAULIFLOWER SOUP WITH SHITAKE MUSHROOMS

 What I love about soup is that I get to chop, simmer and stir my way to dinner in one pot.  Cauliflower is one of those wintry vegetables that you can always turn to, it blends into a bowl of swirling creamy deliciousness.  You just may want to eat this soup wearing your comfy pj’s, like Yale and I do!

latkes2.jpg

Yellow Cauliflower Soup with Shitake Mushrooms

This soup manages to be very creamy while still being vegan friendly.

Ingredients:

  • 1 Tbsp. oil
  • 1 onion, chopped
  • 1/2 tsp. salt, plus more to taste
  • 2 cloves garlic, chopped
  • 1 head cauliflower, chopped
  • 2 carrots, chopped
  • 2 cups vegetable broth or water
  • 1/4 tsp. freshly ground  pepper, plus more to taste
  • 1/8 tsp. freshly grated nutmeg, plus more to taste
  • 1 cups low-fat milk or almond milk, (we like almond milk)
  • 2 Tbsp. finely chopped parsley

Preparation:

  1. In a large pot over medium heat1 Tbsp. oil. Add onions and salt. Cook, stirring occasionally and adjusting heat so onions are cooking but not browning, until onions look starchy and a bit creamy, about 5 minutes. Add garlic and cook until fragrant, about 1 minute.
  2. Add cauliflower, stir to combine, cover and cook 3 minutes. Add broth, bring to a boil, reduce heat to maintain a steady simmer and cook until cauliflower is tender to the bite, about 10 minutes.
  3. Purée soup with a hand-held blender. Or, whirl in batches in a blender or food processor until smooth (place a kitchen towel over blender to prevent potential burns).
  4. Stir in pepper and nutmeg.
  5. Add milk or almond milk and cook over medium-low heat until hot. Taste and add more salt, pepper, and/or nutmeg to taste, if you like.
  6. Garnish with parsley

 For something different try roasting some mushrooms for garnish. 

Roasted Shitake Mushrooms
½ pound fresh shitakes
2 tablespoons extra virgin olive oil
Large pinch of sea salt

LENTIL WALNUT LOAF WITH DIJON MAPLE GLAZE

The cooler weather is here.
I am thinking about comfort food.
Vegan meatloaf may sound like a bit of an odd concept, but I can assure you that it is a tasty one.
There is even ketchup in the glaze.
This may not be your Mother’s meatloaf recipe, but it is now mine!

High in fiber and protein and low in fat.

High in fiber and protein and low in fat.

The recipe will make 2 loafs so you will have leftovers.
Yale and I thought that it was even taster the next day.

Makes 2 loafs

Ingredients:

  • 1 cup uncooked green lentils (I am thinking that chickpeas would work well too)
  • 1 cup walnuts, finely chopped and toasted
  • 3 tbsp ground flax + 1/2 cup water
  • 3 garlic cloves, minced
  • 1 1/2 cups diced  onion
  • 1 cup diced celery
  • 1 cup grated carrot
  • 1/3 cup peeled and grated sweet apple
  • 1/2 cup oats
  • 3/4 cup breadcrumbs, you can use gluten free
  • 2 tsp fresh thyme (or 3/4 tsp dried thyme)
  • ¼ tsp dried mustard
  • ¾ tsp salt & pepper, to taste
  • ¼ tsp red pepper flakes

Balsamic Dijon Glaze

  • 2 Tbsp of ketchup
  • 2 Tbsp Dijon mustard
  • 1 Tbsp pure maple syrup
  • 2 Tbsp balsamic vinegar

Directions: 

  1. Rinse lentils well. Place lentils into pot along with 3 cups of water.  Bring to a boil and season with salt. Reduce heat to medium/low and simmer, uncovered, for at least 40-45 minutes. Stir frequently and add more water if needed. You wnat to overcook the lentils so it will be easy to mash them.  Mash lentils slightly with the back of a  spoon when ready.
  2. Toast walnuts at 325F for about 8-10 minutes. Set aside. Increase oven temp to 350F.
  3. Mix ground flax with water in a small bowl and set aside.
  4. Heat a teaspoon of olive oil in a skillet over medium heat. Sauté the garlic and onion for about 5 minutes. Season with salt. Then add in the diced celery, shredded carrot and apples.    Sauté for about 5 minutes more. Remove from heat.
  5. In a large mixing bowl, mix all ingredients together.
  6. Grease 2 loaf pans and line with parchment paper. Press mixture firmly into pan. Mix glaze ingredients and then spread on top of loaf.
  7. Bake at 350F for 40-50 minutes, uncovered. Edges will be lightly brown. Cool in pan for at least 10 minutes before transferring to a cooling rack. Do not slice while the loaf is hot.  Wait about 10 minutes. 

THE POWER OF SOUP 2012

The power of soup is strong. I was in the kitchen as a volunteer, at Holy Blossom Temple to help prepare soup to bring to people in need of some warmth over the winter months to follow. I was so surprised how quickly 28 woman can work together to make soup.  Keeping us stirring the pot was guest chef, food writer, and author Lucy Waverman.  While the soup simmered Rabbi Karen Thomashow stirred a little spirituality into the evening, leading a discussion about the mitzvah of Bikur Cholim.  I went home with 2 new soup recipes and the knowledge of how something so simple like soup can bring people together!


The power of soup is strong.  Last week over 40 thousand people gathered at Woodbine Park for Soupstock,  a one-day celebration that features soup created by over 200 Canadian chefs to raise funds to support community action against the Mega-Quarry. Two of those chefs are friends of mine, Lisa Kates, aka A Food Gypsy and  Joanna Sable, from Bumpercrop, both are cooks extraordinaire.  Lisa made a rich caramelized beer onion soup topped with Bumpercrop’s Cameron’s Beer Onions and baguette from Knead Bakery.  A group of us volunteers met at The Depanneur,  a cozy little spot in the Junction to do our cooking, we came to peel onions, chop onions and caramelize onions.  I went home smelling like an onion!

Lisa Kates and Gail Gordon Oliver, from having some fun at the Dep while the onions simmer.

Lisa and Joanna serving up soup at Soupstock

Tasting some soup.


Here are the two recipes from Lucy Waverman that we made at Holy Blossom:

Multi Bean Minestone

Serves 6 to 8

  • 2 tbsp olive oil
  • 1 cup chopped onion
  • 1 tsp of minced garlic
  • 1 cup chopped carrots
  • 1 cup chopped celery
  • 1 28 oz can tomatoes, chopped with juice
  • 1 tbsp chopped fresh  basil
  • 1 tsp dried oregano
  • ½ tsp chili flakes
  • 4 cups stock or water
  • 1 can romano or other beans drained
  • 1 bunch spinach, stemmed and chopped
  • 1 cup zucchini, chopped
  • 1 cup short pasta (macaroni, orzo, etc)
  • Salt and freshly ground pepper
  • Grated Parmesan
  1. In large soup pot, on medium heat, add oil.  Sauté onions, carrots, celery and garlic for 2 minutes or until softened.  Add tomatoes, herbs, chili flakes, stock, spinach, zucchini and pasta.  Simmer for 10 minutes.  Add beans and simmer 10 minutes longer or until pasta is tender.  Season well with salt and pepper.  Serve with grated parmesan.


Sweet Potato and Pear Soup

Serves 6 to 8

The sweeter the pears, the more heat and acid you need to balance the taste.

  • 2 tablespoons olive oil
  • 1 cup chopped onion
  • ¼ cup chopped carrot
  • ¼ cup chopped celery
  • large sweet potatoes, peeled and diced
  • 1 pear, peeled and diced
  • teaspoon fresh thyme
  • 1 teaspoon paprika
  • 5 cups vegetable stock, low salt canned or home made
  • ¼ cup whipping cream, optional
  • 2 teaspoons maple syrup or to taste
  • 4 teaspoons lime juice or to taste

Heat oil in a pot on medium heat. Add onion, carrot and celery and sauté for 1 minute. Add sweet potato, pear and thyme and sauté about 2 minutes. Add paprika and chicken broth. Bring to boil and simmer for 15 minutes or until sweet potato is soft.


KALE MARKET SALAD WITH HONEY POPPY SEED DRESSING

I just came home with basket full of honey crisp apples, perfect for this recipe.

We ate this salad two days in a row for lunch – to great fanfare from Yale and guess what, not a  protest from Gordy.  I am pretty sure it was the honey in the poppy seed dressing and crisp apples in the salad that won him over, I can be sure it was not the kale!

Ingredients for the salad:

  • 1/2 to a full bunch kale
  • 1 -2 apples, sliced thin (pears would be great if you did not have apples)
  • 3 radishes, sliced thin
  • 1 cup cabbage, sliced thin
  • 1 cup radicchio, sliced thin
  • 1 avocado, cut into small cubes
  • 1 cup cherry tomatoes
  • a big handful of pumpkin seeds
  • a big handful of dried cranberries, (look for the unsweetened kind, which you can find in most health food stores). I have been using Prana Organic Cranberries, they are fruit juice sweetened.
  • 1 block of tofu cut into small bit sized cubes, (optional)

Directions:

  1. Wash and dry the kale. Cut out and discard the tough stems. Arrange the leaves into stacks, slice crosswise into 1/4-inch ribbons, and add to the bowl
  2. Core the apples, cut them into 1-1/2-inch-long matchsticks, and add to the bowl.
  3. Slice the raddishes, cabbage, and raddico and add to the salad
  4. Half the cherry tomatoes and add to the salad
  5. Dice avacodo into small chuncks and add
  6. Add tofu cubes
  7. Add pumpkin seeds and cranberries
  8. Toss everthink well with the poppyseed dressing and eat.

Ingredients for the dressing:

  • 1/4 cup cider vinegar
  • 2 to 3 tablespoons honey, check for sweetness, you can always add more
  • 3 teaspoons Dijon mustard
  • 2 teaspoons poppy seeds
  • 1/4 teaspoon kosher salt, or more to taste
  • Freshly ground black pepper to taste
  • start with1/2 cup of vegetable oil, your may need more.  I like to use an organic grapeseed oil
  • 1/3 cup small-dice red onion

Directions:

  1. Place the vinegar, honey, mustard, poppy seeds,  salt and pepper in a large bowl.
  2. Whisk to combine.
  3.  While whisking add the oil slowly until all of it is incorporated.

BLACK-BEAN CHILI WITH BUTTERNUT SQUASH

The trees are changing colours.

I have just raked the leaves

 and I am craving a big bowl of hot chili

 This is dinner.

Ingredients:

  • 1 to 2 tablespoonolive oil
  • 1 large chopped onion
  • 1 medium diced yellow or red  bell pepper
  • 3 garlic cloves, minced
  • 2 (15-ounce) cans black beans, rinsed and drained
  • 2 (28-ounce) can diced tomatoes, undrained
  • 2 chipotle chiles in adobo sauce, chopped
  • 1 teaspoon chile powder, or more to taste
  • 1 teaspoon oregano
  • 1 medium butternut  squash (about 2 pounds) – cut into cubes.
  • 1/4 teaspoon salt, or to taste

Directions:

  1. Heat oil in a large pot over medium heat. Add onion and bell pepper, and cook, stirring frequently, until soft, about 5 minutes.
  2. Add garlic and cook, stirring, a few more minutes.
  3.  Stir in beans, tomatoes, chiplotes, chili powder, oregano and salt.
  4. Simmer, covered, 10 minutes.
  5. Add cubes of butternut squash.
  6. Continue cooking, covered for 30 minutes or until squash is tender.

Cooks notes:

If you want to add some ground meat (1 lb) to this chili, cook the meat with the onions and bell peppers for about 10 minutes or until the meat has browned.

 If you like a thicker chili, you can puree one or two cups in the blender and then add back to the pot.

  If you have the time make the chili early in the day so the flavours have time to develop.

THE RAW CHOCOLATE BROWNIE

Sorry Gordy, the oven is not turned to 350 degrees. The butter is not coming to room temp and the sugar and the flour are still in the pantry, but on the counter are raw walnuts, almonds, fresh soft dates and cacao powder. I am making raw chocolate brownies.

The great thing about these brownies is that I keep them frozen. This means that you can just open up the freezer and cut yourself off a bite when a sweet craving hits which is just about every night, ask Yale she is just as addicted as I am!  I have even tempted Gordy to have a taste, it is chocolate after all… he still loves his cupcakes and lately donuts but I think I can get him to come on over to the raw brownie side!


Here is a very easy recipe. You can make it your own by adding some unsweetened coconut, orange zest, cacao chips, dried cherries, apricots, you get the idea.

The Raw Chocolate Brownie

Ingredients:

  • 2 cups whole walnuts (or pecans)
  • 2 ½ cups Medjool dates, pitted
  • 1 cup raw cacao powder
  • 1 cup raw unsalted almonds, roughly chopped or any nut you like.
  • ¼ tsp. pink Himalayan salt

Directions:

1. Place 2 cups of walnuts in food processor and blend  until the nuts are finely ground.

2. Add the cacao powder and salt. Pulse to combine.

3. Add the dates one at a time through the feed tube of the food processor while it is running. What you should end up with is a mixture that when pressed with your fingers will  stick together, (if the mixture does not hold together well, you will need more dates).

4. In a large bowl  combine the walnut-cacao mix with the chopped almonds. Press into a lined cake pan, (I line my glass Pyrex with parchment paper).

Place in freezer or fridge until ready to serve, best to eat when they are very cold or frozen.

THIS IS MY GREAT-GRANDMOTHER’S GEFILTE FISH

My grandmother Jenny Mandel nee Schwartz, came from Minsk, Russia when she was just a baby. Her mother Mary who I am named after made gefilte fish for her family on Rosh Hashanah and Yom Kippur. When Jenny was old enough to learn her mother taught her and her sisters, Sarah and Edith.

It all starts with fresh fish. According to my mother, Jenny would  pick out her fish, ten pounds of white fish and always one Pike, once home the fish were kept alive in the only bathtub in the house.  The next day newspaper would be spread around the floor and kitchen table, the fishmonger would stop by…it was time to kill the fish.  As a child my mother never took a bath and she never ate the fish! 

When Jenny was in her 80’s it was time to teach my mother Irene. From then on twice a year my mother would make the gefilte fish with her late best friend Theda Warner.  I know that they had a long fun day of cooking, chopping, cleaning and lots of good gossip!  And fortunately we don’t have to worry about the bathtub, we can buy our fish already cleaned from Nortown!

Well, my mother turned 80 this year so I guess it is time I learn to make the fish!

I hope to carry on the tradition with my grandmother’s handwritten recipe.

 My mother Irene.

RAW ORANGE-DATE SQUARE

“RAW DATE SQUARES” …well that’s what Gordy said.  He was a bit disappointed that the house did not have that what are you making , you are driving me crazy smell, but when he tasted them that was all forgotten and I was Queen!

Ingredients:

For the Filling:

  • 2 cups chopped, pitted dates
  • 2 Tbsp. water
  • Juice of 1 large, organic orange (1/2 to 3/4 cup)
  • Zest of 1 large, organic orange

For the crust:

  •  2 cups of walnuts (or any other nuts you like)
  • 1 cup raw oats ground (I used my Cuisnart to pulse into a flour like consistency)
  • 2 tsp. ground cinnamon
  • 3 to 4 Tbsp pure maple syrup or agave (taste for sweetness)

Directions:

1. Soak the dates in the water and orange juice for about 30 minutes, until they become a bit soft.
2. Coarsely grind the nuts in a food processor, then add theoats and pulse to mix.
3. Add cinnamon and then maple syrup one tablespoon at a time until the mixture holds together.
4. Lightly oil a 9-inch square pan or round cake pan with coconut, grapeseed oil or any vegetable oil. (I like the taste of coconut oil).
5. Press a little over half of the nut mixture into the bottom of the pan, reserving the rest for later.
6. Puree the date and orange juice mixture until smooth but with a bit of chunks left.
7. Crumble the remaining half of the crust mixture over the dates and press lightly with your hands.
8. Sprinkle some quick oats on top for garnish.
9. Refrigerate or freeze before serving.
10. I like to snack and keep the leftovers in the freezer.


GLORIANNE’S MOCHA CAPPUCCINO MERINGUES

My cousin Glorianne is a one-of-a-kind kinda girl. We have spent many summers together at Lake Simcoe but time has moved on and so has she and last weekend we visited at her beautiful cottage near Haliburton, Ontario on Coleman Lake. When we arrived there was a big cookie sheet in the oven, the oven door was slightly ajar, we could peak inside, hm-mm are these for us we wondered, a welcome to Colman Lake home baked treat?  Well it was 11 o’clock after all and we had been driving for 3 hours… and doesn’t that mean milk and cookies? Maybe, but Gordy was digging in…  “ Wait they are for a party tomorrow,” cried Glorianne.  Just one, and then one more… they were so delish that before we knew it the cookies were gone. Oh well, tomorrow is another day and now Glorianne can show me how she makes these one of a kind melt-in-your mouth meringue’s.

Thank you Glorianne, Tom and Gwynne for a great weekend and for sharing your recipe with me. There is nothing like a good cookie made with love!

Ingredients:

  • 2 large egg whites – at room temperature

  • 1/8 tsp salt

  • 1/8 tsp cream of tartar

  • ¾ cup white sugar

  • 1 tsp instant coffee

  • 1 tsp coco powder

  • ¾ cup of Skor bits

Directions:

  1. Set oven to 300F

  2. Prepare a cookie sheet by lining it with parchment paper

  3. Add the sugar, coco and coffee together in a small bowl – mix well.

  4. Beat egg whites at high speed for 30 seconds and add salt and cream of tartar to egg whites. Continue to beat until you have soft peaks.

  5. Continue to beat the eggs at high speed and slowly add the sugar, coco, coffee mixture.

  6. Continue to beat until it is well mixed and you get hard peaks.

  7. Stop beating the meringues and gently fold the Skor bits into the mixture with a spatula, until just mixed.

  8. Spoon the mixture in teaspoon size mounds

  9. Place in the oven for 25 minutes. Then open the oven door 2 inches and let the meringues cool in the oven for another 30 minutes.

  10. Eat all at once!

You cannot make these cookies on rainy days.

COOKING PAELLA WITH MY BROTHER

My brother Lawrence loves to cook.  He makes a killer pasta sauce, an authentic chicken parmesan but when I hear that he will be cooking paella I know that I will be eating very well.  I wanted to learn his secret so I have asked him and Judy to the cottage with one thought,  paella for dinner.  So instead of bathing suit, sun block and flip flops he arrived with a paella pan in hand, a bag of bomba rice, tiny threads of saffron and a bottle of Spanish wine, so here we go….

As with many authentic recipes there are many variations, but here are a few of the secrets from my brother that you must follow…

 You must make a sofrito (composed of tomatoes and onions), you must use a rice called ” bomba” but any paella rice from Valencia will do, there must be a mix of proteins in the dish, and it must develop a caramelized crust of rice called socarrat at the bottom of the pan which is the prize of a well-made paella. And our fav tip, you must drink Spanish wine!

When making the sofrito, we sautéed a mixture of  finely chopped onions, garlic, and a tin of very good tomatoes.

The bomba rice is able to absorb three times its volume in liquid, so it is perfect for paella recipes. You can buy this rice at Pasquale Bros in Etobicoke.

Traditional paella is cooked outdoors, over wood-fire coals, which gives a pretty even heat to a wide pan. Guess who got the grill going for us…my own personal grill master, Gordy!

Our pan of grilled seafood and chorizo paella and to our surprise we were  halfway through eating when I noticed that we did have the crispy socarrat on the bottom of the pan!  BRAVO!

THE BEST LENTIL SALAD, EVER

I love this lentil salad recipe,  I have been making this salad all summer long and am often asked for the recipe.  My sister-in-law Marilyn is my biggest fan and I am sure that I have seen her eating it at the cottage for breakfast!

You can really make this recipe your own by adding  your favourite veggies, nuts and some crumbly cheese.  I like to toss in some raw pumpkin seeds, raw sunflower seeds and baby arugula, and if it is lunch time I just may crumble in a bit of goat cheese too. 

The Best Lentil Salad

I found this recipe on the food blog My New Roots and it is for sure a recipe you will come back to time and time again.

Ingredients:
2 ¼ cups (1 lb.) Du Puy lentils
1 medium red onion, diced
1 cup dried currants (you could also use raisins or other dried fruit)
1/3 cup capers

Vinaigrette:
1/3 cup cold pressed, extra virgin olive oil
1/4 cup apple cider vinegar
1 Tbsp. maple syrup
1 Tbsp. strong mustard
2 tsp. salt
2 tsp. pepper
1 tsp. ground cumin
1/2 tsp. turmeric
1/2 tsp. ground coriander
½ tsp ground cardamom
1/4 tsp. cayenne pepper
¼ tsp. ground cloves
1/4 tsp. freshly grated nutmeg
¼ tsp. ground cinnamon

Optional add-ins:
Arugula
Nuts and seeds
Goat cheese
Fresh herbs: flat-leaf parsley, cilantro, basil
Sprouts
Crispy seasonal veggies

Directions:
1. Rinse lentils well, drain. Place in a pot and cover with a 3-4 inches of water, bring to a boil, reduce to simmer. Check lentils for doneness after 15 minutes, but they should take about 20 minutes in total. You will know they are cooked if they still retain a slight tooth – al dente! Overcooking the lentils is the death of this dish. Be careful!
2. While the lentils are simmering, make the dressing by placing all ingredients in a jar with a tight fitting lid and shake vigorously to combine.
3. Finely dice red onion – the salad is best if all the ingredients are about the same size. If using raisins, chop them roughly to make them a bit smaller, and do the same with the capers if they are large.
4. When the lentils are cooked, remove from heat, drain and place under cold running water to stop the cooking process. Once cooled slightly but still a little warm, place lentils in a large serving bowl and toss with dressing. Add other onion, capers, and currants. If using other add-ins such as herbs, greens, or cheese, wait until just before serving. Otherwise, this salad can hang out in the fridge for a couple days.

MEXICAN GRILLED CORN

I have had many memorable times with my friend Jayne. We go way back to summer camp in Temagami, we ran a hand-painted t-shirt business from our basements, I have followed her in snowshoes, in sail boats and on an almost road trip to find SondheimMerrily We Roll Along is the beat that Jayne rolls with.

During the summer I am lucky to spend a weekend at her cottage where we do a lot of good eating and this Mexican corn was on the menu.  When you eat this corn you really just need a bottle of chardonnay, and lots of napkins, but  no matter how and when you eat it, the end result is always the same: a sweet, crunchy, spicy,  juicy messy taste of summer.  So here’s to good friends!

This grilled corn is perfect to make in late July or August when the corn is fresh.

I love the charred kernels.

Mexican Grilled Corn
Serves 4

Ingredients:

  • 4 ears sweet corn
  • 1/4 cup mayonnaise
  • 1/2 teaspoon lime juice
  • 1/8 teaspoon cayenne pepper of chile powder
  • salt, to taste
  • 2/3 cup crumbled cotija anejo cheese (substitute parmesan or feta)
  • lime wedges
  • extra cayenne pepper of chili powder, for sprinkling
  • fresh finely chopped cilantro for optional garnish

Directions:

  1. Soak corn (in husks) in cold water for 25-30 minutes.
  2. Prepare a medium-hot grill.
  3. Peel back the corn husks leaving them attached at the end. Remove the silk. Pull the husks back up and tie with a spare piece of husk or a small piece of cooking twine.
  4. Place the ears on the grill. Cook 15 – 20 minutes, turning several times to ensure even roasting.
  5. Then cool ears slightly, pull back the husks (to use as handles) and place the ears directly on the grill (with husks overhanging the side) for 5-7 minutes, or until they reach desired level of charring.
  6. Place crumbled cheese on a plate large enough to fit an ear of corn.
  7. In a small bowl mix the mayonnaise, lime juice, cayenne pepper or chile powder, and salt.
  8. When the corn is cooked, brush each ear with some mayo sauce then roll in the cheese.

Serve with lime wedges, additional cayenne pepper or chili powder, and fresh finely chopped cilantro.

** Cotija anejo, a mild-flavored Mexican cheese with a crumbly texture, can be found in Mexican markets or in the refrigerator section of most major supermarkets. Queso fresco, another mild Mexican cheese, is a good substitute and also can be found in most major supermarkets.

GRILLED WHOLE FISH WITH LEMON AND FRESH HERBS

I love to eat and grill fish.  But I have never made a whole grilled fish, so here I am at the cottage with family and this is the perfect place to try.  I bought three whole Lake Trout’s fresh from Georgian Bay at Johnny’s Fresh Fish and Seafood in Barrie, Ontario. As long as you have a good, fresh fish, you’ve done the hardest part.

I first sprinkled the fish with kosher salt and freshly ground black pepper then stuffed them with lemon slices, chopped garlic, fresh parsley, chives and lemon thyme. I rubbed the fish with lots of olive oil and more kosher salt and pepper.

I must say I was feeling pretty  impressed with myself, but I can’t take all the credit, I am lucky to have my own personal bar-b-q’er who always makes sure he has a Webber to grill on! Gordy, you cooked the fish perfectly.

 Now the fun part, present to your guests, collect your kudos and eat!

PEACH AND BLUEBERRY CRUMBLE

Zach is coming for dinner, all year long I make his favourite desert, a crumble. He loves it made with any fruit, with any topping, in any season.  At the fruit store today I found fresh Ontario peaches and wild blueberries so that’s what I will be baking tonight. I know he will be happy and as always take home the leftovers!

Ingredients

For the fruit:

  • 6 to 8 peaches
  • 2 teaspoons grated lemon zest
  • 2 tablespoons freshly squeezed lemon juice
  • 1/2 cup granulated sugar
  • 1/4 cup all-purpose flour
  • 1 1/2  cups fresh blueberries

For the crumble:

  • 1 cup all-purpose flour
  • 1/3 cup granulated white sugar
  • 1/4 cup light brown sugar, lightly packed
  • 1/2 teaspoon kosher salt
  • 1/4 teaspoon ground cinnamon
  • 1/4 pound (1 stick) cold unsalted butter, diced

Directions

Preheat the oven to 350 degrees F.

  1. Immerse the peaches in boiling water for 30 seconds to 1 minute, until their skins peel off easily. Place them immediately in cold water.
  2.  Peel the peaches, slice them into thick wedges, and place them in a large bowl.
  3. Add the lemon zest, lemon juice, granulated sugar, and flour. Mix well.
  4. Mix in the blueberries.
  5. Spoon the mixture into a well greased 9 x 13 pyrex or a deep dish pie pan.
  6. For the topping, combine the flour, granulated sugar, brown sugar, salt, cinnamon, and the butter in the bowl of a food processor.
  7.  Mix using the on/off  pulse switch until the mixutre looks crumbly.
  8. Sprinkle evenly over the fruit.
  9. Bake for 40 to 45 minutes, until the top is browned and the juices are bubbly.

Serve warm or at room temperature.

ITALY IN MANHATTAN – PANSOTTI WITH LEMON BUTTER SAUCE

I have recently returned from New York City.  Our trip was to celebrate my mothers’ 80th birthday and celebrate we did, with gallery tours, Broadway, lots of walking, shopping and eating!

One of the highlights of our trip was lunch at Mario Batali’s incredible Italian mega-marketplace called Eataly. Eataly is for the food obsessed. Here you will find everything Italian, there are many small restaurants, fresh meats and cheeses, pastas, oils, sauces, kitchen staples and kitchen gadgets, the list goes on. And did I mention that it is the size of a Home Depot!

We had lunch at La Pizza & Pasta, a restaurant inside Eataly.

I had the Inslate Bianca to start.

Then I decided on the Pansotti with Lemon Butter Sauce.  The pasta was stuffed with ricotta and spinach then sautéed with lemon and butter and topped with pistachios. So simple and so delicious. This was heaven on my plate.

I have been dreaming of this pasta since I have been home and how I could make it in my own kitchen.  Well tonight is the night to try and I hope to make Gordy very happy.  

My recipe for Pansotti with Lemon Butter Sauce
Pansotti is a triangular shaped ravioli.  I could not find it the day I went shopping so I used agnolotti, a half moon shapped pasta that I bought  from Bologna Pastificio.

This recipe will serve 4.

Ingredients:

  • 4 tsp olive oil
  • 2 – 3 clove garlic crushed
  • 10 Tbs unsalted butter (you must buy the best butter you can find)
  • zest of 1 lemon
  • juice of two lemon
  • 1/2 cup toasted & chopped pistachios
  • 2 lb spinach & ricotta pansotti or ravioli

Fresh parmesan chesse for grating on top and freshly ground pepper to finish. 

Directions:

  1. Boil water for ravioli and while it is cooking prepare the sauce, salt the water.
  2. In a large saucepan  over medium heat add olive oil and crushed garlic. Cook until you can smell the garlic.
  3. Add butter and turn down heat constantly stirring to melt.(do not brown the butter).
  4. Add lemon juice and zest and cook for a few minutes then turn off the heat.
  5. Add salt and pepper to taste.
  6. Drain ravioli and toss in the lemon butter. (You can add the drained raviloi directly into the pan with the lemon butter).
  7. Divide among 4 plates.
  8. Top with the toasted pistachios and a little grated Parmesan and a grind of pepper.

Here is my interpretation. Gordy, Zach and Yale loved it, and so did I.

VEGGIE BOWL WITH GINGER-TAHINI DRESSING

Yale is back in Toronto and living at home. I now have another veggie-lover in the house, Gordy you are outnumbered! Yale loves her veggies as much as I do so last night we made this bowl of veggie goodness with a raw tahini dressing.

Tahini dressing is popular at many vegetarian and raw restaurants.  I wanted to try and recreate it at home so I have been playing around in my kitchen and I think that this recipe works well over raw or lightly steamed veggies.  I  love tossing this with rice or quinoa and veggies for lunch or drizzling it over tofu for dinner.

This is what Yale and I made  and guess what …Gordy happily ate it too! (Thought I must add that he did eat a a steak sandwich for lunch)!

This beautiful veggie bowl is simple, colorful, and healthy!

Ginger-Tahini Dressing

  • 2 T raw tahini (you can buy raw tahini at the health food store).
  • 1  1/2 t fresh ginger
  • 1/2 cup oil
  • 1/3 cup water
  • 1-2 cloves garlic
  • 1 T lemon juice (about 1/2 small lemon)
  • 1 to 2 t Nama Shoyu or tamari
  • 1 to 2 t agave
  • dash of cumin

Combine all the ingredients in a small food processor or blender and blend until smooth. Taste and then play around with it until you get your desired thickness and taste.
Store any leftovers in a sealed glass jar in the fridge for up to 1 week.

For these bowls I used cooked quinoa (follow package directions), then topped it with steamed broccoli, roasted sweet potato, raw shredded beets, carrots, sprouts and a handful of beans. Make this recipe your own and use whatever vegetables you like.

THE BEST TOMATO SAUCE EVER, REPOSTED FROM 20102

A trip to Montreal always includes a stop at the famous Fairmount Bagel. I cannot buy a dozen bagels without Gordy eating a least two from the paper bag, the bagels are freshly baked in a wood-fired oven and yes impossible to resist! So while walking and eating bagels we noticed this tiny little shop, Drogheria Fine, filled with jars and jars of tomato sauce, olive oils and other delights in mason jars.

Just as you would be welcomed into your grandmother’s kitchen, owner Franco Gattuso welcomed us into his tiny shop. Bottles of olive oil were on the counter and pots of tomato sauce were boiling on the stove in the open kitchen and Franco offered us a spoonful right from the pot!  He calls the sauce La Salsa della Nonna which means Grandma’s’s Sauce.  We went home to Toronto with four jars, but soon realized that was not enough.  Now when visiting Montreal we get our dozen bagels and a dozen jars of Nonna’s sauce. 

Yale and owner Franco Gattuso.