• home
    • Appetizers
    • Breakfast
    • Baking
    • Desserts
    • Mains
    • Muffins
    • Raw
    • Salads
    • Sides
    • Snacks
    • Soups
    • Vegan
    • Vegetarian
    • Veggie Burgers
  • Work With Me
  • Info
  • BUY MY HOME-MADE BONE BROTHS
  • Instagram
Menu

love thy carrot

Street Address
City, State, Zip
Phone Number

love thy carrot

  • home
  • Recipes
    • Appetizers
    • Breakfast
    • Baking
    • Desserts
    • Mains
    • Muffins
    • Raw
    • Salads
    • Sides
    • Snacks
    • Soups
    • Vegan
    • Vegetarian
    • Veggie Burgers
  • Work With Me
  • Info
  • BUY MY HOME-MADE BONE BROTHS
  • Instagram

Moringa Latte

February 12, 2019 Marla Hertzman
moringa_tea.jpg
moringa1.jpg
moringa2.jpg

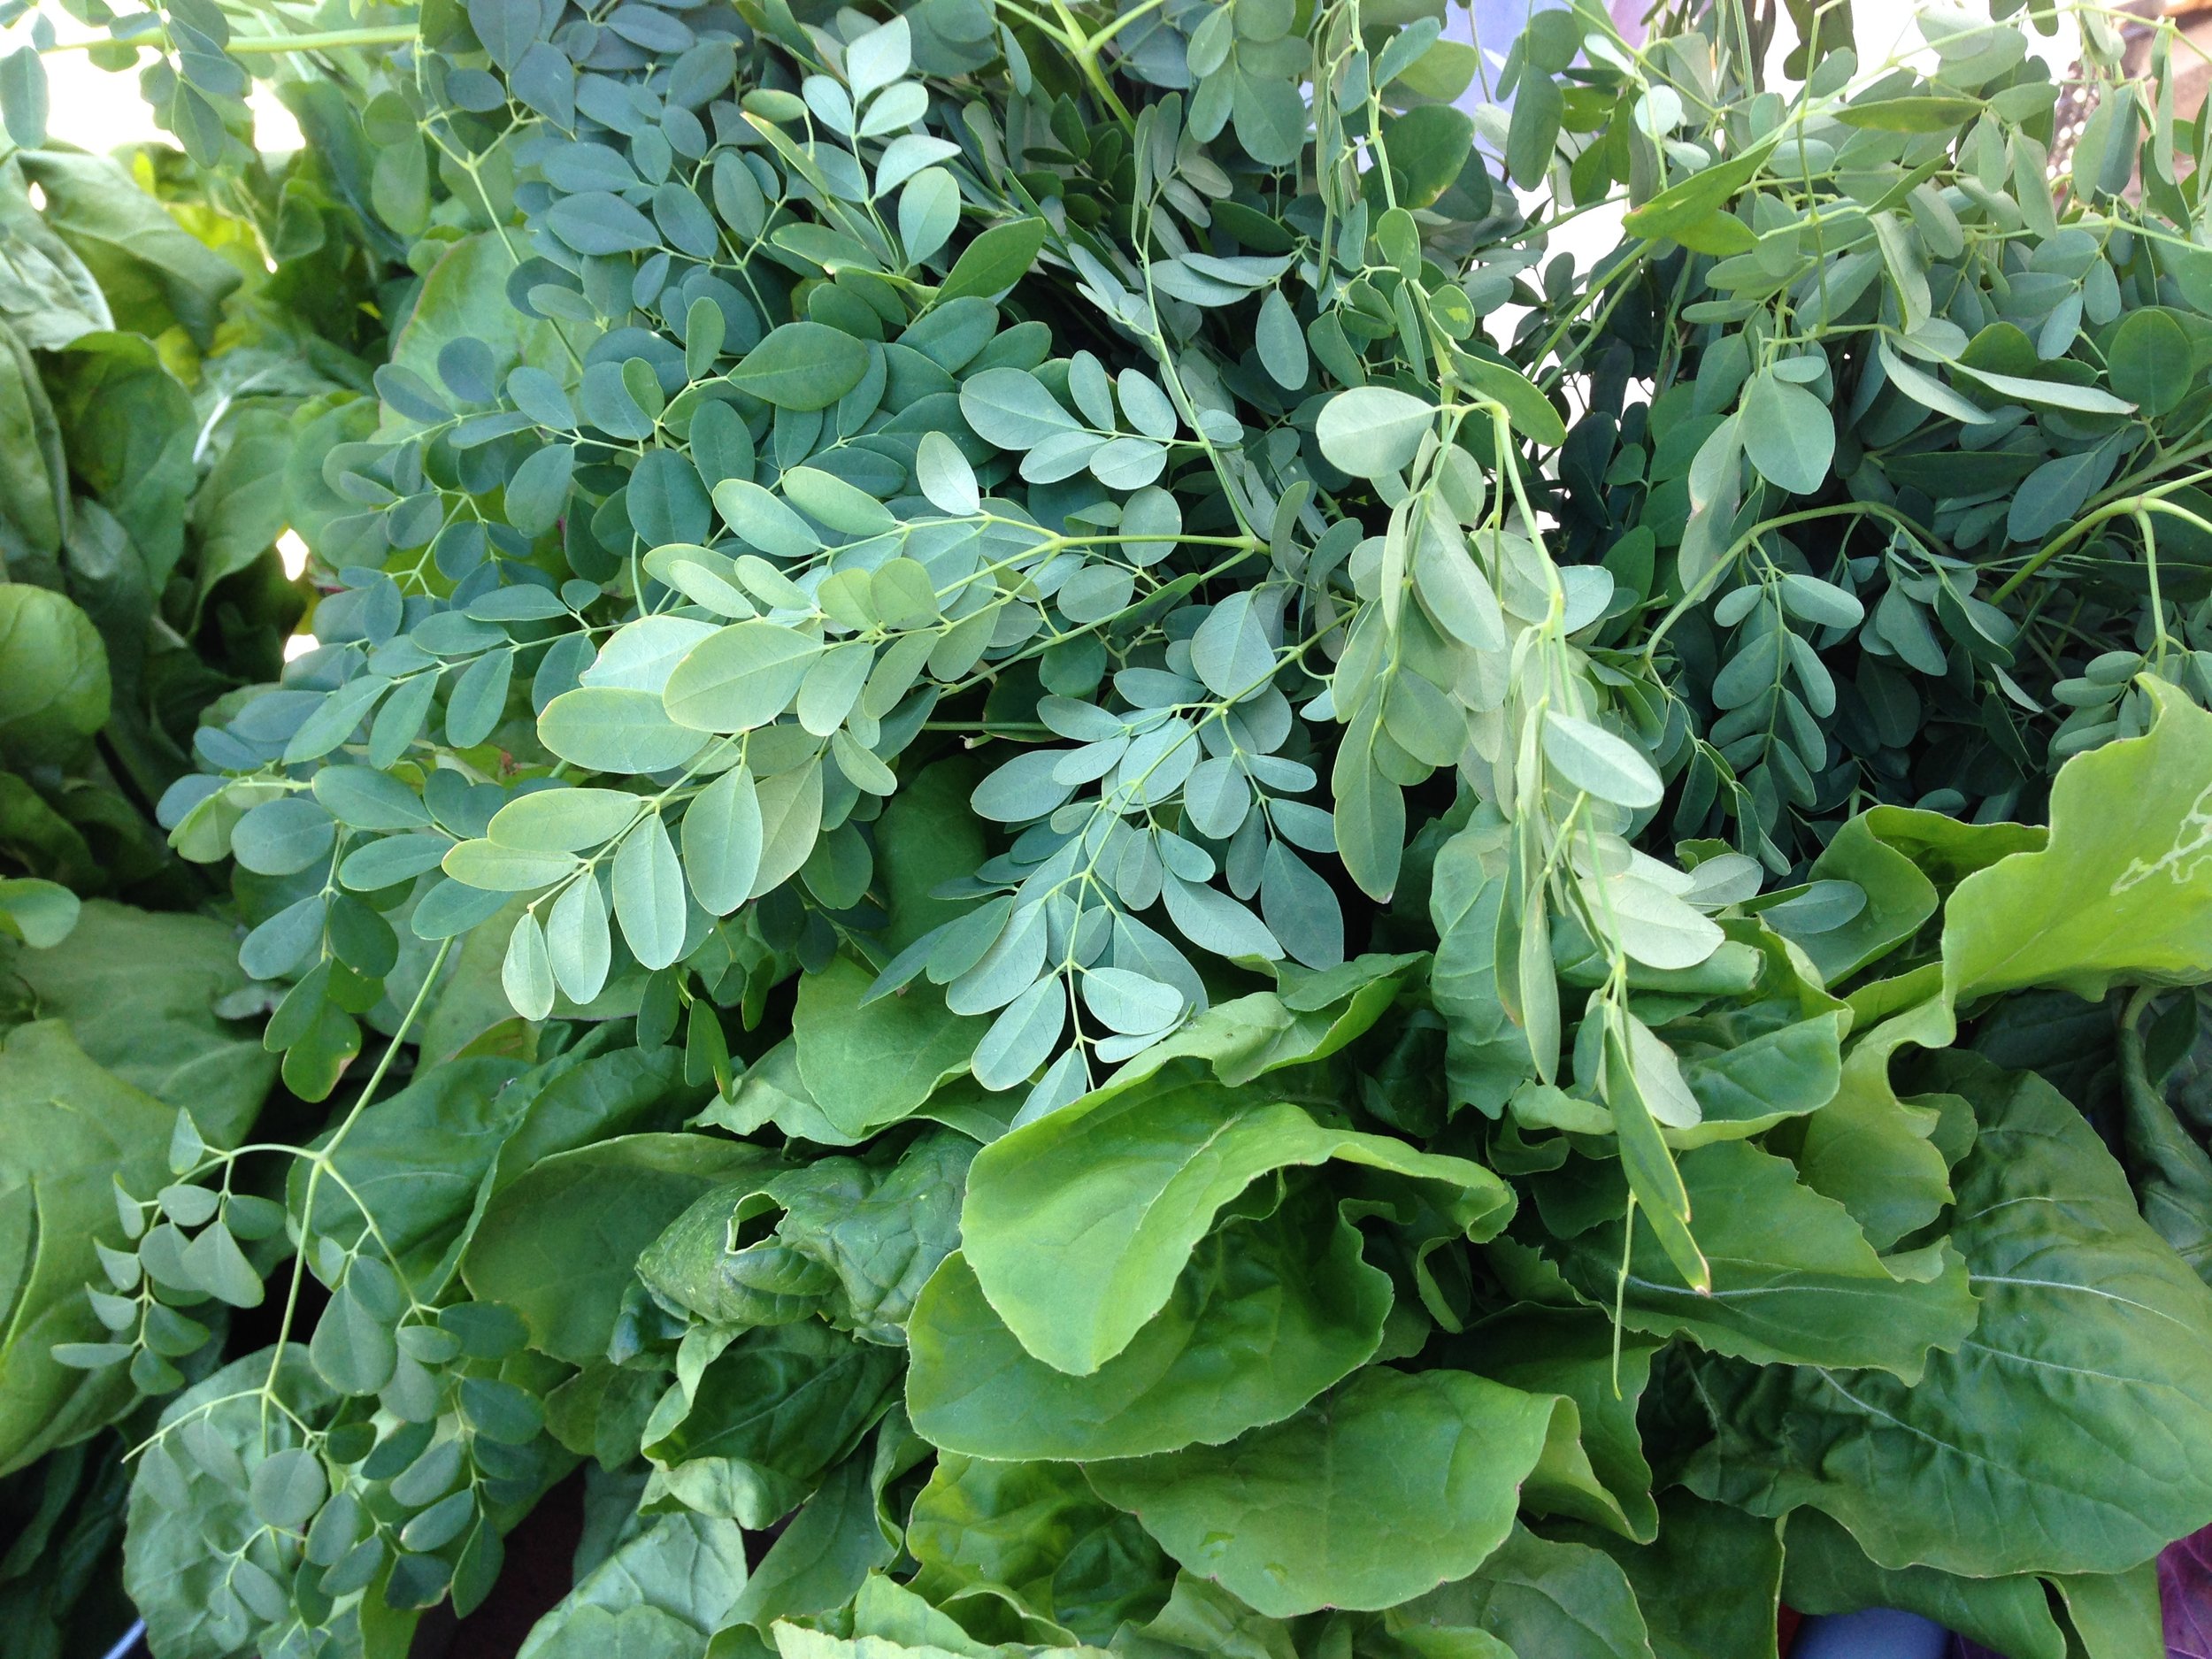
I first discovered moringa at a farmers market in Florida. It was tucked in with all the other fresh herbs. I had never seen or heard of moringa but after talking with the farmers who were excited to share the benefits of the plant I bought a bunch to add to my salads and smoothies. Moringa needs a lot of sunshine and warm weather to grow. So if you live in a warm climate you could try growing it in your garden but here in Canada it will be a challenge, so you will definitely need a visit to your local health food store where you can find it in a powdered form.

This superfood comes from the moringa tree and is often called the “miracle” tree for lots of good reasons. It’s packed with vitamins and minerals and a few leaves or a spoonful of moringa will be more than enough to give you a daily nutritional boost. Moringa leaves are high in protein and a good sources of Vitamins A, B, and C. They also have high levels of calcium, iron, and potassium, making it ideal for anyone looking to increase their nutrient intake.

Try adding moringa to smoothies, juices, or stir a spoonful into a bowl of yogourt or oatmeal. It can also be used to make a tea, just mix moringa powder into hot water with a slice of lemon and honey. I have not tried baking with moringa but I am playing around with a Moringa Morning Muffin Muffin recipe - coming soon.

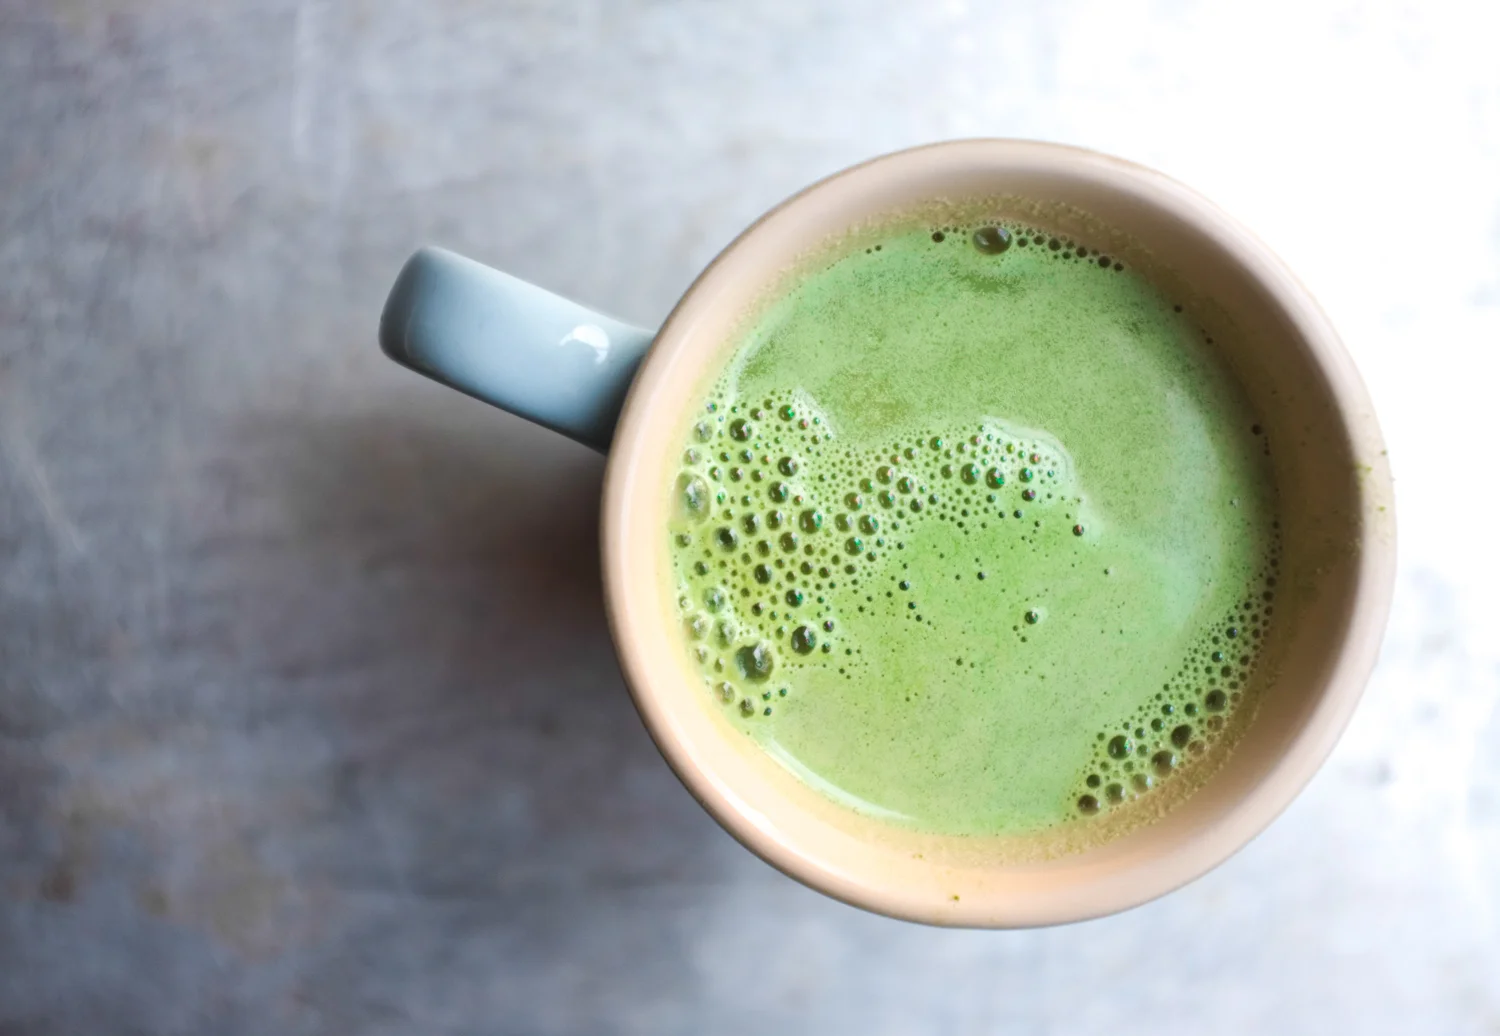
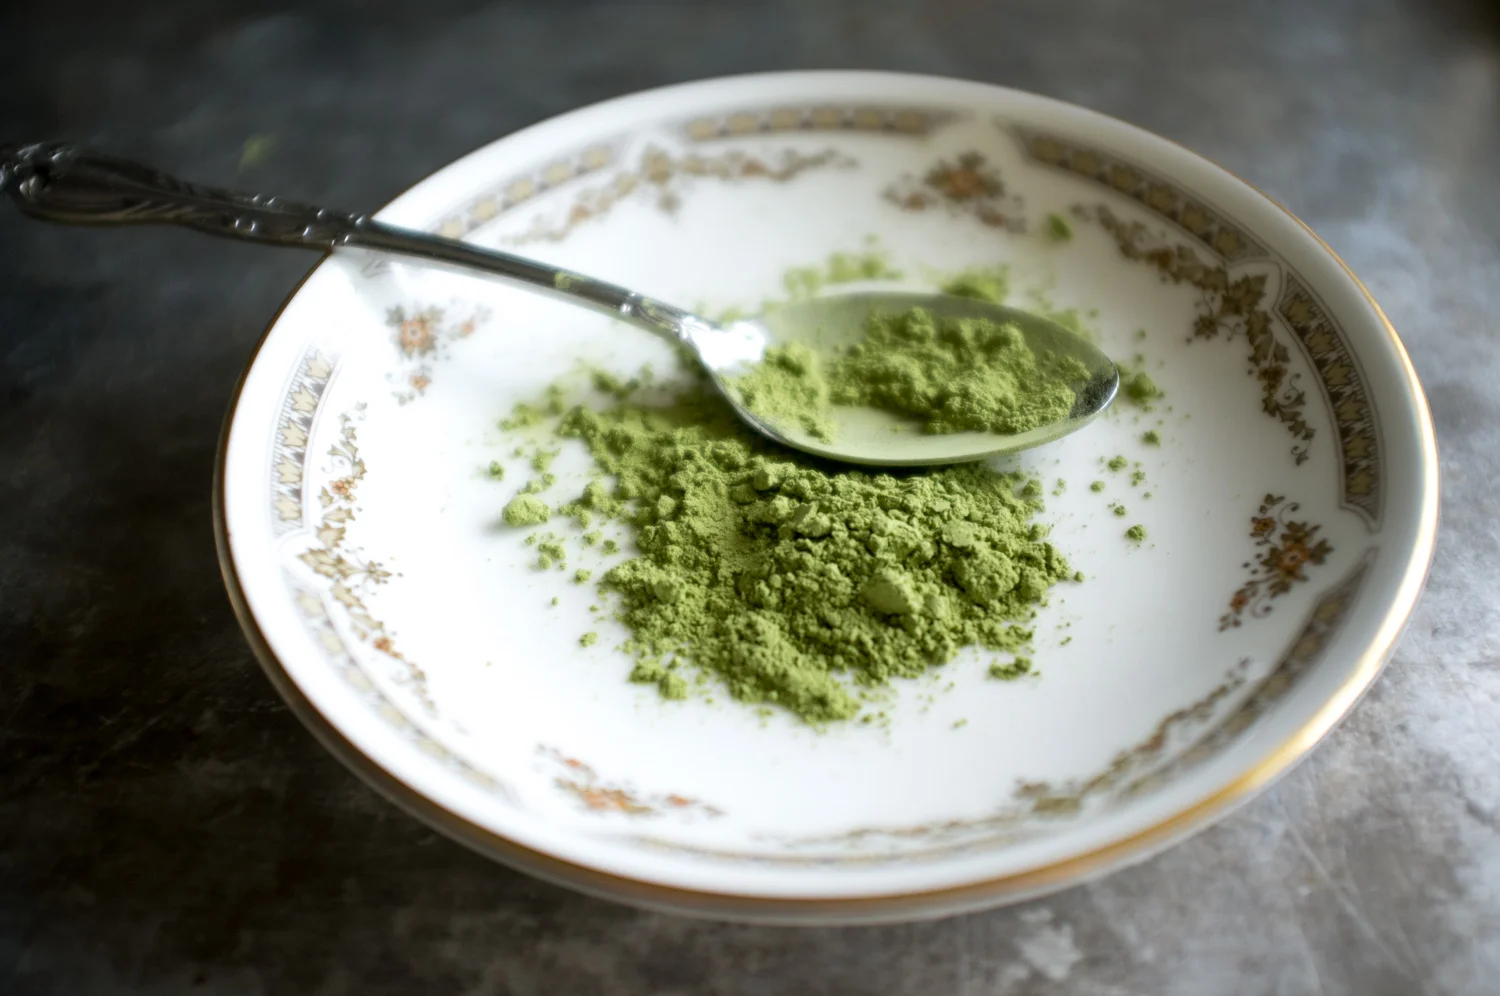
To make this latte I am using powdered moringa, it is a vibrant green colour and has a bright earthy rich taste. When mixed with some almond milk and honey it is deliciously warming; perfect for this mid-February stay at home snowy day.


Moringa Tea Latte
Serves 2

Ingredients

1 1/2 tbsp moringa powder
3 cups plant based milk
2 tsp maple syrup, honey, stevia or any sweetener your like to use
1 tsp coconut oil

Directions

1. In a small pot over medium heat, combine all ingredients and whisk thoroughly until well-combined.
2. Just before the boiling point remove from heat.
3. Blend well with a whisk to make it a bit frothy.
4. Pour into two mugs and enjoy.

print recipe
In Breakfast, Snacks, Vegan, Vegetarian, Desserts
Comment

Vegan Baked Mac and Cheese, with peas...so yummy!

January 9, 2019 Marla Hertzman
mac&cheese.jpg
mac&cheese1.jpg
mac&cheese3.jpg
mac&cheese4.jpg

Who grew up eating Kraft Dinner? I sure did and so did my brother, those were the days when kids came home for lunch. It was our weekday lunch staple served with a glass of Allen’s apple juice sitting in front of the TV watching the Flintstones. This was the lunch kids dreams were made of…afternoon gym and arithmetic classes seemed far far away.

I still love a bowl of mac and cheese now and then but how to create that umami taste that mac and cheese has without the cheese? My secret is lots of nutritional yeast, butternut squash and a dash of dijon blended together to make this savoury sauce. Help me, I could not stop eating this creamy mess, it is addictive - but I had to control myself so I could save some for the photo.

Don’t forget the peas!


Vegan Baked Mac and Cheese
This recipe makes 6 hearty servings.

Ingredients
2 cups butternut squash cut into 1 inch cubes
1 clove garlic, leave skin on, (optional, but I like the flavour)
2 tbsp arrowroot powder or cornstarch
1 cup unsweetened almond milk, or your favourite non dairy milk, divided
1 tbsp canola oil or grapeseed oil
1 tbsp Dijon mustard
1 tsp onion powder divided
1 tbsp lemon juice
1 cup nutritional yeast
1 tsp red chili flakes
1 tsp turmeric
1 ½ tsp sea salt
½ lb macaroni noodles, use any brand you like, they can be gluten-free
1 cup frozen peas, (optional, but I think delicious)

Bread Crumb Topping
1 cup breadcrumbs, you can use gluten-free
1/2 tsp salt
1/4 tsp pepper
2 - 3 tablespoons oil

Directions
1. Preheat oven to 375°.
2. Prepare baking sheet with parchment paper. Arrange cut up squash on cookie sheet along with the garlic. Drizzle the squash and garlic with oil and 1/2 tsp onion powder, toss well. Bake for 30 to 40 minutes or until the squash is soft. Remove from oven and set aside.
3. Mix the arrowroot in a small bowl with ⅓ cup of the milk until smooth and all the lumps are gone. Set aside.
4. In a sauce pan over medium heat add in the remaining milk along with the mustard, onion powder, turmeric, chili flakes, lemon juice, nutritional yeast, and salt. Mix well with a whisk.
5. Turn the heat to medium high and stir in the arrowroot and milk mixture, and continue to whisk just until the sauce begins to thicken up, this will take about 2 to 3 minutes.
6. Transfer the sauce to a blender or food processor, add the roasted butternut squash and squeeze out the roasted garlic, blend until smooth and creamy.
7. Meanwhile, cook the macaroni noodles just until al dente, when the noodles are cooked, drain well, saving about a cup of the pasta cooking water.
8. In the same pot that was used to cook the noodles add the drained noodles back and pour the cheese sauce over the noodles, mix well. If using, add the peas and mix again.
9. Spoon the cheesy macaroni into an oven proof dish. Mix breadcrumbs with salt, pepper and oil in a small dish until combined. Sprinkle over the top of the mac and cheese and cook for 20 - 25 minutes or until it is hot and the crumb topping is golden brown.

Cooks Notes
This cheezy sauce is really good on top of roasted or steamed veggies.
I used my Blendtec to blend the sauce.

print recipe


In Mains, Vegan, Vegetarian
Comment

Savoury Crunch Granola - I love giving this as a gift for the holidays.

December 17, 2018 Marla Hertzman
granola_savoury1.jpg
granola_savoury3.jpg
granola_savoury2.jpg

I love a sweet granola, but how about a savoury granola?

Its crispy, salty and has a little heat and a lot of protein. Sprinkle on top of baked squash, over sautéed vegetables or add a spoonful to a bowl of soup, or some crunch to a salad. This stuff is delicious, addictive and healthy too. I an a big fan of using canola oil when you don’t want your oil to take over the flavours.


Savoury Crunch Granola
This recipe makes about 2 cups
Add to just about anything that could use a bit of crunch.

Ingredients:
1 cup rolled oats
1/4 cup canola oil
3 tbsp maple syrup
1/2 tsp salt
1/2 tsp coriander
1/2 tsp turmeric
1 tsp smoked paprika
1 1/4 tsp chili powder
1/4 tsp cayenne pepper
1/2 tsp ginger powder
2 tbsp raw pumpkin seeds
2 tbsp raw sunflower seeds
1/4 cup raw pecans or walnuts

Directions:
1. Preheat oven to 300 F. Line a large baking sheet with parchment paper.
2. In a small bowl, combine oil, maple syrup, salt, coriander, turmeric, smoked paprika, chili powder, cayenne and ginger and mix well.
3. In a large bowl, combine oats, pumpkin seeds, sunflower seeds and pecans.
4. Pour the oil and spice mixture over the oats and nuts, mixing until everything is well coated.
5. Spread the mixture in one even layer on baking sheet and bake for about 40 minutes until golden brown, stir the mixture every 10 minutes.
6. Let mixture cool completely and store it in a sealed jar or container.

Cooks Notes
You can use any combination of seeds and nuts that you like.
If you like it really spicy then add more cayenne pepper.
Keeps best in an airtight container at room temperature for up to 1 month.
Try mixing things up a bit by using spelt flakes, rye flakes or quinoa flakes.

PRINT RECIPE
In Baking, Snacks, Vegan, Appetizers
Comment

Jackfruit - Two Easy Recipes

December 9, 2018 Marla Hertzman
jackfruit3.jpg
jackfruit5.jpg
jackfruit4.jpg
jackfruit1.jpg

Jackfruit is the new baby of the vegan and vegetarian world. If you have never hard of jackfruit you are in for a real treat. It is a tropical fruit, mild in flavour and easy to find in most grocery stores. It has great texture that makes it the perfect substitute for meat.

The star of both of these recipes is the jackfruit. Karen from Nutrilicious and I were busy again, this time cooking with Jackfruit. We tried the Upton’s Naturals brand which is sold in a pouch and is already chopped into bite size pieces, ready to use, cutting down on your prep time. We also tried the Native Forest Jackfruit in a can, the pieces of jackfruit are bigger and require some chopping. I thought that both products were similar in taste - but know how much you need for your recipe because the Native Forest is a 14 ounce tin and the Upton’s package is only 7 ounces, so depending on your recipe you may need two packages. Both products need to be rinsed, drained and dried well before using; so you don’t water down your dressing or sauce.

Some Jackfruit Trivia…
Jackfruit is considered the largest tree-borne fruit in the world.
Jackfruit is high in magnesium, vitamin B6 and antioxidants, which means healthy skin and hair.
It thrives in tropical climates and is popular throughout Southeast Asia, Africa and Brazil.
It's high in fiber, potassium, iron, magnesium and calcium
Low-carb and low in calories, about 30 calories in 100 grams and 5 grams of fiber!

FOR THE RECORD…My in house taster Gordy had no idea what he was eating… Jack -who?


BBQ Jackfruit
This recipe makes 4 generous servings.

Ingredients

For the jackfruit
2 14-ounce cans of young green jackfruit in water 
2 tbsp brown sugar
1 tbsp oil, (I use grapeseed or canola)
1 tsp paprika
1/2 tsp chili powder
1 tsp garlic powder
1/2 tsp salt
1/2 tsp pepper
3/4 cup BBQ sauce, use your favourite brand

For the Slaw
2 cups shredded cabbage
1 carrot, shredded
1/2 ripe avocado
1 tbsp maple syrup 
1 tbsp lemon or lime juice
1 tbsp oil
pinch of salt
pinch of pepper

For Serving
Your favourite buns

Directions

1. Rinse, drain, and dry the jackfruit well between 2 pieces of paper towels. Chop off the core portion of the fruit and discard. Place in a large mixing bowl and set aside.
2. In a medium size bowl, mix together BBQ seasoning and add to jackfruit. Toss to coat.
3. Heat a large skillet over medium heat, once hot, add oil and seasoned jackfruit. Toss to coat and cook for 2-3 minutes.
4. Add the BBQ sauce, if too thick you can thin with a bit of water to make it saucy. Stir and reduce heat to low- medium and cook covered for about 20 to 30 minutes, stirring occasionally.
5. While the jackfruit is cooking you can make slaw. Start by making the dressing; whisk together the maple syrup, lemon or lime juice, oil, salt and pepper. Pour dressing over the cabbage, carrots and avocado and toss to coat. Place in the refrigerator until ready to serve.
6. To serve place a spoonful of slaw on the bottom buns, top with a generous serving of the BBQ jackfruit.

Cooks Notes
For finer texture, use two forks to shred the jackfruit, you can do this while it is cooking.
You can store any leftover jackfruit in the fridge for a few days, though best when fresh.
Make sure to purchase canned jackfruit that says “in brine” as opposed to “in syrup”


Jackfruit ‘Tuna’ Salad
This recipe makes 2- 3 servings

Ingredients

1 14-ounce can of young green jackfruit in water 
2 medium stalks celery, finely chopped
1/4 cup red onion, finely chopped
1/2 cup finely chopped red, green or yellow pepper
3 tbsp vegan or any mayo you like
1 tsp yellow mustard
2 to 3 tsp fresh dill, finely chopped
2 tsp fresh lemon juice
1/2 tsp smoked paprika
1/4 tsp salt, or more to taste
1/2 dill pickled, finely chopped, (optional, but adds a bit of tanginess and crunch)
Freshly ground black pepper, to taste

Directions

1. Rinse, drain, and dry the jackfruit well between 2 pieces of paper towels. Chop off the core portion of the fruit and discard. If not already chopped, chop into bite sized chunks.
2. Put the jackfruit in a medium mixing bowl and add the rest of the ingredients and mix until fully combined. Taste and adjust seasoning. I like to let the mixture sit in the fridge for at least 30 minutes to let the flavours develop.
3. Serve in a sandwich or on top of your favourite greens.

Cooks Notes
Leftovers can be refrigerated in an airtight container for 3 to 4 days.
Make sure to purchase canned jackfruit that says “in brine” as opposed to “in syrup.”

PRINT RECIPE
In Mains, Vegan, Vegetarian
Comment

CHOCOLATE POTS

November 21, 2018 Marla Hertzman
chocolatePot5.jpg
chocolatePot6.jpg
chocolatePot.jpg
chocolatePot1.jpg
chocolatePot2.jpg

Silky and smooth.
Five ingredients.
Five minutes.

This is not the Snack Pack Pudding cups you ate as a kid! And this is not my usual healthy version of my childhood favourite, this is the recipe I make when friends come for dinner and I want to spoil them.

These mini pots of chocolate are perfect for prepping ahead of time - they need to set in the fridge for a few hours. Just before serving I add a touch of whipped cream, a sprinkling of shaved chocolate and the magic happens; one spoonful and your guests will love you forever.

My in house taste-tester Gordy was hanging around - as you can imagine the spoons and spatulas I used were licked clean!


Chocolate Pots
This dessert will satisfy any chocolate craving.  All I can say is decadent!
This recipe serves 8

Ingredients

2 cups heavy cream
3/4 lb. semisweet or bittersweet chocolate, at room temperature, coarsely chopped
4 large egg yolks
3 tbsp dark rum, or any liquor you like or even some strong coffee or espresso, (should be at room temperature)
3 tbsp unsalted butter

Directions

1. In a medium saucepan, heat the cream just until bubbles appear around the edge. Remove the pan from the heat, then add the chocolate and let stand for 1 minute, then stir until smooth.
2. Whisk the egg yolks in a small bowl, then add in a 1/2 cup of the melted chocolate and cream and whisk. With a spatula scrape this mixture back into the saucepan with the melted chocolate and cream and whisk constantly until smooth. Once smooth stir in the rum and butter.
3. Pour the mixture into eight 1/2-cup ramekins and refrigerate until chilled, at least 4 hours.

Cooks Notes

I used 70% dark chocolate, but use any bittersweet chocolate you like.
The chocolate pots can be made ahead and refrigerated overnight.
These pots will keep for a few days in the fridge.
Serve topped with grated or shaved chocolate and a spoonful of whipped cream.

print recipe
In Desserts, Snacks, Vegetarian
Comment

Gluten Free Pasta taste-test and a recipe for Vegan Pumpkin Pasta Sauce with wild Mushrooms

November 13, 2018 Marla Hertzman
karen_pastaBOX.jpg
KarenpastaBox.jpg
karen_pasta3.jpg
mushroom_glutenfreepasta.jpg

Do you love spaghetti, penne or mac and cheese? My friend Karen from Nutrilicious and I sure do, well really who doesn’t love a good noodle. Which is why we thought why not try of some of the new pastas that are showing up on grocery shelves. It use to mean a trip to the health food store to find gluten-free and alternative pasta options. Not any more, now you can find noodles made with chickpeas, lentils, black beans and I even spotted a box of edamame spaghetti.

The good news is most are packed with protein but also low on carbohydrates. Explore Cuisine’s black bean spaghetti has 23 grams carbs, 24 grams of protein and 11 grams of fibre per 2 ounce serving. When shopping for gluten free pastas read the back of the box, I noticed that some brands base the nutritional values on 2 ounce serving and some on 3 ounce serving.

Here's what we sampled:
Tolerant Organic Black Bean Penne VS Explore Organic Black Bean Spaghetti
Explore Organic Chickpea Fusilli VS Tolerant Organic Chickpea Penne

Now the fun part, eating the pasta!
The pastas did hold up well with the sauce, but yes you do have to get use to the chewy and dense bite of the noodle. I did enjoy both the Tolerant Organic Chickpea Penne and the Explore Organic Chickpea Fusilli, but if I were to buy again I would go for the penne, but that’s because any penne is my go to pasta. Both the black bean pastas are a good choice too, and they make for a dramatic presentation. Though have fun getting members in your family to buy into black pasta, (I thought it looked purple). For the record my in house taste-tester Gordy was not sold - just give me a bowl of white spaghetti!

Cooking Gluten Free Pasta
It is challenging to correctly cook gluten-free pasta. My best advice is to start tasting for doneness a few minutes before the recommended cooking time. And do not make that pasta in advance, have it ready for when you are ready to eat. Do not rinse the pasta, just drain and add it to the sauce, and save a bit of the pasta water so you can add a splash to the sauce.

These alternative pastas are not exactly like regular spaghetti, but they make great substitute and are a healthy, alternative to regular pasta.  So go ahead and get your pasta fix and eat your noodles.

blackbeanPasta3.jpg
blacbbeanPasta.jpg

Vegan Pumpkin Pasta Sauce with Wild Mushrooms
This recipe serves 2

Ingredients

1/2 cup raw cashews
2 cups pumpkin puree, fresh or canned
½ cup vegetable stock
1 tsp salt
1 cup of mixed mushroom
2 shallots, minced
2 cloves garlic, minced
1/4 tsp dried thyme
1/4 tsp dried chili flakes
pinch of salt and lots of fresh black pepper
9 oz of pasta, any variety you like
Chopped fresh parsley, for garnish
Drizzle of olive oil, for garnish

Directions

1. Soak the cashews in hot water for 15 to 30 minutes or until soft.
2. Blend the cashews, pumpkin puree, vegetable stock and salt in a blender until smooth and creamy.
3. Cook the pasta according to the package directions and drain, saving a cup of the pasta water. Do not drain the pasta.
4. In a large non-stick pan heat the oil over medium-high heat. Add the mushroom and cook until golden brown. Remove to a plate then cook the shallots, garlic and thyme until soft and transparent. Add the mushrooms back to the pan and sprinkle with salt and pepper.
5. Add the pumpkin sauce mixture to the pan with the mushroom. Toss in the pasta, reserving some mushrooms to decorate the top. Sprinkle over some fresh chopped parsley and more salt and pepper. If the sauce is too thick add a bit of the reserved pasta water to thin out.

Print Recipe


In Mains, Vegan, Vegetarian
Comment

Yellow Lentil Soup with Coconut Milk, vegan

October 29, 2018 Marla Hertzman

I will say it loud and clear, I LOVE TO COOK AND I LOVE TO EAT. Cooking allows me the freedom to make just what I like and want to eat. I hear this over and over ...it takes to long to make healthy food, all the shopping, chopping and prep.

I have a few tips to make cooking at home FUN, think creative, you are creating something that should taste and look good enough to eat.

Set the tone! Start with a well-organized workspace and for me that means music on, tea kettle on or glass of wine, ingredients, knives and pots on the counter, ready to be used.

Have a well-stocked pantry. A cupboard filled with canned tomatoes, canned and dried beans, coconut milk, nuts, seeds, honey, maple syrup and an assortment of spices.

My fridge always has veggies like carrots, red and green cabbage, celery, onions, shallots, white and sweet potatoes and garlic. Fruits like bananas, apples. pears, lemons, limes and I always have an avocado or two ripening on the counter.

In my freezer are bags of frozen fruit for smoothies, vegetables like corn, peas and chopped spinach that can be added last minute to soups and stews.

During the week I fill in with the fruits and veggies that have a shorted shelf life.

Now on to this soup recipe. I love this soup because you can make this with what you have in your pantry and it’s easy to substitute the veggies. If you don’t have fresh spinach in the fridge, frozen works or any fresh leafy green veggies, like kale or chard. As for the rest of the ingredients I used red lentils for fibre, (and they cook up fast) and added the turmeric for the beautiful colour and its antioxidants. The coconut milk gives it the creamy texture and the dark leafy greens are a good source of many vitamins.

So with a bit of creativity and smart shopping you can stock your pantry and fridge and start cooking healthy beautiful meals filled with good ingredients and most important your LOVE..best ingredient ever.


Yellow Lentil Soup with Coconut Milk
Makes 6 servings.
This soup will warm and fill you up with all that is good for you.

Ingredients:

olive oil for sautéing
1 large onion, diced
3 large garlic cloves, minced
2 tsp ground turmeric
1 1/2 tsp ground cumin
1 tsp cinnamon
1/2 tsp curry powder
1/4 tsp ground cardamom
1 can tomatoes, with juices, 26 ounce tin
1 can coconut milk, 15 ounce tin
1 cup uncooked red lentils, rinsed and drained
6 cups water or vegetable broth
1 tsp salt, or more to taste
freshly ground black pepper, to taste, 
1/4 tsp cayenne pepper, to taste, (I like a little heat so I used more)
2 cups baby spinach, kale or swiss chard chopped and remove the stems if using kale or chard
squeeze of lime juice, add just before serving

Directions:

1. In a large pot, add the oil, onion, and garlic. Add a pinch of salt, stir, and sauté over medium heat for 4 to 5 minutes until the onion softens.
2. Stir in the turmeric, cumin, cinnamon, and cardamom until combined. Continue cooking for about 1 minute, or until you smell all the spices.
3. Add the diced tomatoes (with juices), can of coconut milk, red lentils, water or broth, salt, and pepper and cayenne pepper.
4. Stir to combine. Increase heat to high and bring to a boil.
5. Once soup starts to boils, reduce heat to medium-high, and simmer, uncovered, for about 30 minutes. 
6. Add in the spinach or whatever green you choose.
7.  Taste and adjust for salt and pepper. If soup is to thick add more water or broth.
8. Just before serving add a squeeze of lime or serve on lime wedges on the side.

PRINT RECIPE
In Appetizers, Mains, Sides, Vegan, Vegetarian, Soups
Comment

MUSHROOM SOUP WITH A SPLASH OF SHERRY AND A DRIZZLE OF TRUFFLE OIL

October 21, 2018 Marla Hertzman
mushroom_soup4.jpg

Earthy
Woodsy
Nutty
Rich

No, I am not describing my husband!

But if you love mushrooms then you know what I am talking about. Whenever I make this soup I am often asked for the recipe.  You will be surprised how easy it is to make.  I love how recipes with the least ingredients can taste quite complex. Mushrooms do just that.

You can make this soup a day in advance of when you want to serve it. This gives the soup some time to develop great flavours.  And if you really want to up your soup into pretentious (and deliciousness), drizzle a few tiny drops of truffle oil over the soup just before serving, (or truffle salt if you have some). And please do not omit the dried wild mushrooms, they are loaded with deep flavours and are an essential to this soup. I use a mix of dried porcini, oyster and shiitake. You can usually find dried mushrooms in the produce section at the grocery store in small packages. Any combination of fresh mushrooms work in this recipe.

 So, invite some friends over and enjoy this soup with people you love! And don’t forget to give your hubby seconds!

A note on Truffle Oil

When buying truffle oil is important to distinguish between real and synthetic. Most brands make a canola or olive oil blend with truffle flavouring. Real truffle oil is made by adding edible truffles to an olive oil and allowing the flavours to infuse over several days. Look for a high quality truffle oil and be prepared to pay for it. But don’t worry when you see how small the bottle is; you only need a few drops or a drizzle to experience the intense smell and delicious taste.

Oops…I just noticed that I forgot to drizzle the truffle oil for the photo!


Mushroom Soup with Sherry and Truffle Oil
This recipe serves 6

Ingredients

2 Tbsp olive oil or butter, a bit more if needed or a mix of both - if you want to keep if vegan omit the butter
1 ½ pounds of brown mushrooms or a variety of mushrooms
1 medium onion, thinly sliced
1 large carrots, chopped
1 stalk of celery, chopped
3 cloves garlic, finely minced
¼ cup dried mushrooms, covered and soaked in warm water for about 15 minutes
5 sprigs of fresh thyme, leaves only
5 cups of water
salt and pepper to taste
chives or flat leaf parsley for garnish
a big splash of sherry to taste
truffle oil a few drops to garnish, optional

Directions

1. In a large saucepan, melt 2 tablespoons butter or olive oil over medium heat and add the onion, celery and garlic. Cook for 5 minutes until the onion is soft and translucent.
2. Then add the fresh mushrooms, dried mushrooms (with the water they were soaking in, taking care not add any of the dirt which may be in the bottom), carrots, thyme and more oil or butter if necessary.
3. Let the mixture cook over medium heat for about 8 to 10 minutes taking care that the onion doesn’t take on any brown colour.
4. Stir in the water and bring to a boil.
5. Immediately reduce the heat and simmer (covered) for about an hour.
6. Let soup cool for a few minutes then transfer to a blender or food processor and carefully blend at high speed until smooth. Do this in stages and remember to hold the blender lid down.
7. When blended, return the mix to the pot, season with salt and pepper, and bring up to a simmer again. Add the sherry, mix well, and serve immediately with a drizzle of truffle oil and a sprinkle of fresh chives.

Cooks Notes

I do not blend the whole pot of soup, I do about half the soup as I like my soup to have some texture and some sliced mushrooms to bite into.
I like to make this soup a day ahead, I find the flavours more intense.  But it is delicious the same day too.
If you are making in advance you may need to add a bit of water when reheating to thin out the soup.

Print Recipe
In Soups, Vegan, Vegetarian
Comment

Pumpkin Loaf, Gluten Free, Dairy Free and Sugar Free - Made with almond and coconut flour. All In One Bowl!

October 4, 2018 Marla Hertzman
pumpkin_loaf2.jpg
pumpkin_loaf3.jpg

I love this time of year.
Fall and
falling leaves,
orange
and red.
Cozy sweaters,
cinnamon sticks
and pumpkins.


Pumpkin Loaf
This recipe makes one loaf.
Soft and moist with a deep pumpkin flavour and best of all you only need one bowl.

Ingredients

3/4 cup pumpkin, I used organic canned pumpkin
1/4 cup maple syrup
1/4 cup melted coconut oil, let cool a bit
3 eggs
1 cup almond flour
1/4 cup coconut flour
1/2 tsp sea salt
1/2 tsp baking soda
1 tsp cinnamon
1/4 tsp ground ginger
1/4 tsp nutmeg
1/4 tsp allspice
1/4 tsp cloves
handful of pumpkin seeds, (optional)


Directions

1. Preheat oven to 325 F.
2. Combine all wet ingredients in a bowl and mix.
3. Add the dry ingredients to the wet ingredients. Stir until well-combined.
4. Pour the mixture into a greased loaf pan.
5. Sprinkle with a handful of pumpkin seeds on top.
6. Bake for 45–60 minutes.

Cooks Notes
Feel free to add in a handful of your favourite chocolate chips.

Print Recipe
In Baking, Breakfast, Desserts, Muffins, Vegan, Vegetarian, Snacks
Comment

Concord Grape Chia Seed Jam

September 27, 2018 Marla Hertzman
grape_chiajam.jpg

Growing up there was only one jam in our house and it was Welch’s Concord Grape Jelly eaten in a peanut butter and jelly sandwich. I can still see the jar in the fridge, smudged with grape fingerprints and always some peanut butter mixed into the the jar… I asked my brother Lawrence …”how did that happen?“ There is still nothing as good as biting into a gooey PB&J sandwich to make you feel warm and safe. I still love the combo, but times have changed and now I try to eat less sugary foods, though I still crave the taste of grape jelly. My recipe has no refined sugar, no pectin and is ready in about 20 minutes. It may not be as sweet or as purple as Welch’s but it will still make you and your peanut butter happy.

Try my recipe for Strawberry Chia Jam and Home-Made Almond Butter.


Concord Grape Chia Seed Jam
This is super easy to make.
This recipe will make 1 jar.

Ingredients

3 cups concord grapes
2 tbsp maple syrup
2 tbsp chia seeds
zest of 1/2 a lemon

Directions

1. In a medium saucepan on medium high heat, add in the grapes and cook the fruit until it starts to break down and the grapes begin to bubble and simmer, they will start to release some juices, about 5 to 10 minutes.
2. Turn the heat down and add the maple syrup and chia seeds. Cook another 5 minutes, stirring frequently. Add in the lemon zest and remove from heat and let cool. The jam will still be a bit runny, but as it cools it will start to thicken.
3. Once the jam has cooled to room temperature, transfer it to a jar. Store in the fridge for about 2 weeks.

Cooks Notes

The jam will thicken further and become more set once it has completely chilled.
This jam is not a shelf stable. Use within 2 weeks and keep refrigerated.
Jam can also be frozen.

Print Recipe


In Sides, Vegan, Vegetarian
2 Comments

Peach and Blueberry Muffins, Sugar Free and Gluten Free

September 11, 2018 Marla Hertzman
blueberryPeachMuffin.jpg
blueberryPeachMuffin4.jpg
blueberryPeachMuffin1.jpg
blueberryPeachMuffin2.jpg

Life is a peach.
With a few blueberries tossed in.


Peach Blueberry Muffins
You will love these naturally sweetened muffins
Recipes make 9 muffins

Ingredients

1 cup brown rice flour
1/2 cup oats
2 tsp baking powder
2 tsp cinnamon
1/2 tsp salt
2 eggs
1/4 cup almond milk
1/4 cup maple syrup
2 tsp pure vanilla extract
1/2 cup melted coconut oil, slightly cooled
3/4 cup blueberries
3 peaches, finely chopped

Directions

1. Preheat oven to 350 degrees. Grease a muffin tin with coconut oil or line with paper muffin cups. (I like to use paper cups).
2. In a large bowl combine flour, oats, baking powder, cinnamon and salt.
3. In a separate bowl, combine eggs, almond milk, maple syrup and vanilla. Stir in the coconut oil to the wet mixture. Then add the dry mixture to the wet and mix.
4. Fold in the blueberries and chopped peaches.
5. Measure into muffin tins. They do not rise a lot, so you can fill the batter up to the top. Bake for 30-35 minutes. 

Cooks Notes

I use regular oats, not quick cooking.

PRINT RECIPE
In Baking, Muffins, Vegetarian
Comment

Dark Chocolate Cake and gastronomy aboard the Victory II with Victory Cruise Lines

August 18, 2018 Marla Hertzman
vanilla_chocolatecake3.jpg
cruise_veganchocolatecake2.jpg
My own version of the mini chocolate cake, straight from the oven.

My own version of the mini chocolate cake, straight from the oven.

I just had a great nine days aboard the Victory II with my sister in law, Judi.  We cruised and toured and dined our way along the St Lawrence Seaway, Great Lakes and passed through 17 Locks and 7 cities.  So what did it matter that I have been to all the ports before? It didn't.  Sailing on the Victory II put a new spin on the sights and they way I look at our beautiful country.  It was fun to be a tourist with people who have never been to Toronto or some of the cities we visited - I personally felt responsible for the sunny days, gourmet food, beautiful sunsets and winning at Name That Tune!

So what does chocolate have to do with cruising? Lots to a chocolate lover!  The food aboard the Victory II was well prepared and beautifully served. We had a tour of the galley and was surprised that all the food we ate come from such a small but well organized space.  We ate well and tried really hard to leave room for dessert, especially if chocolate was on the menu.  I tried a delicious Mousse au Chocolate, (sugar-free option), it was smooth and creamy, I did not miss the sugar and yes there was a cherry on top, and it was a real cherry! I also loved the mini chocolate cake paired with vanilla ice cream, I know it sounds simple but simple is hard to pull off, it has to be perfect and perfectly delicious is what we had.

Now that I am home I really wanted to try and recreate the chocolate cake. My version is gluten-free, dairy-free and sugar-free and the ice cream is made with coconut milk.  Ok, so maybe my recipe is not as much fun as what we ate on the ship, but I am home now and need to fit back into my jeans. 

For a full review of the Victory ll Great Lakes Adventure have a look at the article written by my sister-in-law Judi Cohen for Quirky Cruise. 


Some of the delicious food we ate.

cruise_shrimpcocktail.jpg
cruise_lamb.jpg
cruise_macandcheese.jpg
cruise_dessert.jpg
cruise_tea1.jpg
cruise_tea.jpg
cruise_lunch salad.jpg
victory_coctail1.jpg
cruise_tea2.jpg
victory_lobster.jpg
victory_sunset.jpg
victory_salad.jpg
victory_cookies.jpg
victory_dessert.jpg
victory_icecream.jpg
victory_wine.jpg
victory_menu.jpg
victory_dinner.jpg
victory_strawberries.jpg
victory_postcard.jpg

Mini Dark Chocolate Cake
This recipe makes 4 mini cakes.
I used 125ml porcelain ramekins

Ingredients

2/3 cup almond milk
1 1/2 tsp vinegar
1/2 cup pure maple syrup
1/4 cup vegetable or melted coconut oil, ( I used coconut oil)
2 tsp pure vanilla extract
1/3 cup cocoa powder
1 cup of gluten free flour (I used Bob's Red Mill)
1 tsp instant espresso (optional)
1/2 tsp salt
3/4 tsp baking powder

Directions

1.  Preheat oven to 350 F.
2. Grease 4 round baking ramekins.
3.  Mix together the milk, vinegar, maple syrup, oil and vanilla extract, set aside for 10 minutes.
4.  Stir together the remaining ingredients in a separate bowl until well mixed.
5.  Pour wet into dry, stir just until evenly mixed, and transfer to the greased ramekins.
6.  Bake 20 to 25 minutes on the middle rack, or until cake is done.
7.  Let cool before removing.  Remove by running a knife around the edges and gently turn over and remove cakes.

Cooks Notes

Make sure the almond milk, maple syrup and coconut oil are at room temperature.
You can prepare ahead of time and then bake just before serving for a warm dessert.  Just remember to wait at least 10 minutes before removing from ramekins.  

PRINT RECIPE
In Vegan, Vegetarian, Snacks, Desserts, Baking
Comment

Zucchini Kale Quiche With A Sweet Potato Crust

June 27, 2018 Marla Hertzman
quiche_sweetpotato.jpg
quiche_sweetpotato1.jpg
quiche_sweetpotato4.jpg
quiche_sweetpotato3.jpg

Food brings people together - no matter how far apart you are. This recipe was posted by my friend Shelley who moved to Israel in the early 80's.  Fast forward a few decades and continents and thanks to Facebook I can see what she's up to and what she's been eating.  And it's all healthy! 

Shelley eats grain-free and created this delicious quiche.
You can find the original recipe at Galilee Green.


Zucchini And Kale Quiche With A Sweet Potato Crust
Serves 4 to 6
What makes this recipe special is the sweet potato crust.

Ingredients:

2 medium sweet potatoes, peeled and sliced thin
1 tbsp olive oil
1/3 cup of minced yellow onion
2 - 3 cloves garlic, minced
2 cups of shredded zucchini
2 cups of chopped kale, make sure to remove the stem
1/4 cup canned coconut milk or coconut cream
5 eggs
1/2 tsp salt
1/2 tsp pepper
1/4 tsp ground nutmeg
1  tomato, sliced, (optional)
a sprinkle of dried rosemary, (optional)
goat cheese, (optional)

Directions

1.  Preheat the oven to 400 degrees.
2. Lay out the sliced sweet potatoes in a pie dish in a crust-like fashion.
3. Brush some olive oil onto the sweet potato slices with a silicone basting brush.
4. Bake the sweet potato crust for 20 minutes.
5. While the sweet potato crust is baking, put 1 tbs of olive oil onto a large frying pan over medium heat.
6. Put the the minced onion and garlic in the pan, mix them into the olive oil and let them cook 3 1/2 minutes.
7. Add the shredded zucchini and kale to the pan, mix them into the onions and then let it all cook for 4 minutes, stirring every so often
8. Set the veggies aside.
9.  Then, in a medium bowl, mix the eggs, coconut milk or cream, salt, pepper, and nutmeg together with a whisk.
10. Mix the zucchini and kale into the egg mixture and then pour the whole thing into the sweet potato crust
11. Top the quiche with the sliced tomatoes. If you want, sprinkle with some dried rosemary.
12. Reduce the oven heat to 375 degrees.
13. Put the whole thing into the oven and bake for 40 minutes. Let the quiche rest for 15 minutes.
14.  Slice and Enjoy!


In Appetizers, Mains, Vegan, Vegetarian
Comment

Banana Almond Flour Muffins

April 30, 2018 Marla Hertzman
banana_almondflourmuffins.jpg

I am dreaming of muffins...


Banana Almond Flour Muffins
Delicious, healthy, quick, and easy.
This recipe make 8 muffins

Ingredients

2 cups almond flour
1 tsp ground flax seed
1 tsp chia seeds
1/2 tsp baking soda
1 tsp cinnamon
4 eggs
2 tbsp honey
1 tsp apple cider vinegar
1 tsp vanilla
1 ripe banana, mashed

Directions

1. Preheat oven to 350 degrees F.
2. Line muffin cups with paper liners.
3. Mix almond four, flax seed, chia seeds, baking soda and cinnamon together in a small bowl.
4. Whisk eggs, honey, apple cider vinegar and vanilla together in a separate bowl.
5. Stir almond meal mixture into egg mixture until batter is just mixed. Add the mashed banana into batter.
6. Divide the batter into the prepared muffin cups.
7. Bake in the preheated oven until slightly browned, about 20 -25 minutes. Cool muffins in pan for at least 20 minutes before removing from pan.

Cooks Notes:

These muffins freeze well.

print recipe
In Baking, Breakfast, Desserts, Muffins, Snacks
Comment

Cauliflower Smoothie with Blueberries and Cinnamon

April 4, 2018 Marla Hertzman
bluberry_cauliflowersmoothie1.jpg
bluberry_cauliflowersmoothie4.jpg

I tested this smoothie on my number one taste tester - Gordy; and I didn't dare tell him that it was made with cauliflower because I knew what his reaction would be. NO thanks. So with a twinkle in my eye, I presented him with this beautiful blue smoothie. I sensed a bit of hesitation, I know he is thinking there is more to this smoothie then just blueberries.  I waited and happily heard music to my ears...seconds please.  So there you have it, proof that cauliflower hides behind all the (healthy) deliciousness in this smoothie.


Cauliflower Smoothie with Blueberries and Cinnamon
For the record cauliflower adds zero taste to your smoothie, what it does add is a super creamy texture, and if you use frozen cauliflower and frozen blueberries you may just believe that you are feasting on a milkshake.
Serves 2

Ingredients

1 cup fresh or frozen cauliflower florets
1 cup loosely packed greens of choice, I used swiss chard
1 cup frozen blueberries
1 tsp cinnamon
2 tbsp hemp hearts
pinch of salt
1 tsp vanilla extract
1 ripe banana
water, (about 1 cup)

Directions

1.   Add all ingredients to blender, add a cup or so water, then blend until very smooth.
2.  Add more water if needed and blend again.
3.  Drink and enjoy!

Cooks Notes

I used frozen cauliflower for this smoothie. I have made it with fresh cauliflower and it was just as delicious, I add a few ice cubes to make it colder and thicker.  Just so you know frozen cauliflower is lightly steamed.  When I use fresh I don't bother cooking the cauliflower first.  
You can use fresh blueberries too.
Store any leftovers in the fridge.

print recipe
In Breakfast, Raw, Snacks, Vegan, Vegetarian
Comment

Banana Bread made with Almond Flour, sweetened with maple syrup & a surprise - Golden Berries

March 18, 2018 Marla Hertzman
banana_loaf.jpg
goldenberries1.jpg
goldenberries.jpg

This just might be the best banana bread! It’s really easy to make, naturally sweetened and I added some golden berries - just for something unexpected. 

These little orange golden berries are sweet like a raisin and tart like cranberries.  They are called gooseberries when they're fresh and golden berries when dried.  They are rich in vitamins, minerals, and antioxidants.  They have fibre, protein, and phosphorus.  I am adding them to oatmeal at breakfast and salads at lunch. 

This loaf is moist and a bit sweet and has a tangy kick from the golden berries.


Banana Bread made with Almond Flour and Golden berries
This recipe makes 1 loaf

Ingredients

3 large ripe bananas
2 eggs
1 tsp vanilla extract
3 tbsp pure maple syrup
2 cups almond flour
1 tbsp baking powder
1/4 tsp salt
2 tsp cinnamon
1/4 tsp nutmeg
1/3 cup golden berries
handful of hemp hearts for sprinkling on top, (optional)

Directions

1. Preheat the oven to 350 degrees F and lightly oil a loaf pan. (I used melted coconut oil).
2. In a food processor add the bananas and process until they are mashed.
3. Add the eggs, vanilla, maple syrup, baking powder, salt, cinnamon and nutmeg to the processor and blend until well combined.
4. Add the almond flour and give a few quick pulses, just until the flour is combined.
5. Add in the golden berries and again give a few quick pulses.
6. Pour banana bread mixture into the prepared loaf pan and with a spatula spread the batter evenly.
7. Sprinkle with a handful of hemp hearts and a few more golden berries.
8. Bake for 40 to 50 minutes.
9. Allow bread to cool for 30 minutes before removing from loaf pan.

Cooks Notes

This loaf keeps well in the fridge for a week.
You can also slice and store in the freezer.
If you don't have golden berries you could use cranberries or any other dried fruit you like. 

Print Recipe
In Baking, Breakfast, Desserts, Muffins, Snacks, Vegetarian
Comment

Bee Pollen Energy Balls with Dates and Chia Seeds

January 30, 2018 Marla Hertzman
beepollen_ball2.jpg

I often get asked about healthy snacks.
What do I eat when I have a sweet tooth?
These Bee Pollen Energy Balls are my new favourite treat and all you need are a few simple ingredients.
I love the sweetness of the dates, the crunch of the nuts and the energy from the bee pollen.
Bonus:  Bee Pollen is an excellent source of protein, carbohydrates, fat, vitamins and minerals including potassium, calcium, magnesium, zinc and iron and it's nutritious too.
Keep these in the fridge or freezer and when you need a burst of energy you will be ready for action.

Enjoy and have a ball!


Bee Pollen Energy Balls with Dates and Chia Seeds
This recipe makes about 10 energy balls

Ingredients

1 cup walnuts or pecans, soaked at least 6 hours or overnight, rinsed well
2 tbsp bee pollen
1/2 tsp coconut oil
10 dates, (you may need more)
1 tbsp maple syrup or honey
1/4 tsp salt
1 tbsp chia gel (chia seeds soaked in water for at least an hour)
1/2 tsp vanilla
1/2 tsp cinnamon
Optional toppings:  bee pollen, hemp hearts and flaked unsweetened coconut 

Directions

1.  Soak the dates if dry.  I like to soak for about 10 minutes in warm water, drain and dry well.
2. Make the chia gel by adding 1 tbsp of chai seeds to 3 tbsp of water, let sit for 10 minutes or until gel-like.
3.  Put all ingredients into a food processor and process until well mixed.  The mixture will start to gather around the blade, you may need to scrape off with a spatula and continue processing until well combined.
4.  Transfer the mixture to a medium sized bowl and shape into balls by rolling in your hand.
5.  If you like a bit more crunch then roll in bee pollen, hemp hearts or unsweetened coconut.
6.  Store in the fridge or freezer until firm, then eat.

Cooks Notes

Be sure to keep any unused bee pollen refrigerated or in the freezer to avoid spoilage. 
If you have allergies, check with your doctor before using bee pollen.
I like to keep in the freezer.

print recipe
In Breakfast, Desserts, Raw, Snacks, Vegan, Vegetarian
1 Comment

Dark Chocolate Bark - Delicious Meets Healthy This Holiday

December 10, 2017 Marla Hertzman
chocolate_bark8.jpg
chocolate_bark4.jpg
chocolate_bark5.jpg

My day isn't complete unless it ends with chocolate. A few squares of dark chocolate here, a warm mug of hot chocolate there, a handful of cacao nibs... I can't get enough of it. I have my own chocolate drawer that is well-stocked, always, with my favourite dark chocolate bars. Enough said.

Now that we are in the midst of the holiday season, my better self is telling me to stop eating sweets. Despite these good intentions, everywhere you go people are offering you sugary treats that are simply too hard to resist; peppermint, candy canes, white chocolate, milk chocolate and cookies in all shapes and forms. While this is all fun, after a few days of indulgence it's time to get back to eating healthy.

This Dark Chocolate Bark has come to my rescue...made with organic cacao powder, coconut butter, coconut oil, sweetened with maple syrup and covered with handfuls of nuts and dried fruit.  I just feel better knowing that the ingredients are all good for me and that I will be snacking on the healthy side.

Happy holidays and eat lots of chocolate!

Any combination of topping will do, here are some ideas to make this chocolate bark your own: chopped almonds, pistachio nuts, pumpkin seeds, sesame seeds, chopped dried fruit, peppermint extract, hemp seeds, cranberries and chia seeds.


Dark Chocolate Bark
This recipe is sweetened with maple syrup and is vegan, paleo-friendly and dairy free. 

Makes enough for 6-8 servings. 

Ingredients

1/4 cup cacao butter
1/2 cup coconut oil
3/4 cup cacao powder
1/2 cup maple syrup
1 tsp vanilla extract
1 tsp cinnamon
2 tbsp goji berries
1/4 cacao nibs
1/4 cup coconut chips
2 tbsp currants
1/3 cup cashews or your favourite nuts
pinch of salt

Directions

1. Line a 9 x 13 pan with parchment paper and set aside.
2. Melt the cacao butter and coconut oil together in a bowl over a pot of hot water.
3. Add the cacao powder, maple syrup, vanilla, cinnamon and salt  to the oils and mix until very smooth.
4. Pour the chocolate mixture into the parchment lined pan and sprinkle with the goji berries, cacao nibs, coconut, currants and cashews.
5. Place in the fridge or freezer for 30 minutes until hard.
6. I like to break it up with my hands into pieces.
7. Store in the fridge or freezer in an airtight container.

Cooks Notes

Because the chocolate bark is made with coconut oil and coconut butter this chocolate melts very easily so it’s better to keep it in the refrigerator or freezer until serving.
The 9 x 13 pan makes for a very thin bark, if you like it thicker use a smaller pan.

PRINT RECIPE


In Baking, Desserts, Snacks, Vegan, Vegetarian
Comment

Sweet Potato Shoestring Fries with Chipotle Mayo Dipping Sauce

November 13, 2017 Marla Hertzman
sweetpotato_fries.jpg
sweetpotato_fries3.jpg

Fries = happy food.

I ate them as a kid sprinkled with salt and slathered in ketchup.  I still love fries but nowadays I make my own using sweet potatoes and I a spicy dipping sauce.

I love this orange root vegetable for lots of reasons, it is one of the most nutritious foods in the vegetable kingdom, filled with fibre as well as containing a variety of vitamins and minerals including iron, calcium, selenium, and they're a good source of most of our B vitamins and vitamin C. One of the key nutritional benefits of sweet potato is that they are high in an antioxidant known as beta-carotene, which converts to vitamin A when we eat them and gives the sweet potatoes its vibrant orange colour.

I made this for my personal in house taste-tester Gordy and when I pulled them from the oven…” what happened to my potatoes?” But once these shoestring fries were dipped in the mayo all was good in my house.

For this recipe you will need:
a spiralizer
sweet potatoes
pink salt
olive oil
and a very hot oven.

They are:
crunchy
slightly sweet
a little salty
and you won’t be able to stop eating them! 

Toss the spiralized sweet potatoes directly on a cookie sheet and drizzle with oil and whatever spices you like.  I am a purist, just salt for me. No deep-frying which makes them easy to make, and healthy too - just a hot oven.  You will need to really watch the cooking time as they burn quickly towards the end of cookings so keep checking on them and giving them a quick toss or two.  While they bake you will have just enough time to whip up the Chipotle Mayo Dipping Sauce.

Eat fries, be happy!


Sweet Potato Shoestring Fries with Chipotle Mayo Dipping Sauce
These delicate, crunchy sweet potato fries are the perfect side dish and are far healthier than french fries!
This recipe makes 2 serving.

Ingredients for the Sweet Potato Fries

1 large sweet potato
1 - 2 tablespoon extra virgin olive oil
pink salt, to taste 

Directions for the Sweet Potato Fries

1. Preheat the oven to 400 degrees. Spread the sweet potatoes on a large baking sheet covered with parchment paper. Drizzle with the olive oil and salt.
2. Bake for 15 minutes, then take out of the oven and toss.
3. Bake for another 15 minutes, now is the time to keep checking the fires to make sure they don't burn. You will get some areas that will start to brown quickly just removed them as they become done and put the rest of them back in the oven.
4. Serve with the chipotle mayo.

Ingredients for the Chipotle Mayo Dip

1 cup mayonnaise, I like Vegenaise but use your favourite brand
1 tsp minced canned chipotle chili in adobo sauce, plus 1 tsp sauce
zest from half a lime
2 tsp lime juice

Directions for the Chipotle Mayo

1. In a bowl, mix mayo, chipotle, adobo sauce, lime zest and lime juice.
2. Cover and chill until ready to use.

Cooks Notes

I do not bother to peel the sweet potatoes, I just wash them really well.
Use the smallest blade for spiralzing.

Print Recipe


In Appetizers, Sides, Vegan, Vegetarian
8 Comments

Quinoa Salad with Pomegranate Seeds and a Maple Lime Dressing

October 17, 2017 Marla Hertzman
quinoa_pom.jpg
quinoa_pom3.jpg

This is my new favourite quinoa salad. It is filled with colours that will make you happy its autumn.


Quinoa Salad with Pomegranate Seeds and Maple Lime Dressing
A fresh, crunchy salad with a delicious maple lime dressing
This recipe serves 6.

Ingredients

For the Quinoa Salad
1 cup dry quinoa, rinsed well
1/4 cup red onion, diced
1/2 cup red or yellow pepper, diced
1/4 cup pine nuts
1/4 sunflower seeds
3/4 cup pomegranate seeds
3/4 cup cooked chickpeas, drained and rinsed, (optional)
1/2 cup chopped parsley or fresh mint, (sometimes I use a combination of both if I have some on hand)

For the dressing
juice from 1 lime, you may need more depending on how juicy your lime is.
2 tbsp maple syrup
1/4 cup olive oil
salt and pepper to taste

Directions

1.  Prepare quinoa according to package instructions. 
2  While quinoa is cooking, drain and rinse the chickpeas. Chop the onion, peppers and parsley and remove the seeds from the pomegranate.  Set aside.
3.  In a small bowl prepare the dressing by whisking together the lime juice, olive oil, maple syrup, salt and pepper.  Taste the dressing, it should be a bit sweet from the maple syrup and have a bit of tang from the lime.  You may need to add more maple syrup or lime to you liking.
4.  Pour the dressing over the quinoa, (I like to do this while the quinoa is still warm) and mix.  Add in the veggies and pomegranate seeds. Taste again for seasonings. Just before serving toss in the pine nuts and sunflower seeds. 
5.  You can prepare ahead of time and store in the fridge.  I like to serve this quinoa salad at room temperature.  

Cooks Notes
To learn how I get the seeds out of a pomegranate have a look at my recipe for Winter Cabbage Slaw with Hazelnuts and Pomegranate Seeds.
Any leftover can be stored in the fridge for up to 2 days.
You can use any nuts and seeds you like in place of the pine nuts and sunflower seeds.  I like to use raw unsalted nuts. You can lightly toast them it you want, it will add a bit more of a crunch.

Print Recipe
In Appetizers, Salads, Sides, Vegan, Vegetarian
Comment
← Newer Posts Older Posts →

LOVE THY CARROT IS THE FOOD BLOG OF MARLA HERTZMAN


APPETIZERS

BAKING

BREAKFAST

DESSERTS

MAINS

MUFFINS

RAW

SALADS

SIDES

SNACKS

SOUPS

VEGAN

VEGETARIAN

VEGGIE BURGERS


INSTAGRAM

Hot and Spicy Tofu. 🌶 This was pretty much a big bowl of veggies that needed using up in my fridge. 🥢 For all things delicious and healthy to eat ➡️ visit www.lovethycarrot.com
.
.
.
.
#stirfryveggies #vegan #homemadefood #vegan #veganfood #plantba

LET'S CONNECT


Subscribe

We respect your privacy.

Thank you!

carrot.png

 Toronto Food Blogs