• home
    • Appetizers
    • Breakfast
    • Baking
    • Desserts
    • Mains
    • Muffins
    • Raw
    • Salads
    • Sides
    • Snacks
    • Soups
    • Vegan
    • Vegetarian
    • Veggie Burgers
  • Work With Me
  • Info
  • BUY MY HOME-MADE BONE BROTHS
  • Instagram
Menu

love thy carrot

Street Address
City, State, Zip
Phone Number

love thy carrot

  • home
  • Recipes
    • Appetizers
    • Breakfast
    • Baking
    • Desserts
    • Mains
    • Muffins
    • Raw
    • Salads
    • Sides
    • Snacks
    • Soups
    • Vegan
    • Vegetarian
    • Veggie Burgers
  • Work With Me
  • Info
  • BUY MY HOME-MADE BONE BROTHS
  • Instagram

Quinoa Salad with Pomegranate Seeds and a Maple Lime Dressing

October 17, 2017 Marla Hertzman
quinoa_pom.jpg
quinoa_pom3.jpg

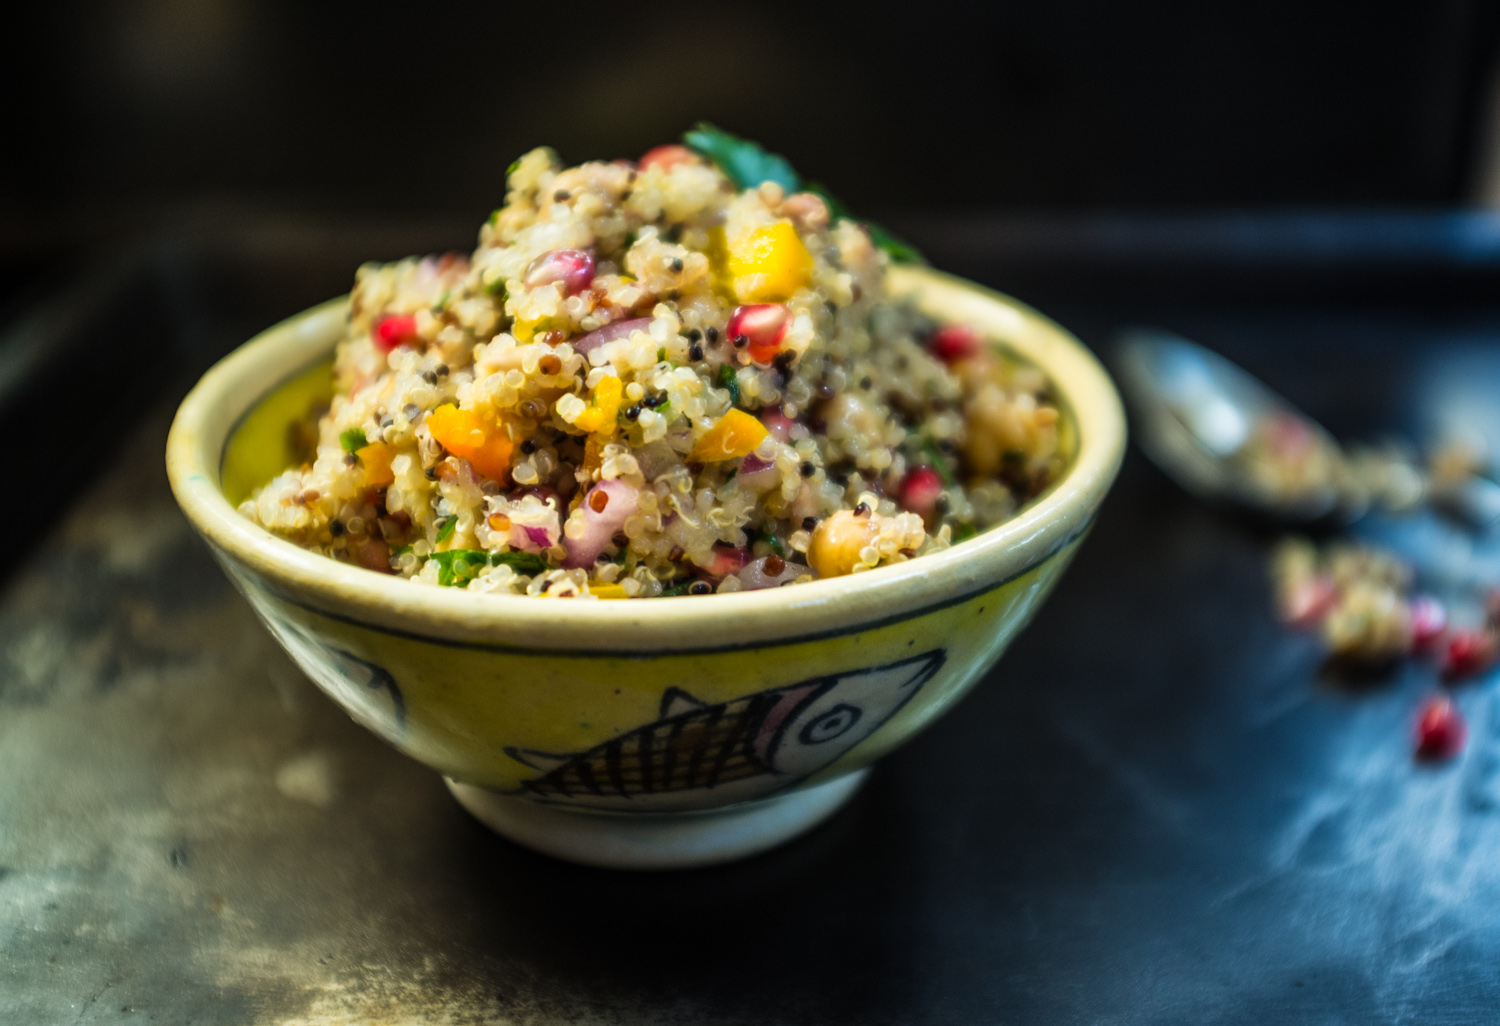
This is my new favourite quinoa salad. It is filled with colours that will make you happy its autumn.


Quinoa Salad with Pomegranate Seeds and Maple Lime Dressing
A fresh, crunchy salad with a delicious maple lime dressing
This recipe serves 6.

Ingredients

For the Quinoa Salad
1 cup dry quinoa, rinsed well
1/4 cup red onion, diced
1/2 cup red or yellow pepper, diced
1/4 cup pine nuts
1/4 sunflower seeds
3/4 cup pomegranate seeds
3/4 cup cooked chickpeas, drained and rinsed, (optional)
1/2 cup chopped parsley or fresh mint, (sometimes I use a combination of both if I have some on hand)

For the dressing
juice from 1 lime, you may need more depending on how juicy your lime is.
2 tbsp maple syrup
1/4 cup olive oil
salt and pepper to taste

Directions

1.  Prepare quinoa according to package instructions. 
2  While quinoa is cooking, drain and rinse the chickpeas. Chop the onion, peppers and parsley and remove the seeds from the pomegranate.  Set aside.
3.  In a small bowl prepare the dressing by whisking together the lime juice, olive oil, maple syrup, salt and pepper.  Taste the dressing, it should be a bit sweet from the maple syrup and have a bit of tang from the lime.  You may need to add more maple syrup or lime to you liking.
4.  Pour the dressing over the quinoa, (I like to do this while the quinoa is still warm) and mix.  Add in the veggies and pomegranate seeds. Taste again for seasonings. Just before serving toss in the pine nuts and sunflower seeds. 
5.  You can prepare ahead of time and store in the fridge.  I like to serve this quinoa salad at room temperature.  

Cooks Notes
To learn how I get the seeds out of a pomegranate have a look at my recipe for Winter Cabbage Slaw with Hazelnuts and Pomegranate Seeds.
Any leftover can be stored in the fridge for up to 2 days.
You can use any nuts and seeds you like in place of the pine nuts and sunflower seeds.  I like to use raw unsalted nuts. You can lightly toast them it you want, it will add a bit more of a crunch.

Print Recipe
In Appetizers, Salads, Sides, Vegan, Vegetarian
Comment

Coconut Curried Cauliflower, Carrot and Parsnip Soup

September 6, 2017 Marla Hertzman
caulifower_currysoup2.jpg
caulifower_currysoup.jpg
caulifower_currysoup1.jpg

I love how the soup changes colour when you add the coconut milk. 


Coconut Curried Cauliflower, Carrot and Parsnip Soup
This soup makes 4 to 6 serving

Ingredients

1 large head of cauliflower, chopped
olive oil
1 tsp sea salt
1 leek, chopped
4 large carrots, chopped
2 large parsnip, chopped
2 tablespoons ginger, chopped
3 garlic cloves, crushed with your knife
1 tsp ground turmeric (or a 1/2-inch piece turmeric root, chopped)
2 tbsp Thai curry paste
8 cups of water or vegetable broth
1 – 15 ounce can coconut milk
salt, to taste
chopped nuts, hemp hearts and a squeeze of fresh lime juice to garnish 

Directions

1.  Preheat the oven to 400 degrees. Line two baking sheets with parchment paper or foil.
2.  Put the chopped cauliflower on one of the baking sheets, drizzle with 1 tablespoon of olive oil and sprinkle with salt. Roast the cauliflower for 30 to 40 minutes, or until it is soft and caramelized. On the second baking sheet put the chopped carrots and parsnip, drizzle with more oil and sprinkle with salt. Roast for about 20 to 30 minutes or until soft and lightly caramelized.
3.  While the vegetables are roasting, start making the soup.  In a large pot over medium-high heat add 2 tablespoons of oil, add the onion and sauté for 5 minutes. Then add the ginger and garlic and cook for 2 minutes. Add the turmeric and Thai curry paste and cook until you start to smell the curry, about 2 more minutes. Add the water or stock and turn up the heat to high and bring to a boil.
4.  As soon as the vegetables are cooked remove from the oven add them to the pot, gently simmer for 10 minutes.
5.  Using a food processor or blender, blend the soup until it is very smooth.  I like to use my blender and I do this in small batches.
6.  Add the coconut milk and season to taste with salt and a bit of pepper.
7.  Serve with chopped nuts, hemp hearts and fresh lime.

Cooks Notes

If you like a spicy soup you could add more curry paste.
Do not use light coconut milk, it is just a watered down version of coconut milk.

Print Recipe


In Appetizers, Soups, Vegan, Vegetarian
Comment

Beet Noodles with Spicy Almond Sauce

August 24, 2017 Marla Hertzman

I love that my noodles are actually beets.  If you are gluten-free or grain-free or just want to eat more vegetables then replacing pasta with veggie noodles is a great way to up your daily intake of vegetables. And now you can buy them ready to eat at the grocery store. No beet stained fingers...Harvest Fresh is doing all the work for you!

Spiralized beets taste slightly sweet and have a great crunch. They are fun to eat, a pretty colour and loaded with all things that are good for you... nutrients like vitamins B and C, iron, manganese, copper, magnesium, and potassium. There is more, they are rich in antioxidants that are especially important for the body’s natural detoxification.

Now to this one-dish meal; start by sautéing the beets in lots of garlic and fresh ginger.  You can prepare the sauce ahead of time, then when you are ready to eat toss the beet spirals with the sauce and dinner is ready.  This recipe is as flavourful and nutritious as its bold ruby beet colour. Happy twirling!

Want to know about he health benefits of beetroot and blood pressure - keep consuming beets and read this article.


Toppings
cilantro or parsley, chopped
crushed almonds or cashews
thinly sliced green onions
lime wedges

Directions
1. Start by making the sauce.  Mix all ingredients in a small bowl and whisk to combine, set aside.
2. In a large pan (big enough to hold the whole package of beet spirals), heat oil over medium hight heat and add the garlic and ginger. Then add the full package of beet spiral and cook for about 5 to 7 minutes or until just tender.
3. Turn down the heat and add in a good amount of the Spicy Almond Sauce, just enough to coat the noodles.  Toss well and heat through.
4. Serve in bowls and top with more sauce, cilantro, crushed nuts, green onions and lime wedges.
5. Don't forget the chopsticks!

Cooks Notes
You can add protein to this dish, tofu or tempeh.
The sauce can be prepared ahead of time.
Any leftover sauce keeps well in the fridge.

Red Beet Noodles with Spicy Almond Sauce
Serves 2
This recipe is vegan and delicious!

Ingredients

For the Beets
1 package Harvest Fresh Beet Spirals
1/2 yellow pepper, thinly slices
2 tbsp olive oil or coconut oil
1 clove garlic, minced
1 tbsp fresh ginger, minced

For the Spicy Almond Sauce
1/3 cup almond butter, (or any nut butter you like), room temperature
1 tbsp tamari or soy sauce
1 tbsp rice wine vinegar or apple cider vinegar
1/2 tsp chili flakes, (more if you like it really hot)
2 tsp fresh lime juice
1 small cloves garlic, minced
2 1/2 tps warm water, (more if needed)
2 tsp sesame oil

PRINT RECIPE

Now you can buy all kinds of spiralized vegetables ready to eat from Harvest Fresh.
Thank you Harvest Fresh for sending me this colourful package of deliciousness.

Beets_harvestfresh.png
In Mains, Sides, Vegan, Vegetarian
1 Comment

Two-Bite Brownies, Super delicious and surprisingly healthy. Vegan and Sugar Free Too!

August 16, 2017 Marla Hertzman

Two bites to happiness!


Two-Bite Brownies

This recipe makes about 12 to 14 mini brownies.
These healthy brownies have no flour or added sugar and are sweetened with dates.  My secret ingredient is adding shredded zucchini.
I first tasted these brownies made by my friend and healthy baker Karen from Nutrilicious.

Ingredients

coconut oil to grease the muffin tins
1 cup madjool dates
1/4 cup water
1/2 cup almond butter or any nut butter
3/4 cup zucchini, shredded and squeeze lightly in your hand the excess moisture
1 tbsp ground golden flax seed
5 tbsp cacao powder
1/2 tsp baking soda
2 tsp vanilla extract
2 tsp balsamic vinegar
1/4 tsp salt

Directions

1.  Preheat the oven to 250ºF.
2.  Grease a mini muffin tin with coconut oil. 
3.  In a food processor add the dates, water and zucchini and process until the dates have broken down.
4. Add in the almond butter, ground flax, cacao powder, baking soda, vanilla, vinegar and salt and process again until the batter comes together.  It will be a bit wet and sticky.
5. Using a tablespoon spoon the batter evenly into the mini muffin tin; you can fill to the top and then smooth the tops gently with a spoon.
6. Bake for about 18 to 20 minutes, they will seem slightly under done when you take them out.  Let cool for 15-30 minutes before removing from pan.

Cooks Notes

I like to keep these in the fridge in an air-tight container, they become dense and super moist.
These mini brownies freeze well, if you have any left!

PRINT RECIPE
In Baking, Desserts, Snacks, Vegan, Vegetarian
Comment

Mashed Chickpea Salad that tastes like tuna - really!

August 5, 2017 Marla Hertzman

I grew up eating tuna sandwiches -  on rye bread, open-face on a bagel or packed between two slices of challah.  It had to be Clover Leaf white albacore tuna, that was the only kind my mother bought and she still does. Tuna was my go to sandwich, but as I have long ago learned eating too much tuna is not so good for you, but hey...chickpeas are.

This chickpea salad is a great substitute. What I love about this recipe is that once you mash up the chickpeas, add in the veggies for a little crunch and mayo for creaminess you have a hearty filling for your sandwich.  Chickpeas are packed with protein, low in fat and filled with fibre, manganese, iron and folate. 

 This may not be the sandwich I grew up with but it sure is tasty and I think my mother would approve!


Mashed Chickpea Salad
Chickpeas are a great source of plant-based protein.
This will make enough for about 3 big sandwiches.

Ingredients:

  • 1 can chickpeas, rinsed, (15-ounce tin)
  • 2 stalks celery, finely chopped
  • 2 green onions, thinly sliced, (or you could use red onion)
  • 1/4 cup finely chopped dill pickle, (use a bit more if you like pickles)
  • 1/4 cup finely chopped red or yellow pepper
  • 3 tbsp mayonnaise, (I like Vegenaise but if you love Hellmann's then why not)
  • 2 tsp yellow mustard
  • 2 tsp fresh lemon juice, (start with a bit and add more to taste)
  • 1/2 tsp salt, or more to taste
  • ground black pepper

Directions

1. Pulse the chickpeas in a food processor until broken down, but not totally mushy.
2. Add in the celery, green onions, pickles, peppers, mayonnaise and pulse a few times.
3. Transfer to a medium sized bowl and stir in the mustard, lemon juice, salt and pepper.
4. Taste and adjust seasoning, you may need more salt or lemon juice or more mayo, depending on your tastes.
5. Serve on your favourite bread or add a scoop on top of your salad.

Cooks Notes

This keeps well in the fridge for about 3 to 4 days.
 

print recipe
In Mains, Vegan, Vegetarian
Comment

Roasted Eggplant with Honey and Chiles

June 23, 2017 Marla Hertzman

When I think of eggplant I am reminded of the eggplant parmesan my mother use to make.  The eggplant was cut into thick slices, cooked in oil then baked in the oven smothered with tomato sauce and thick slices of mozzarella cheese.  I don't really remember the flavour of the eggplant, but the gooey cheese was pretty tasty.   
What I find so delicious about roasting eggplant in the oven is with just a few ingredients you can really taste the sweet and smoky flavours that magically happen in just about 30 minutes.  How to eat:  scoop out the eggplant and spread on a warm baguette or use as a dip for veggies.  I love the heat of the peppers, but be careful it can be hard to judge how spicy they are until you bite into them.  


Roasted Eggplant with Honey and Chiles
Serves 4 as an appetizer or a side dish

Ingredients

4 or 5 baby eggplants, halved, or 2 regular eggplants
5 fresh green Thai chiles, halved lengthwise
1/4 cup honey or maple syrup
2 tablespoons olive oil
salt and freshly ground pepper

Directions

1. Preheat oven to 400 degrees.
2. Prepare a baking sheet with parchment paper.
3 . Toss eggplants and chiles with the honey and oil.  (I do this directly on the cookie sheet).
4. Roast eggplants (skin sides up) and chiles until the eggplant is golden, about 20 minutes. Turn eggplant over and roast about 10 more minutes or until the eggplant is soften. (Keep an eye on the chiles, they may be done after 20 minutes, just remove from the baking sheet and set aside.)
5. Season with salt and pepper and serve.

What to do with these baby eggplants...

Give each guest there own eggplant and have them scoop out the filling and spread on a baguette.
Serve as a side dish on top of some peppery arugula with some crumbled soft cheese like chevre or feta.

PRINT RECIPE
In Appetizers, Sides, Vegan, Vegetarian
Comment

CAULIFLOWER CARROT AND LEEK SOUP

June 7, 2017 Marla Hertzman

Cauliflower and carrots become the most delicious colour when cooked together and because we eat with our eyes you will love the deep orange hue of this soup and of course the simplicity of taste.


Cauliflower Carrot and Leek Soup
This soup is quick and easy to make and is dairy-free.
Serves 4

Ingredients:

1 tablespoon extra virgin olive oil
1 onion, chopped
1 clove garlic, chopped
1/4 tsp chili powder
1 medium cauliflower, cut into florets
2 leeks, white parts only, chopped and rinsed well
3 carrots, diced
8 cups water
1 tbsp fresh thyme if you have, otherwise use 1 tsp dried thyme
salt & pepper to taste

Soup Toppings
almonds, roughly chopped
sprouts
dash of hot sauce, optional

Directions:

Chop garlic and onions.
Separate the cauliflower florets from the stalk and cut into smaller pieces, cut the remaining stalk into small bite-sized pieces.
Prepare the leeks, cut off the dark green bottom and discard.  Coarsely chop the leeks.
Add the olive oil to a medium sauce pan over medium heat. Stir in the onions and garlic and cook until the onions soften, stiring occasionally. Add the leeks and cook for a few more minutes. Then add the chili powder and cook until fragrant.
Add the cauliflower, carrots, thyme and water and bring to a boil.  Then lower the heat and let the soup simmer until all the vegetables are soften, about 20 to 30 minutes. 
Using a blender or food processor puree as much or the soup as you want to the consistency you like.  I like to blend most of the soup. If the soup is to thick you can add more water.  Taste and add the salt and pepper.
Serve with chopped almonds, fresh sprouts and a dash of your favourite hot sauce.


Cooks Notes

Can be made ahead for the freezer.

In Mains, Soups, Vegan, Vegetarian
2 Comments

Roasted Mini Peppers and Potatoes with Fresh Thyme, Rosemary and Garlic.

May 23, 2017 Marla Hertzman
peppers1.jpg
peppers5.jpg

I spent a delicious day with my friend Karen from Nutrilicious tasting and talking to some of the best fruit and veggie producers from across the country at the Canadian Producers Marketing Association otherwise known as the CPMA Trade Show.   I came home with all of my favourites; cucumbers, peppers, eggplants, lettuces, potatoes...Gordy kept asking me where is all the real food, this is it, the real thing, all natural and all fresh.  The closest I came to a treat was some apple chips.  

I do love these cute mini peppers, grown in Leamington Ontario at Pure Flavor's 25-acre greenhouse. I drizzled them with olive oil, added whole pieces of garlic, a handful of fresh herbs and roasted them until charred.  For a little pepper they pack a lot of flavour.  We ate them with a crusty baguette, a hunk of feta and a glass of wine, and now these little sweet peppers are all gone.  

My box of goodies from Pure Flavour!

My box of goodies from Pure Flavour!


Roasted Mini Peppers and Potatoes with Fresh Thyme, Rosemary and Garlic
This recipe will make enough to serve 6 as an appetizer.

Ingredients

2 lbs mini bell peppers
1 lb mini yukon gold potatoes
1/4 cup extra virgin olive oil, more if needed
2 sprigs of fresh rosemary
2 springs of fresh thyme
6 cloves fresh garlic, (I like to leave the garlic whole and with the skins still on, just smash with the back of a knife, this way you can squeeze the garlic out of the skins and toss with the roasted peppers when done).
kosher salt to taste
fresh ground pepper

Directions

1. Preheat oven to 425 F.
2. Prepare 2 baking sheets with parchment paper, (this will make for an easy clean up). One baking sheet will be for the peppers and the other for the potatoes. Cut larger mini peppers in half, leaving the smaller ones whole. Arrange peppers on cookie sheet.  Cut potatoes in half and arrange on the second cookie sheet.
3. Add 3 cloves of the smashed garlic to each cookie sheet.
4. Drizzle both of the cookie sheets with oil, add rosemary, thyme and toss everything until nicely coated. You will now have two cookies sheets ready to go in the oven.
5. Bake the peppers for 25 to 35 minutes, or until just slightly charred.
6. Bake the potatoes for 35 -45 minutes or until fork tender.  
7. Sprinkle with salt and freshly ground pepper
8. Serve with a crusty baguette.

Cooks Notes:

I added a few cherry tomatoes to baking sheet of my potatoes just because I had some around.
You could also crumble chèvre or feta cheese on top of the peppers.

print recipe
In Appetizers, Sides, Vegan, Vegetarian
Comment

Broccoli Bites: Vegan and Raw - The best thing since kale chips, really!

May 10, 2017 Marla Hertzman

I first tried these Broccoli Bites from Doug's Public Kitchen and loved them.  So I thought well I do have a dehydrator from way back in the day while I was in my dehydrating faze...I made kale chips, apple chips, banana chips and crackers.  Then somehow my dehydrator made its way to the basement with other once-loved kitchen appliances, my crock pot, bread machine and sandwich press have all found a home in the basement too.  Well no more, the dehydrator is back and I am making broccoli bites.  I will admit it is a bit of work; you need to soak the nuts and seeds overnight, so some advanced planning is advised.  If you are looking for a quick snack then open a bag of chips, dehydrating is not a speedy process, after 6 hours my big head of broccoli had reduced to barely two trays and it did not take long to eat the whole batch. I think next time I get a craving I will be heading over to Doug's Public Kitchen.  In the meantime if you have a dehydrator hiding in the basement then try making this crunchy healthy snack.


Broccoli Bites

Broccoli bites are the new kale chips.  
Careful, it is easy to eat the whole batch yourself, I did!

Ingredients:

3/4 cup raw sunflower seeds and/or cashews, soaked overnight and then drained, (I like to use a combinations of both)
1 red bell pepper, chopped into large chunks
1/2 carrot, chopped, chopped into large chunks
1/2 cup nutritional yeast
2 tbsp apple cider vinegar
1 tbsp olive oil
juice and zest of 1 lemon
1/2 tsp salt
1/4 tsp cayenne, (I like them a bit spicy so I added 1/2 tsp))
1/2 tsp garlic powder
1 or 2 tbsp water, (if needed)
1 head of broccoli, cut into bite-size pieces, (about 6 cups)

Directions:

  1. Chop broccoli into bite-sized pieces.
  2.  Put all ingredients except the broccoli, into a food processor and blend until smooth.  If it is too thick add a bit of water.  Depending on your food processor this will take a few minutes to become a thick paste.  
  3. Pour this mixture into a medium sized bowl. Add the broccoli and toss it all together until well-coated.
  4. Spread the broccoli out onto the sheets of your dehydrator.
  5. For my dehydrator I set the temperature between 115 to 125 degrees for about 6 to 8 hours. Following your model’s instructions, dehydrate the broccoli until they’re totally dry and crunchy. Keep at room temperature to store.

Cooks Notes:

Note on storage:  they do tend to lose their crispness.  If you save up those little desicant packets you find in some packaged foods (like kale chips), place one or two of those in the container with the broccoli bites and it extends their shelf life...if you have any left to store!

The time needed to dehydrate the broccoli bites until crispy varies, as it depends on the temperature and humidity levels outside and in your house.  Read the instruction for your brand of dehydrator.  I have an Excalibur Dehydrator. 

If you have any leftover 'sauce'  - it makes a delicious dip for raw veggies. 


PRINT RECIPE
In Raw, Snacks, Vegan, Vegetarian, Appetizers
Comment

Lentil and Mushroom Shepherd's Pie Topped with Mashed Cauliflower and Parsnip, Vegan

April 21, 2017 Marla Hertzman
lentil_pie1.jpg
lentil_pie3.jpg

Remember eating TV dinners?  I sure do.  I loved them as a kid, peeling back the foil, the piping hot apple dessert (always a pea stuck in the gooey apple). My brother ate the Hungry Man Salisbury Steak and I had the Turkey Dinner.  We also ate frozen fish sticks from a blue box, crinkle cut fries and chicken pot pies. Well my recipe for Lentil and Mushroom Shepherd’s Pie brings back the TV dinner, but with a healthy twist.  I used lentils, lots of veggies and I have even thrown in a handful of peas to add a comfort food vibe to my shepherds pie! I made them in these cute little tinfoil pans for easy freezing and a dinner for one. I am planning ahead - I want to have healthy and delicious food ready to go in the freezer when I don't have time to cook. 

So preheat the oven, turn on the TV and eat!

And if you are craving that apple dessert why not try my recipe for Apple Cranberry Crisp made Sugar and Dairy Free.


Lentil and Mushroom Shepherd’s Pie topped with Cauliflower and Parsnip Mash
This recipe will make 6 servings.

Ingredients

1/2 large cauliflower, cut into florets
1 to 2 medium parsnip, peeled and cut into 1 inch chunks
2 tbsp vegan butter
2 tbsp olive oil
½ cup unsweetened rice milk or other nondairy milk, more if needed
Salt to taste
2 tbsp olive oil
1 large onion, finely chopped
2 cloves garlic, minced
8 ounces cremini mushrooms, sliced
Two 15-ounce cans lentils, rinsed and drained
1 cup frozen green peas, or fresh when they are in season
2 tbsp dry red wine, optional
1 to 2 tbsp reduced-sodium soy sauce
dash of hot sauce
½ tsp dried thyme
3 tbsp corn starch or arrowroot powder mixed with enough water to make a smooth paste
1 cup, packed of baby spinach or swiss chard, chopped
Freshly ground pepper to taste
Sprinkle of paprika

Directions

1.  Preheat the oven to 400º F.
2.  In a large saucepan add the cauliflower and parsnip and cover with water. Bring to a boil then cover and simmer until tender, about 30 minutes. Drain and transfer to a food processor. 
3.  To the food processor add the vegan butter, rice milk and process until smooth.  Season with salt, taste and adjust seasoning, set aside until needed.  
4.  Heat 2 tbsp of oil in a medium skillet. Add the onions and sauté over medium heat for about 5 minutes.  Then add the garlic and mushrooms and continue to sauté until the mushrooms are soft and start to release their liquid.
5.  Add the lentils, wine, soy sauce, thyme, hot sauce and pepper. Cook for 5 minutes. Add the cornstarch paste and stir into the lentil mixture. Bring to a simmer just until the mixture begins to thicken. Taste and adjust seasonings.
6.  Add the spinach and the frozen peas. Remove from the heat; (I like to taste and for seasonings).
7.  Pour the lentil mixture into 6 small tinfoil pans or a 9 x 13 glass pyrex, then spoon the cauliflower parsnip mixture evenly over the top the sprinkle with paprika.
8.  Bake for 30 to 35 minutes, or until the top begins to turn golden and slightly crusty. Let stand for 5 to 10 minutes before serving. If you are putting them in the freezer, cool for about 10 minutes then cover with foil, label and store in the freezer until ready to use.  

Cooks Notes

You can always make this with mashed potatoes in place of the cauliflower.
Frozen corn work well in this recipe.
This recipe freezes well, just defrost when ready to eat and bake in the oven at 400º F for about 30 minutes or until hot.  You can also put in the oven without defrosting, bake for about 50 minutes, checking halfway.
You can make this in a 9 x 13 glass pyrex or two smaller pans.

Secrets from my kitchen

Freezing wine is a great way to always have it ready to use.  I have a designated ice cube tray just for wine.  Then when I have a recipe that calls a bit of wine I just open the freezer and pop out a wine cube and voilà, I have another layer of flavour added to my meal.


print recipe


In Mains, Vegan, Vegetarian
2 Comments

Raw Vanilla Maca Macaroons

April 14, 2017 Marla Hertzman

On Passover we eat lots of matzah, matzah balls, matzah kugel, matzah brei and matzah with butter and salt, (my fav) -  that's a lot of matzah over eight days which may leave you feeling a bit weighted down. So I thought it would be nice to have a simple NO BAKE treat that you can eat during Passover, is made without matzah and is healthy too.  These little macaroons even have Maca, a superfood in the ingredient list. How good is that!  

Maca tastes a bit like malted chocolate, it reminds me of the candy Maltesers that I ate as a kid, (I looked up the ingredient list and not surprising sugar is listed first).  So if you liked the taste of Maltesers, then try these maca macaroons, they are naturally sweetened and ready in 10 minutes. Have a quick read at VegKitchen to learn about the power of Maca.

 Happy Passover and even if you are not eating matzah this week you will love these little mounds of power.

Try more delicious Passover Recipes:

Macaroons, The Official Cookie of Passover
Romanian Eggplant Salad
Chocolate Covered Toffee Matzah
This is my Great-Grandmother Gefilte Fish
My Mother's Potato Kugel
My Favourite Chicken Soup
Latkes From My Mother's Kitchen
Pistachio and Dried Fruit Haroseth


Raw Vanilla Macaroons
This will make about 10 macaroons and take only 10 minutes to make!

Ingredients

2 cups shredded coconut (unsweetened)
2 Tbsp honey or maple syrup
2 Tbsp raw almond butter
1 Tbsp Maca powder (Maca is a superfood, you can find at your local Health Food Store)
1 /2 Tbsp pure vanilla extract
Pinch of sea salt
a little water, (if needed)
1/4 cup shredded coconut to press into the rolled balls
1/4 cup hemp hearts to roll balls into the rolled balls

Directions

1. Mix everything together in a food processor just until it begins to stick together. If it is too thick add a drop or two of water, if not sticky enough a bit more almond butter. Taste for sweetness and you could always add a bit more honey or maple syrup if needed.
2.  Scoop about a tablespoon of the mixture and roll with your hands into balls.  Then if you want roll in a bit more shredded coconut and or hemp hearts.
3. You can eat this now, or I like to place in the fridge or freezer so they firm up a bit.  You can store them in the freezer and take them out when ready to eat, just let them sit on the counter to soften up.

PRINT RECIPE


In Baking, Desserts, Snacks, Vegan, Vegetarian, Raw
Comment

Blood Orange, Carrot, Ginger, and Turmeric Smoothie

February 13, 2017 Marla Hertzman

This smoothie will knock your socks off - 

It's spicy with a real kick.

If you have a cold, drink this.

If you are cold, you will be warm. 


Blood Orange, Carrot, Ginger and Turmeric Smoothie
Makes about 2 cups

Ingredients

1 blood orange, peel and white pith removed
1 large carrot or 2 small, chopped into chunks
1 cup mango chunks, fresh or frozen
1 cup water
1 inch knob of peeled ginger
1 inch knob of peeled turmeric
Pinch of cayenne pepper, (more if you like a hit of heat, I do)
Pinch of pink Himalayan salt
1 tbsp hemp seeds (for sprinkling on top, optional, I forgot to add them for the photo)

Directions

1.  In a blender add all ingredients, blend until smooth.  
2.  Taste and adjust, you may want more heat from the cayenne pepper or more fruit to make it sweeter.  

Cooks Notes

If you can't find blood oranges, use any variety of oranges.
If you don't have fresh turmeric, use about 1 tsp of dried.

PRINT RECIPE
In Breakfast, Raw, Snacks, Vegan, Vegetarian
1 Comment

Grilled Tofu with Almond Butter Dipping Sauce

February 8, 2017 Marla Hertzman
tofu_bbq4.jpg
tofu_bbq3.jpg
tofu_bbq5.jpg

This is what happens when you don't use indirect heat, you get burnt tofu.

If you are trying to cut back on eating meat sooner or later you're going to find yourself eating tofu.  I have tried tofu baked, stir fried, deep fried and eaten it right from the package, (that was kind of bland) - and thats whats so great about tofu, it's usually pretty bland and when is bland good, never!  But you can make tofu tasty by playing around with different marinades, sauces and cooking methods, that's what happening here...

Tonight the Webber is heating up and Gordy is in charge of grilling. Since I bake tofu all the time and Gordy is BBQ'ing all the time then why not throw some tofu on the Webber. I know what you are thinking, no he did not eat the tofu, a big juicy New York steak is ready to take over the BBQ when the tofu is done. Back to the tofu ...  I was worried the tofu would be dry and rubbery but I found this great article on the The Food Lab and if you follow the 'rules' then you will have perfectly grilled tofu.  It also helps to have a master BBQ'er in the family, Gordy the tofu was cooked perfectly.

If you don't have time to read the rules here is a summary...

1.  Buy firm or extra firm tofu.
2. Cut the tofu into thick wide slices.
3. Dry the tofu well in paper towels. Press as much of the the water out before grilling. 
4. Season well with whatever you like.
5. Make sure the grill is clean, and well oiled (you could use cooking spray to oil the grill).
6.  And use indirect heat, otherwise you burn the tofu, you can see what happens in the photo above. Remember low and slow.

For the lowdown on tofu and tempeh have a look at the great article written by my friend and Nutritionist Karen Gilman from Nutrilicious.


Grilled Tofu with Almond Butter Dipping Sauce
Serves 4

Ingredients for the Tofu

1 lb of extra firm tofu drained and cut lengthwise into 8 slices
2 tbsp fresh lime juice
1⁄4 cup maple syrup
1⁄4cup low sodium tamari or soya sauce
2 tsp chili paste or asian hot sauce
2 cloves garlic, minced
1⁄8 tsp black pepper
1/4 cup sesame seeds, lightly toasted

Ingredients for the Almond Butter Dipping Sauce

3 tbsp creamy almond butter
1 tbsp soy sauce
1 tbsp lime juice
1 tbsp maple syrup
dash of hot sauce, to taste, (optional)
1 to 2 tbsp hot water

Directions for the Tofu

1. Place the tofu slices on several layers of paper towels and cover with additional paper towels.
2. Let stand for about 20 minutes, pressing down occasionally with your hands to squeeze out the water. Place the tofu in a single layer in the bottom of a 13x9 glass baking dish.
3. In a small bowl, whisk together the lime juice, maple syrup, tamari, chile paste, garlic, and pepper.
4. Pour mixture over the tofu, stirring to coat all the slices.
5. Cover the baking dish with plastic wrap and place in the refrigerator for at least 4 hours, (or you could do this the day before).
6. When you are ready to BBQ, spray the grill with nonstick cooking spray. Heat to about medium.
7. Place tofu slices on the grill. Reserve the marinade.
8. Grill tofu 3 or 4 minutes on each side, or until the outside is browned and crisp.
9. Return tofu to the baking dish and toss the slices with the reserved marinade.
10. Serve when done with sauce the Almond Butter Dipping Sauce on the side.

Directions for the Almond Butter Dipping Sauce

1. Whisk all ingredients together in a small bowl, thinning with hot water as needed.
2.  Store any leftovers in the fridge for up to a week.

Cooks Notes:

This is a great article from The Food Lab on how to grill tofu, worth a read before you start grilling.

Print Recipe
In Mains, Vegan, Vegetarian
Comment

EASY MARGHERITA PIZZA WITH CHOPPED TOMATOES, BUFFALO MOZZARELLA AND HONEY WALNUTS

January 30, 2017 Marla Hertzman
pizza_mutti3.jpg
pizza_mutti2.jpg

When I was old enough to start making my own snacks I loved making pizza, we made our own pizzas on bagels, they were called pizza bagels.  We baked them in the toaster oven with a big spoonful of tomato sauce then piled on grated yellow cheese that came from a bag.  By the time it came out of the toaster oven the bagel was mushy from too much sauce and too much cheese, I spent a lot of time picking off burnt cheese that melted on the bottom of the toaster oven, it was a yummy mess.

These days I like to make a healthier and more grown-up version of the pizza bagel. I prefer the soft and chewy texture of naan bread, it crisps up really well in the oven and it holds up to the toppings. To make this pizza I start Mutti Finely Chopped Tomatoes, I love them for the fresh taste and vibrant red colour, just spoon some right from the tin and then layer with slices of soft fresh Buffalo mozzarella, pop it in the oven for about 10 minutes, finish with fresh basil, honey walnuts and eat. So simple and so delicious when you start with quality ingredients - and I'm still trying to figure out how to keep the cheese off the bottom of the toaster oven...


Easy Margherita Pizza with Tomatoes, Buffalo Mozzarella and Honey Walnuts
Simple and delicious.
Serves 2 as a main or 4 as a hearty appetizer.

Ingredients

2 naan bread
6 slices of fresh Buffalo mozzarella cheese
1/2 cup of chopped tomatoes (I used Mutti Popla Finely Chopped Tomatoes)
5-6 leaves basil or fresh mint, chopped
1 clove garlic, (I used my garlic press)
2 Tbsp Olive oil
1 1/2 Tbsp Balsamic Vinegar
Salt & Pepper to taste
1/2 cup walnuts, chopped
1 tsp honey
1 tsp balsamic vinegar

Directions

1.  Mix the garlic with the olive oil in a small bowl, then brush the naan bread with the oil & garlic mixture and place in a 350F oven for 5 minutes.
2. In a small pan over medium low heat toast the chopped walnuts for about 3 minutes, add the honey and balsamic vinegar and stir until coated.  Remove from heat and set aside.
3. Remove the nann bread from the oven and top with the Mutti tomatoes and sliced cheese. Place back in the oven for another 5 minutes, plus a few minutes under the broiler if needed, make sure to keep an eye on it, depending on your oven it may need less or more time.
4. Once the pizza is baked and the edges are golden in colour, remove from the oven, drizzle with a bit of olive oil, salt and pepper, toss on the basil leaves and walnuts, slice and serve.

Cooks Notes

In the winter I sometimes like to use fresh mint if the basil does not look great.
To make this vegan either leave off the cheese or use a vegan 'cheese.'
This nann pizza makes an excellent appetizer, cut into bite size pieces.

 Happy cooking and eating and thanks to Mutti for sponsoring this recipe.

print recipe
In Appetizers, Mains, Sides, Vegan, Vegetarian
1 Comment

SPAGHETTI WITH GARLIC, OLIVE OIL, TOMATO PASTE, FIGS & GOAT CHEESE

January 23, 2017 Marla Hertzman

I bought some beautiful black mission figs today and thought they would be perfect for a salad, but it being so cold and grey by the time I got home I forgot all about the salad, (Gordy will be happy). Today is a day for comfort food, and that means and a big bowl of spaghetti.

I really don't have a lot of time to spend cooking today so having staples on hand made this easy to prepare.  I always have spaghetti, olive oil, garlic, cheese (I used goat cheese but use any cheese you have), and fresh herbs in my fridge. I like to make my sauces with a tin of tomatoes but this time I tried a different method.  Of course I started my sauce with onions and garlic, then I added a big squeeze of Mutti Tomato Paste, cooked it a few minutes with a pinch of red pepper flakes, salt and pepper and thats it!  The Mutti Tomato Paste added a rich red colour and the fresh tomato taste brought this sauce together. The combination of goat cheese, sweet figs and tomato paste made this simple spaghetti a not so simple bowl of comfort food on a very grey day, (Gordy is very happy).

I love how easy the Mutti Tomato Paste is to use.  Just open the tube and squeeze out as much or as little as you need.   Keep in the fridge until next time. No waste! I have added it to stews and soup for rich colour and deep flavour.  Thanks Mutti for another great pantry staple.


Spaghetti with Garlic, Oil, Tomato Paste, Figs and Goat Cheese
This is an easy and quick sauce, everything was prepared while the spaghetti cooked. This recipe makes 2 big servings.

Ingredients
1/4 cup extra-virgin olive oil
2 tbsp tomato paste, (I used Mutti Tomato Paste)
3 to 4 cloves garlic, minced
dash of red pepper flakes
1 tsp salt
1/2 pound dried spaghetti, I used whole wheat
3 tbsp chopped fresh flat-leaf parsley or basil
2 tbsp goat cheese
zest from 1/2 a lemon
3 fresh figs, cut in half or quarters, depending on size
drizzle of balsamic vinegar
freshly ground black pepper

Directions:

1. Preheat the oven to 400ºF.
2. Place the figs, cut side up, in a small baking dish. Drizzle with balsamic vinegar.
3. Roast in the oven until soft, about 10 to 15 minutes.  When done, set aside.
4. Bring a large pot of water to a boil, add pasta, stir and cook until al dente.
5. While the pasta is cooking take a large pan and add the olive oil, garlic, tomato paste, pinch of red pepper flakes and 1 teaspoon salt. Cook over moderately low heat, stirring occasionally, until the garlic is golden, about 5 minutes. Remove from the heat and set aside.
6. Drain the pasta, add it to the pan with the sauce and toss well, then add the lemon zest, freshly ground black pepper and cook a minute more or until the pasta is warmed through.
7. Finish with the goat cheese, figs and a big handful of fresh parsley or basil, serve immediately.

Cooks Notes

If you want to make this vegan just leave out the goat cheese and add a handful of your favourite nuts, like walnuts or hazelnuts.
Use black or green figs.
If you don't have goat cheese, try any soft cheese like feta.


 Happy cooking and eating and thanks to Mutti for sponsoring this recipe.

print recipe


In Mains, Vegan, Vegetarian
Comment

DELICATA SQUASH & POMEGRANATE SALAD WITH PECANS, GOAT CHEESE AND POMEGRANATE DRESSING

December 21, 2016 Marla Hertzman

This salad is...

Crunchy

A little sweet

Savoury

Nutty

Delicious

Colourful


Delicata Squash and Pomegranate Salad

This salad serves 4

Ingredients for the salad:

1 delicata squash, halved lengthwise and seeded, sliced into ½-inch segments
1 tablespoon extra-virgin olive oil, more if needed
Salt and freshly ground black pepper
1 box or bag of baby spinach or arugula
1/2 cup pomegranates seeds
1/2 cup pecans
Goat cheese, (as much as you like)

Ingredients for the Dressing:

1/3 cup pomegranate juice
1/4 cup apple cider vinegar
1 tsp finely chopped shallot or garlic
1/4 tsp salt
1/4 tsp pepper
1/3 cup olive oil

Directions for the salad:

1. Preheat the oven to 400°F and line a baking sheets with parchment paper.
2.Place the prepared squash on the parchment lined baking sheet and toss with olive oil and several pinches of salt and pepper.
3. Roast until golden brown, 25 to 30 minutes, set aside.
4. Heat a small saucepan over medium heat and add the pecans, toast until they are slightly golden, shaking the pan as they cook for about 5 minutes, set aside.
5. Prepare the salad by putting the greens in a large salad bowl with a pinch of salt and pepper.  Toss in the toasted pecans, sprouts, goat cheese and pomegranate seeds.
6. Pour the dressing over the salad, lightly toss and you are ready to eat.

Directions for the dressing:

1. In a small bowl combine the pomegranate juice, vinegar, shallot, salt and pepper and whisk together.
2. Slowly pour in the olive oil while constantly whisking until the dressing comes together. 

Cooks Notes:

Make this salad vegan by leaving out the cheese.
This salad is also delicious with feta cheese.
You can use walnuts or hazelnuts in place of the pecans.
You can store any leftover dressing in the fridge for up to one week .

Print recipe
In Appetizers, Mains, Raw, Salads, Sides, Vegetarian, Vegan
Comment

Chocolate Zucchini Loaf that is gluten-free and sugar-free

November 28, 2016 Marla Hertzman

Who doesn't LOVE Chocolate? I love chocolate, so much that I have a chocolate drawer in my kitchen filled with chocolate. Other people, (no names here) - in my household try put other treats in that drawer, (well it does have a prime spot in the kitchen), but no, I am saying this loud and clear...chocolate only.  My chocolate collection is made up of various dark chocolate; bars, nibs, cacao, chunks, chips, bon-bons... open the drawer and magic happens -  I am instantly happy and if I'am happy then everyone is happy.

This recipe is for all chocolate lovers. If you want a delicious loaf that is very moist, you can thank the zucchini and if you like to hide healthy stuff in your baking then thank me.  

Shh...try out my other recipes that are good for you and hide veggies.

  • Parsnip Carrot Muffins

  • Good Morning Muffins

  • Carrot Muffins with Spelt and Coconut Flour

  • Sweet Potato Brownies

  • Buckwheat Zucchini Muffins

  • Maple Pecan Zucchini Loaf

Your welcome!


CHOCOLATE ZUCCHINI LOAF

This recipe makes one loaf.

Ingredients:

1¼ cup almond flour
¼ cup cacao powder
¼ teaspoon salt
½ teaspoon baking soda
2 large eggs
2 tbsp coconut oil, melted and slightly cooled
¼ cup honey
¼ teaspoon vanilla extract
1/2 tsp instant espresso powder (optional)
1 cup zucchini, grated
a little extra zucchini for the top of the loaf

Directions:

1. In the bowl of a food processor combine almond flour and cacao powder.
2. Add in salt, espresso powder and baking soda and pulse a few times.
3. Then add in eggs, coconut oil, vanilla and honey and pulse again until all ingredients all mixed well.
4. Then add in zucchini and mix just until zucchini is combined.
5. Transfer batter to a greased medium loaf pan, (I used coconut oil to grease my loaf pan).
6. Top with a bit of extra zucchini, optional.
7. Bake at 350° for 35-40 minutes.
8. Test if done with toothpick or cake tester.
9. Cool in pan before removing.

Cooks Notes:

If you don't have espresso powder, you could use instant coffee or just leave it out.


PRINT RECIPE
In Baking, Breakfast, Desserts, Muffins/Loaves, Snacks, Vegan, Vegetarian
Comment

Sweet Potato Brownies made with Coconut Flour, Gluten Free and Sugar Free!

November 12, 2016 Marla Hertzman

Gordy was very excited when I said I was making brownies.  Little did he know that these brownies are made with sweet potatoes. I may be a bit sneaky but thats how I roll!  Really, the sweet potatoes keep these brownies moist and are a powerhouse of flavour and nutrients, are rich in an antioxidants, have lots of Vitamin A and are very high in fiber.  So not only do these brownies taste great but they are healthy too. 


Sweet Potato Brownies made with Coconut Flour
I always save room for dessert!

Ingredients:

1 medium sweet potato, about 1 cup mashed
3 eggs
¼ cup coconut oil, melted and cooled
⅓ cup honey
¼ tsp vanilla extract
3 tbsp coconut flour
2 tbsp unsweetened cocoa powder
¼ tsp baking powder
¼ tsp cinnamon
pinch of salt
½ cup of dark chocolate chips or dark chocolate 85%, chopped into bite size pieces 

Directions:

1. Bake the sweet potato in a preheated oven at 400 degrees.  This should take about 40 minutes depending on the size of your sweet potato.
2. When the sweet potato is done, remove the skin and mash with a fork or potato masher.  Set aside to cool.
3. Turn your oven down to 350 degrees.
4. In a medium size bowl mix together the 1 cup of sweet potato, eggs, coconut oil, honey, and vanilla and mix well.
5. To the wet ingredients add the coconut flour, cocoa powder, baking powder, cinnamon, salt and chocolate chips.
6. Mix well and pour into a 8 x 8 baking dish.
7. Bake for 25-30 minutes, or until done.
8. Let cool before cutting into squares.

Cooks Notes:

Next time I am going to add a teaspoon of espresso powder to the mix.
You can also replace the honey with maple syrup.
You can freeze these brownies but I doubt you will have any left!


print recipe
In Baking, Desserts, Snacks, Vegan, Vegetarian
Comment

TURMERIC tea with almond milk, warm and delicious

November 3, 2016 Marla Hertzman
chai_tea4.jpg
chai_turmeric.jpg
chai_tea5.jpg

Can I paint my walls turmeric?
I am enchanted by the colour;
golden like the leaves falling outside,
bright like the sun and glowing as the moon.

This time of year I find myself craving warm drinks, sometimes just to hold a warm mug.  I often turn to herbal teas in the evening to remind myself to slow down. Now I am obsessed with the taste and health benefits of turmeric tea, a vibrant yellow-orange spice. The taste of this tea is similar to chai, my recipe uses almond milk, but use any milk you like. The spicy blend of cinnamon and black pepper is warm and ever so subtle when mixed with the earthy flavour of turmeric.

To me this is the perfect bed-time time treat. So put on your slippers, simmer a pot of this tea and let the flavours merry to create a beautiful healthful drink that is also a powerful anti-inflammatory, packed with antioxidants. I love the taste and the beautiful golden hues of yellow and orange. 

This is the power of turmeric tea...

Turmeric – anti-inflammatory, improved brain function, reduce depression
Cinnamon – anti-inflammatory, balances blood sugar, fight bacterial & fungal infections
Ginger – anti-inflammatory, balances blood sugar, anti-inflammatory
Nutmeg – digestive support, improved sleep
Celtic Sea Salt – alkalizing, improve brain function, normalize blood pressure
Black pepper – improves absorption of Turmeric, improves cognition, antibacterial


Turmeric Tea with Almond Milk
Why add Black Pepper? It is beneficial to use black pepper with turmeric because it helps the body absorb the turmeric.

This recipe makes 2 servings

Ingredients:

2 1/2 cups unsweetened almond milk, (or any milk you like)
1 cup of water
1 or 2 cinnamon sticks or 1/2 tsp ground cinnamon (or more to taste, I like lots)
1  - 2inch piece turmeric, unpeeled, thinly sliced, or 1tsp dried turmeric
1  - 1 inch piece ginger, unpeeled, thinly sliced or 1 tsp dried ginger
fresh nutmeg, about 1/4 tsp freshly grated, or 1/4 tsp dried
1 tablespoon honey, maple syrup or 1 packet of stevia, (or more to taste)
6 whole black peppercorns
More ground cinnamon to sprinkle on top

Directions:

1. In a small saucepan add milk, cinnamon, turmeric, ginger, nutmeg, honey, peppercorns and 1 cup of water, bring to a low boil.
2. Turn down the heat and simmer for about 10 minutes. The longer you simmer the tea, the stronger and more intense the tea becomes.
3. Strain and pour into 2 mugs.
4. Top with a sprinkle of cinnamon.

Variations:

Add 2-3 whole cardamom pods while boiling
Add 1 tbsp coconut oil
Add 1 tsp of vanilla extract
To chase away your chocolate craving try adding a tsp of cocoa powder.

Cooks Notes:

You can double the recipe and store in the fridge, gently warm before serving.
I like to use fresh turmeric, but don't worry if you can't find it at the store, substitute with dried.
You can also use a combination of fresh and dried.
If you like your drink a bit sweeter, just add more sweetener to taste.
Turmeric stains like crazy — from clothing to countertops — so be careful!


print recipe


In Breakfast, Desserts, Snacks, Vegan, Vegetarian
1 Comment

ROASTED CAULIFLOWER TACOS WITH AVOCADO SPINACH cream - vegan and delicious

October 15, 2016 Marla Hertzman

I made this for a certain someone who has committed to going vegan for a month.  I keep getting questions... you mean no cheese, no yogourt, no eggs. Yes.  But I did buy some vegan sour cream to top the tacos and to my surprise no more questions asked. Just a request...next time make more!


Roasted Cauliflower Tacos with Avocado Spinach Cream

Serves: 3 to 4

Ingredients for the Tacos:

1 head cauliflower, cut into bite-sized florets
1/4 cup almond milk, unsweetened
1 tablespoon fresh lime juice
1 garlic clove, minced
1/2 tsp thyme, dried
1/2 tsp turmeric
1 teaspoon cumin
1 teaspoon paprika
1/2 teaspoon salt
A pinch of black pepper
1/8 teaspoon cayenne pepper (optional)
1 tbsp oil
Fresh cilantro, for topping
Fresh lime juice, for topping
Jalapeño slices, for topping
Vegan 'sour cream' - (this is actually pretty good, I bought it for the first time)
Package of corn tortillas or your favourite tortillas, lightly warmed in a pan for a few minutes on each side

Ingredients for the Avocado Spinach Cream:

1 cup spinach, tightly packed
1 ripe avocado
1/4 cup fresh cilantro
1/2 tsp cayenne pepper
2 1/2 tablespoons fresh lime juice
2 tbsp honey
1/4 cup water
1/4 teaspoon sea salt
A pinch of black pepper

Ingredients for the Cabbage Slaw:

3 cups purple cabbage, thinly sliced
1 cup white cabbage, thinly sliced
1 tbsp lime juice
1 tbsp tsp apple cider vinegar
1/2 tsp honey, (optional)
1/2 tsp salt
3 tbsp olive oil

Directions:

1. Preheat oven to 400°F. Line a baking sheet with parchment paper.
2. In a large bowl, mix together the almond milk, lime juice, garlic, thyme, turmeric, cumin, paprika, salt, pepper, cayenne and oil, add the cauliflower and mix well to coat. 
3. Place cauliflower on baking sheet and bake for 25-30 minutes. Check on the cauliflower after 20 minutes and give a little toss.  Continue cooking until the cauliflower is golden.
4. In a food processor, blend all of the ingredients for the spinach avocado cream until smooth, set aside.
5. Mix all the ingredients for the cabbage slaw in a medium bowl, toss well, set aside.
6. To assemble the tacos, start with the warm tortillas, top with cabbage, then the cauliflower, a spoonful of avocado spinach cream, and then a dollop of vegan sour cream. Top with fresh cilantro and jalapeño slices.  A big squeeze of fresh lime juice is the perfect finish.

Cooks Notes:

Any leftover avocado spinach cream is delicious as a dip or salad dressing.


print recipe


In Mains, Vegan, Vegetarian
Comment
← Newer Posts Older Posts →

LOVE THY CARROT IS THE FOOD BLOG OF MARLA HERTZMAN


APPETIZERS

BAKING

BREAKFAST

DESSERTS

MAINS

MUFFINS

RAW

SALADS

SIDES

SNACKS

SOUPS

VEGAN

VEGETARIAN

VEGGIE BURGERS


INSTAGRAM

Hot and Spicy Tofu. 🌶 This was pretty much a big bowl of veggies that needed using up in my fridge. 🥢 For all things delicious and healthy to eat ➡️ visit www.lovethycarrot.com
.
.
.
.
#stirfryveggies #vegan #homemadefood #vegan #veganfood #plantba

LET'S CONNECT


Subscribe

We respect your privacy.

Thank you!

carrot.png

 Toronto Food Blogs